Rflshootr
Well-Known Member
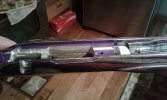
Cut that garbage out. Wrap masking tape around the barrel at the fore end until the barreled action sits in the stock properly. tape off the lug on front, sides and bottom with 2 layers of tape. Get some long screws that fit the action and cut the heads off to use as locators. Dry fit it to be sure it sits properly. Then wax everything twice. Mix the bedding compound and carefully assemble. Clean up excess. Let cure. It should look like this when you're done. Doing a half-a$$ed job doesn't work, as you just found out.