You are using an out of date browser. It may not display this or other websites correctly.
You should upgrade or use an alternative browser.
You should upgrade or use an alternative browser.
Need help to design LRH Gear Shop range book
- Thread starter Len Backus
- Start date
esshup
Well-Known Member
On the same page as the pic of the anatomy, what about size of the animal from top of back to bottom of brisket, and maybe something on the length (maybe leg to leg)? Not only average size, but large, and small size. That would give guys with mil-dot type scopes something to verify. It would only take up 3 lines, and they might fit between the legs of the critters in the pics.
bears, hogs, caribou, sheep, deer (coues, whitetail, mulie), Moose.
Make the notebook so the pages could be removed/re-inserted?
Instead of buying a whole new notebook, just get the insert package like a Daytimer?
bears, hogs, caribou, sheep, deer (coues, whitetail, mulie), Moose.
Make the notebook so the pages could be removed/re-inserted?
Instead of buying a whole new notebook, just get the insert package like a Daytimer?
Shawn Carlock
Sponsor
I like the ideas alot. A couple of notes from my perspective:
1. Be careful not to make it a novel containing too much non shooting data.
2. Pages really need to be removable and supplement packs of blank and grid paper should be available. That way some of the things may or may not be of use to the user and could be removed and replaced with blanks for other uses. I make lots of just plain notes and sketches in mine.
3. A couple of elastic pen holders would be handy.
4. Possibly a small elastic pocket for a small cheap calculator. If your going to use the conversion charts for anything this would be handy.
If they turn out like I think they will they will become standard issue at my classes.
Russ Hatch
Well-Known Member
At the present time I have in my 9200 kit
page 1 google earth map of my stand area marked out in 50 yd increments
page 2- 10 target pages with date, weather info, and load info printed by me.
page 11-15 standard range cards from rite in rain.
page 15-25 double sided Shot log From Shawn's video printed by me.
page 25- 50 notes double sided.
4 pens in provided pockets
PDA in provided pocket.
I also have a 7 1/2 inch by 5 inch spiral bound note book from Staples in which I keep groups and loads when at the range. The note book fits in the folder nicely.
All of the forms except the staples book are printed on rite in the rain paper and the pens are rite in the rain.
I'm going to check with Staples for the clear pockets, maybe Daytimer has someting that can be made to work.lightbulb
Russ Hatch
Well-Known Member
Just for the heck of it I printed off the deer anatomy pic blew it up to 125% and it comes out the right size to glue to the back side of my google earth map page.lightbulb
Last edited:
Buffalobob
Well-Known Member
Last installment
The reticle ranging should be either on the page with the animal sizes or with the reading the wind indicators.
This is what I have composed.
Also my choice of words might not be the easiest for people to grasp.
The reticle ranging should be either on the page with the animal sizes or with the reading the wind indicators.
This is what I have composed.
FFP scopes
1. Check the calibration of the reticle at home or the range. If it is a Mil or MOA reticle make sure the hash marks are accurate.
2. While hunting if an animal is to be ranged determine if it has an average body size or is smaller or larger than average. Adjust the "Animal Size" to suit the target animal.
3. Steady the rifle and measure the number of MOA or Mils between brisket and back.
4. Use the following formula to calculate the range
Animal Size inches/(MOA X 1.047) = Range (in 100 yards)
Animal Size inches/(Mil X 3.6) = Range (in 100 yards)
This might not be totally correct being as it has been a number of years since I used a reticle to do my rangefiding.Second Focal Plane scopes
1. Check the calibration of the reticle AND THE POWER RING at home or the range. If it is a Mil or MOA reticle make sure the hash marks are accurate at the prescribed power.
2. While hunting if an animal is to be ranged determine if it has an average body size or is smaller or larger than average. Adjust the "Animal Size" to suit the target animal.
Method A for a Pre-calibrated scope such as a Nightforce with NP-R1
3. Steady the rifle and turn the power ring to calibrated power index mark.
4. Measure the number of MOA between brisket and back.
5. Use the following formula to calculate the range
Animal Size inches/(MOA X 1.047) = Range (in 100 yards)
Method B for general SFP reticles
1 Calibrate your reticle at 100 yards to a known measurement such as 10 inches and record the power setting that bracket that "Target Length" and which parts of the reticle you used.
2. While hunting if an animal is to be ranged determine if it has an average body size or is smaller or larger than average.
3. Steady the rifle and adjust the power ring until the animal is bracketed by your stadia.
4. Read the power from the power ring.
Use the following formula to calculate the range
(calibration power/ final power) X ( animal size/ target Length)= Range in hundreds of yards
Also my choice of words might not be the easiest for people to grasp.
bigngreen
Well-Known Member
I use Goggle earth everyday but never thought to use a print of a stand site!Just for the heck of it I printed off the deer anatomy pic blew it up to 125% and it comes out the right size to glue to the back side of my google earth map page.lightbulb
I think I would put a data page on the back side though for each map.
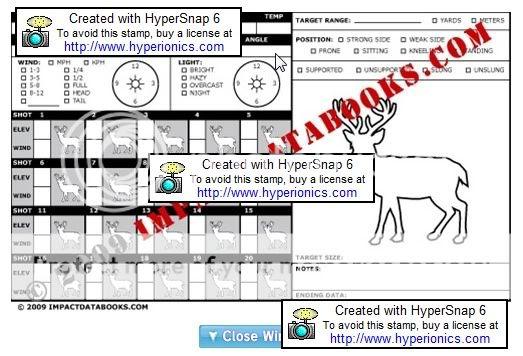
I would like something like this but with maybe two large shot placement pics and three shot data places below each larger one.
I like the idea of a PDA pocket! Really like the idea of having the step by step ranging page like Buffalobob, I don't use it enough to remember it but it will come in handy.
Shawn brought up a good point about it turning into a novel though.
Russ Hatch
Well-Known Member
Len, anything further on this project? Really interested in the results.
Russ
Russ
- Joined
- May 2, 2001
- Messages
- 7,488
bigngreen
Well-Known Member
Thanks Len, I checked it out and it looks like it will do what I'm wanting. I was about to buy the full license for the other program, I think I'll order Litz's book instead.
I've been holding out to buy Litz's book and tee shirts till I can get the range book also but maybe I shouldn't wait. Thanks again.
I've been holding out to buy Litz's book and tee shirts till I can get the range book also but maybe I shouldn't wait. Thanks again.
- Joined
- May 2, 2001
- Messages
- 7,488
No new news at this time, just waiting.
Similar threads
- Replies
- 1
- Views
- 2K