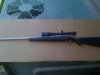
Sorry it took a little bit, but here's how I did it.
Materials: 4 Colors, flat clear coat, piece of burlap fabric or something similar, old basketball goal net, tall grass, weeds, etc...
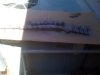
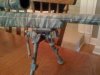
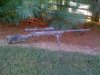
First lay down a base coat of what ever color you would like, I chose tan because I liked the rifle to be mostly tan.
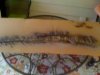
Second, use your piece of burlap fabric to put on a pattern all over the gun of whatever color you would like, I chose brown. This just breaks up your large tan spots and gives a cool effect. I used the pattern in different directions, it's your choice on what you would like.
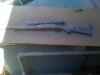
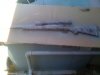
Third/Forth, use the long stringy end of your old basketball net, the part that hooks to the goal, not the diamond part. What you want is to let those strings fall in a random way across your gun so it makes a tiger stripe look, I did this with tan first to add some solid tan parts to the gun. Then I did the same thing in black to give some contrast/shadow effect on the tan.
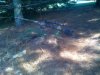
Fifth/Sixth, I used green for this step because it kind of looks like grass when you use this. Take your long grass and get a good hand full of it that's about 12 to 18 inches long and hold it very still on the gun or you will get blurry lines that don't look good. Spray only through thin open spots in your grass, you may have to shuffle it around to get the best pattern you're looking for, you'll figure it out. After the green I went back and hit a few spots with brown and the grass because it made everything appear to stand out and look more three dimensional for some reason.
Seventh, spray on your clear, there's a a boundary between enough and too much here. The rule the more the better doesn't apply, or at least I don't think it does.
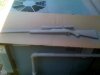
I sprayed one side with all the effects/patterns and then flipped and did the other side. Then I sprayed clear on each side, make sure each side has thoroughly cured before you flip or the paint/clear will stick to what it's laying on. I'd wait at least a couple hours between flips because mine stuck in a few places, my gun is also pretty heavy which didn't help I'm sure.
Just play around for a few test runs and you'll find something you'll like, painting your baby takes a lot of courage but you'll be happy if you find something you like. I also have some other camo designs I've done that I can post up for ideas if you would like.

")