Not bad for a second attempt! Great improvements, can't wait to see the finished product. But here is a couple pointers to make the next one better!
Hopefully the putty in and around the action screws didn't make the action sit up higher, that can affect the distance from the bottom metal to the action, making it not feed properly. The headless action screws with a couple layers of tape around them is simply better, they help to center up the action in the screw holes, keeping it in line as well as plumb to the pillars.
Use more bedding material next time as well, you may end up having a patchy looking bed job. I try to make sure I have squeeze out over the entire length of the action, this ensures full contact. Will likely still be plenty for what your after, but could be better.
With using more bedding material, also remove the bolt release and fill with putty, or at least cover with tape. And put plumbers putty into the trigger inlet and pin holes, if bedding happens to make it into there, you can create a mechanical lock.
As stated, no need for the tape to wrap around into the action inlet, though there isn't enough bedding material to squeeze up in there. If it is a tight fit there however, it can add a small amount of stress or possibly cause some troubles with alignment.
And you don't need that much release on the action, you want a tight fit, and I can see the ridges from the release compound, so it will likely show up in the bedding. Do make sure you put some release agent on tape too though, otherwise the bedding will stick to it and look ugly.
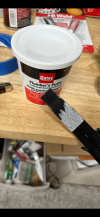
With the electrical tape, less is more. I usually don't even use it any more, but if I do, then maybe one light wrap. The point is to be stress free, and while the amount of stress induced with electrical tape will be very miniscule, it can still exist.
The centering/leveling tape on the front is good, I generally use that method if it is a stiff enough stock.
I usually spend nearly 2 hours on prep before I start mixing my bedding compound, prep is extremely important, and I would say males up 80% of the effort for a quality bed job, 15% is clean up work, and 5% is mixing and applying the compound and placing the action in the stock. But when you pop the action out and do your clean up, and your bedding job looks as good or better than some professional jobs, it's all worth it.
Here are a few images of my prep showing some examples of what I stated...
Taping and a putty dam to stop front flow. I mushed UT down more than that, I didn't want it to touch the barrel when the action was set in, just make a stop point so not as much flowed forward and clean up was easier.
This is with release compound on the action, kiwi clear show polish or Johnsons paste wax, heated and polished on to a very very thin layer. Putty blocking off where I don't want to chance epoxy getting.
The tape I was taking about to center and plumb up the action screw holes and pillars.
More putty work, this already has release compound applied. I don't put putty in the feed port anymore, the epoxy doesn't get up in there as gravity makes it go down and not into there. However I did not remove the bolt stop here, and almost payed for it. The squeeze out almost got into the bolt stop, it was close! Lesson learned!
Prep work done, ready to *lightly* screw the action screws with a little tape around them into the action, with the cut to length pillars on (you can see the pillars with action screws in them if you zoom in), mix bedding and apply.
Then, after you pull the action out, carefully clean up with a razor knife and dremmel, and it will come out great!