• If you are being asked to change your password, and unsure how to do it, follow these instructions. Click here

DIY $15 scope level

N10sivern

Well-Known Member
Joined
Aug 8, 2012
Messages
150
Location
Biloxi, MS
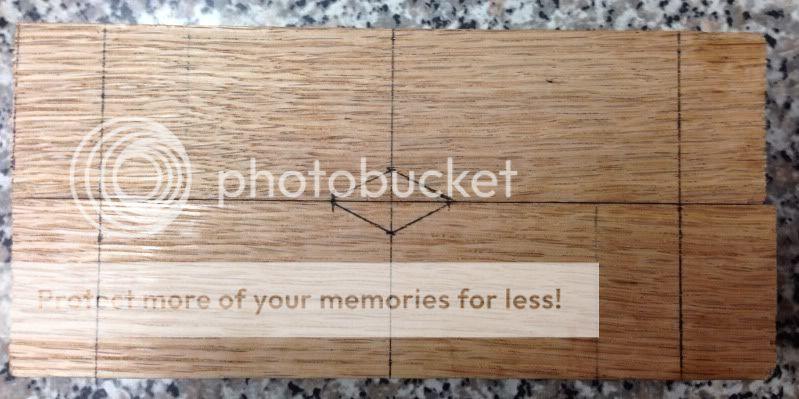
Well, I decided to make this my evening project. I started off with a 3/4" x 2" x 24" piece of oak board. I cut the board into two 6.25" pieces. I marked lines 0.75" from each end and used a square to draw the line across. I also marked up with the center of the boards. I found the center and made a mark 0.25" above and below the center point and 0.50" left and right of the center point.
15AF03B5-8761-4701-9860-8F69573A7C1B-2265-000002396AB49649_zpse306b4db.jpg


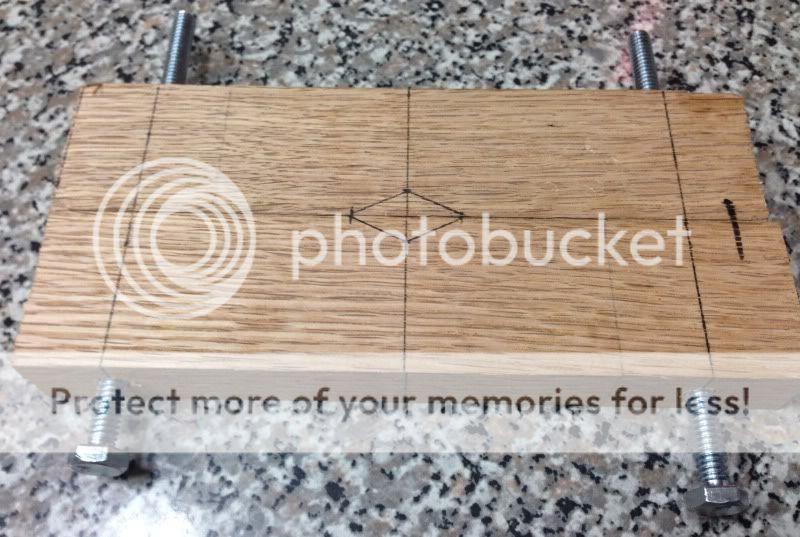
I used my drill press and a 17/64" drill bit and drilled the center point on top and bottom of the boards ensuring that they meet up. I bought 1/4" x5" all thread bolts, 2 flat washers, and wing nuts from Lowes.
80F0F53B-4AED-4C8F-AC62-69F389748A1C-2265-000002396FADFD92_zps9626601c.jpg


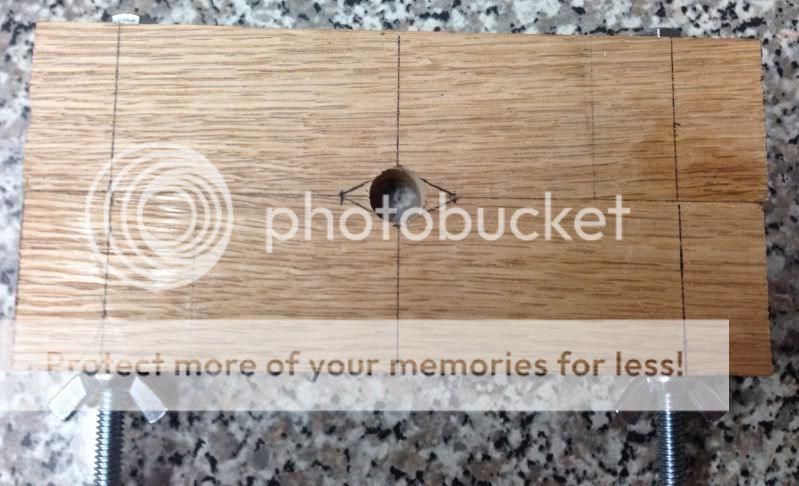
I then used a 1/2" Forsner bit to drill out the center hole. I also used it to countersink the holes on the top of a board.

0ED5FC45-BE18-47EA-AF36-6F0B83EE010A-2265-000002397CE798FB_zpsdbad9b36.jpg


C688E785-1218-46E1-BF3D-DFBB3137EE4F-2265-0000023973DF1975_zpsd2a3039e.jpg


A little jigsaw and dremel time and I cut out the center angles
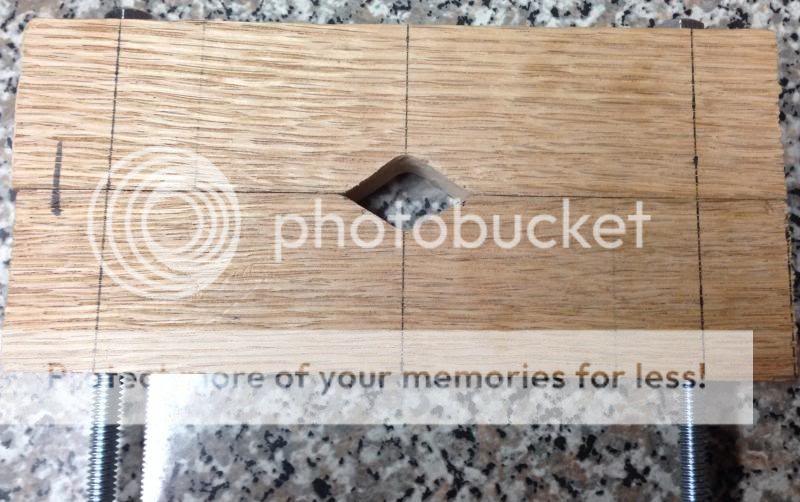
photo4.jpg


I sanded off the lines and rounded the corners on the boards
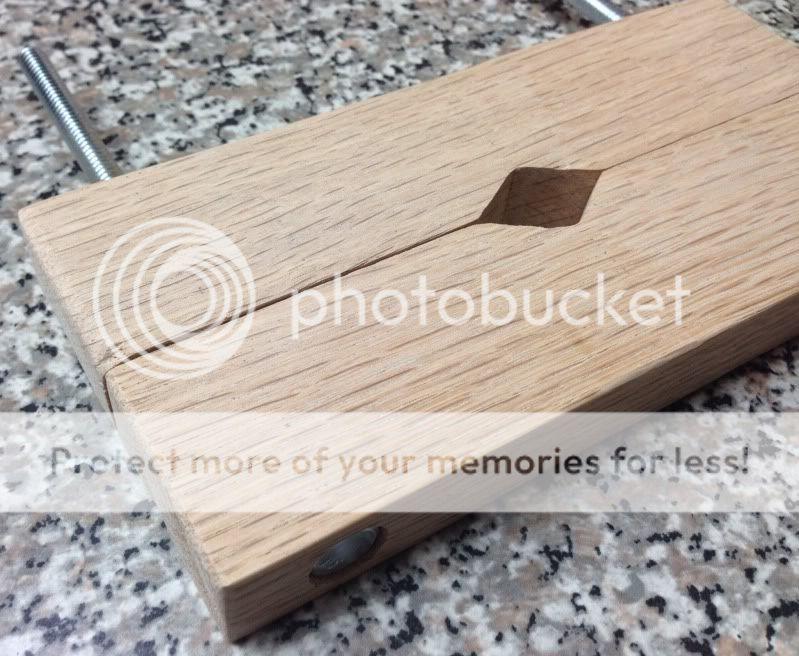
F63DEEEE-292E-45C2-A564-B205E5B5EE76-2265-000002398252CCBF_zpsd45e613a.jpg


Finally, I used epoxy to secure the bolts in the countersunk holes. I also used epoxy to secure the aluminum cased line level from Lowes to the top board. I used some spray glue to secure felt between the 2 boards. Now, all I have to do is place a second level on the scope mount and then use the wing nuts to secure the leveler to the barrel. Once the leveler is secured, I can attach my scope mounts and scope and then use the level on the scope cap. Level the rifle, level the scope, and the reticle should be level as well.
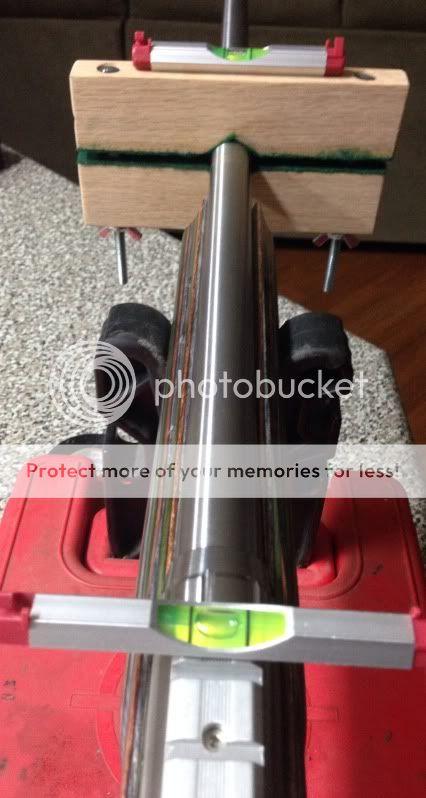
96A6C878-1EB1-41DC-A79B-55399C9839F4-2265-0000023989314CA0_zps31325a26.jpg
 
How do you know if your level is actually indicating level?

This is a trick question BTW, sort of.

Lets put it this way. I use precision machinist levels with ground vials accurate to 0.005 thats 5 thousands of an inch deviation in one foot of lineal measurement... but back to the question and that is, do you know your level is actually indicating level and do you know how to check it?
 
It's level enough for its purpose which is to level reticles on new scopes for my wife's and daughter's hunting rifles. I checked each one of these cheap levels with the 3 other levels I have at my house and they were good. As far as getting specifically level to the thousandths, it'll be impossible as there aren't marking on the levels to get them that close. I just wanted something similar to wheelers professional scope level system that's $60 and this is what I came up with.
 
From what I can tell, it appears that you are assuming your base is level since I see you putting a level on there, then leveling your new tool to match?

I can tell you from experience that it's not always a valid assumption to consider the base as level. However, it's accurate a fair amount of the time.
 
I agree. The bases may not always be perfectly level. The base screw holes may not always be dead center. For a rifle that will shoot 300 yards at most and typically 100-200 yards, I feel that this is good enough and better than eyeballing it.
 
You never check a level against another level. That compounds the error because you have no idea if the 'other' level is accurate or not.

The comments tell me you don't know and assumption is a bad thing....

It's really simple actually.

You set the level on a reasonably flat, smooth surface (like your granite counter top), allow the bubble to come to a rest and note the position of the bubble in relationship to the indicator lines and then rotate the level in the same plane, 180 degrees, swapping it end-for-end. Let the bubble stabilize and then note the relationship of the bubble to the indicator lines again. The deviation between the two, prior to rotation/after rotation is how much the level is 'unlevel'.

The issue is, if the level used is not accurate, just a slight error compounds the rotation of the scope in relationship to the centerline of the bore quite a bit, so stating 'it's close enough' may or may not be true, depending on how far you plan on shooting.

100 yards will absorb some error, past 500, everything gets much more critical.

60 bucks for a level is cheap (wheeler). Mine cost hundreds and a ultra precision level is thousands.

All well made levels for checking squareness and trueness in a linear plane are adjustable, that is, the vial is adjustable for inclination in relationship to the base, necessary because even precision levels need ocassional adjustment.

A little machine shop 101 and why a 'cheap' level is cheap. Always remember that the accuracy of any installation of any optic is only as accurate as the least accurate component of the installation, in this case the level.

Have fun....
 
Who is to say any part of the rifle is level and square to the centerline of the bore to level against. I understand what you are saying, but at the same time I think that is a bit extreme for a cheap youth rifle to shoot 100-200 yards. People have killed many of animal eyeballing scopes for years without $100-1000 levels. I just made this to simplify it some. Don't make this out to be something it isn't. It is not a precision instrument, and it wasn't meant for extreme long ranges or F class rifles. Just a simple device to get a scope close enough for a 243 and 7mm-08 for my wife and daughter. As long as they can shoot 6" or less at 300 yards I'm happy. That's enough to kill a deer or a hog.
 
Absolutely.

What I'm saying is simply that there are inherent inaccuracies in setup components, nothing more and people tend to trust the calibration and trueness of those components when in fact, they are inaccurate from the get-go.

Accuracy and alignment is only as true as the least inaccurate link.

Myself, I prefer iron sights for less than 101 yards anyway.

My original post was to give you (and others) some insight as to how to check any level for accuracy, Nothing more.

Sportsmen spend thousands on firearms and thousands on optics, rails and bases and then cheap out on alignment tools. You can have the best that money can buy in components but they are only as good as the weakest link in the chain of mounting those components to the firearm.
 
Well, I decided to make this my evening project. I started off with a 3/4" x 2" x 24" piece of oak board. I cut the board into two 6.25" pieces. I marked lines 0.75" from each end and used a square to draw the line across. I also marked up with the center of the boards. I found the center and made a mark 0.25" above and below the center point and 0.50" left and right of the center point.

15AF03B5-8761-4701-9860-8F69573A7C1B-2265-000002396AB49649_zpse306b4db.jpg


I used my drill press and a 17/64" drill bit and drilled the center point on top and bottom of the boards ensuring that they meet up. I bought 1/4" x5" all thread bolts, 2 flat washers, and wing nuts from Lowes.

80F0F53B-4AED-4C8F-AC62-69F389748A1C-2265-000002396FADFD92_zps9626601c.jpg


I then used a 1/2" Forsner bit to drill out the center hole. I also used it to countersink the holes on the top of a board.

0ED5FC45-BE18-47EA-AF36-6F0B83EE010A-2265-000002397CE798FB_zpsdbad9b36.jpg


C688E785-1218-46E1-BF3D-DFBB3137EE4F-2265-0000023973DF1975_zpsd2a3039e.jpg


A little jigsaw and dremel time and I cut out the center angles

photo4.jpg


I sanded off the lines and rounded the corners on the boards

F63DEEEE-292E-45C2-A564-B205E5B5EE76-2265-000002398252CCBF_zpsd45e613a.jpg


Finally, I used epoxy to secure the bolts in the countersunk holes. I also used epoxy to secure the aluminum cased line level from Lowes to the top board. I used some spray glue to secure felt between the 2 boards. Now, all I have to do is place a second level on the scope mount and then use the wing nuts to secure the leveler to the barrel. Once the leveler is secured, I can attach my scope mounts and scope and then use the level on the scope cap. Level the rifle, level the scope, and the reticle should be level as well.

96A6C878-1EB1-41DC-A79B-55399C9839F4-2265-0000023989314CA0_zps31325a26.jpg

I give you an A+ for effort, ingenuity and design and an A for execution, for the intended purpose. That said, the cheapest and most accurate leveling tool on the Earth is a plumb bob. That's what I use for mounting scopes.

Thanks for sharing, one man's idea is the seed for another's.
 
Warning! This thread is more than 12 years ago old.
It's likely that no further discussion is required, in which case we recommend starting a new thread. If however you feel your response is required you can still do so.

Recent Posts

Top