Badlands BD-2 load data

As mentioned, loaded some of the 150 grain with RL23 and did some more in depth testing today in my 7Max, 24" proof barrel 1/8 twist.

View attachment 446267
Started out seated at 3.030 (0.020 off the lands) running a 0.282 mandrel for .002 neck tension, and used a Lee fcd for a light crimp. Fired 2 rounds at each of the powder charges below.

60.5 - 2988
61.0 - 3010
61.5 - 3040
62.0 - 3071
62.5 - 3101 slight ejector mark
63.0 - 3146 slight primer cratering, no ejector

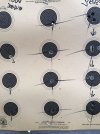
Then proceeded to test different seating depths and powder charges, The groups came together better at a COAL of 3.010 (0.040 off) best group at 100 yards today was 61.0 grains seated 3.010 running 3030 fps

View attachment 446272
Would like to know what others have done with neck tension, I've got 21st Century mandrels and can dial it in to .0005 if it would help.

Also wondering whether to crimp or not, specific to the Badlands BD2. The crimping seems to help with the Hammer bullets, I don't have enough experience with the Badlands yet to say if it does or not.

I prefer to stick with temp stable powders. So far I have tested the following with the 150 badlands in 7 Max:

H1000 - 68.0 (compressed) 2989 fps, no signs of pressure
H4831sc - hit pressure between 66.0 and 67.0 running 3108 fps

In my earlier testing with RL23 (in warmer temps) I was able to get 65.0 grains in for a speed of 3144 fps, 66.0 grains (compressed) ran 3205 fps with a stiff bolt lift.

I've got some H4350, could try that but thinking it might be too fast.
Nice data! Well presented. Just wanted to clarify. The data is from a 7 mm Sherman Max. Is that correct?
 
The first of these blogs will deal with brass. Would like to focus on the 308win because this case likely has the greatest variety of brass available. All brass makers make this case. There are 2 different types. Large rifle primer, LRP, brass ( the most universal ), and the small rifle primer brass, SRP. The SRP brass has a smaller diameter primer pocket and as such is inherently stronger than the LRP pocket. In the 308 Win we have found that the SRP brass has longer primer pocket life with higher velocity loads. The key is using an SRP magnum primer to assure consistent powder ignition and assured performance cold weather. This is berified by hunters in Manitoba, Canada who have posted on LRH the fact that they hunt with SRP mag primers in weather as cold as below 0F eithout apparent ignition issues. In the 308 we have been able to drive our 175 gr BD2 bullet safely (no pressure signs) from a 26" 1/10 twist Savage barrel 2900 fps using 51.5 gr of Leverevolution, SRP Lapua brass and CCI 450 primers. In the 243Win using Peterson SRP brass with StaBall6.5 powder we can safely push our 80 gr BD2 bullet a max of 3800 fps and a very reasonable hunting load 3650-3700 fps all from a 22" 1/10 twist 1963 vintage ADL Rem rifle with sub MOA accuracy at 600 yds.
This next blog describes our experience with keeping necks straight during the sizing process. Any comments by contributors to this site on this subject are very welcomed. So here goes. All these observations were done in the 338 Lapua Mag case using Lapua brass.
Accuracy of copper bullets is quite dependent on alignment of the bullet to the rifling. A bullet entering the rifling eccentrically will move down the barrel eccentrically and proceed throughout it's flight with more precessional motion than is required by the twist rate of the barrel. This is not good for accuracy or BC, both will be degraded. Having the case aligned with the barrel central axis AND having the bullet alined to the central axis of the case is paramount to maximal accuracy and BC. A misaligned neck will misalign the bullet to the rifling. On the first firing, a piece of brass's neck is not only expanded to that of the chamber neck diameter, but also now is almost perfectly alined to the rifle central axis. The trick in reloading is resizing that brass's body and neck without changing that alignment, then seating a bullet as straight as possible in the neck.
Resizing the brass involves several goals. The first is reducing the body diameter sufficiently to allow enough clearance with the chamber to make bolt closure easy. The second is pushing the shoulder back 0.001-0.003" to achieve the proper head space but not work the brass excessively to cause excessive stretching and contraction at the base/body junction which will fatigue the brass there and eventually lead to a case head separation. The third is to narrow the neck diameter sufficiently to achieve enough neck tension to hold the bullet firmly enough in the neck to resist recoil forces of the rifle while in the magazine to not allow the bullet to move within the neck.
We are finding that neck alignment is best preserved if this resizing process is broken up into three steps. The first is body resizing simultaneously with shoulder bump WITHOUT RESING THE NECK. This is best accomplished with a dedicated body sizing die whose neck diameter will not narrow the neck diameter of the brass. The next step is to BEGIN to narrow the neck and remove the spent primer. I remove the expander ball so as not to touch the neck. I use a full length sizing die whose neck is honed to 0.363" diameter and whose shoulder area DOES NOT touch the shoulder by about 0.040" or so. The last step is to use again a full length sizing die whose neck area has been honed to 0.360-0.358." The rationale here is twofold. The first is by progressively narrowing the neck the brass there is not "worked" too quickly. We have seen that neck runout can increase to 0.003-0.005" if neck resizing is done too quickly. Using an expander ball can improve this runout some but not enough consistently. The second reason is that by leaving a portion of the neck base close to or at the chamber neck diameter helps align the cartridge to the rifle bore and offset the slight misalignment that plunger ejectors induce by canting the case upon full bolt closure.
One crucial point is you will need 1 or 2 custom honed full length sizing dies. I have had absolutely superb service in this regard from Forster. I have no connection to the company, but I simply think their customer service us absolutely superb and their pricing is reasonable.

Using this method of resizing we are able to keep neck runout to 0.00125" or less assuming we use brass with circumferentially uniform neck wall thickness. Last point is that the neck mouth is chamfered lightly with a chamfering tool. I like Lyman's hand chamfering tool. If one finds that neck turning is necessary to even up the neck thickness circumstantially, do the turning AFTER the first firing and BEFORE any attempt to resize. A double cutting dedicated electrical mini lathe is the best tool for the job, but it is a bit expensive. If you start out with high quality brass you may not need it.
 
300wm
28" 1:8
205gr sbd 2
Lapua brass
Cci250
73.4 gr h1000
Jumping .110"
2960fps

5 shots @100View attachment 362667
300 WM. Shots @ 100 yds. @ small bore (reduced target) for shooting @50'. H-1000 79.5 gr. 180 gr (SST) LRM primer win brass
 

Attachments

  • 9B7CC5F0-D0BB-40DA-B16D-F583B8F375F4.jpeg
    9B7CC5F0-D0BB-40DA-B16D-F583B8F375F4.jpeg
    486.4 KB · Views: 64
  • 320C5431-491F-47D6-AD8C-B4F4DAA8416D.jpeg
    320C5431-491F-47D6-AD8C-B4F4DAA8416D.jpeg
    573.4 KB · Views: 70
This is one of the best threads going. I continue to see others testing loads from 30 yards, 100 yards, 200 yards and then on out. This makes me happy because that is how I test loads using an older model chronograph. MOA accuracy in my opinion remains the same to distance (Litz) but every once in a while I see MOA tighten up at distance with a rifle and custom load - and now the big opinion - it occured in the faster the twist rate barrels with higher B.C. bullets and slower burning temperature stable powders(quality compnents). I am still learning and enjoy making an average factory gun shoot 1/2 MOA to 800 yards every once in a while.
 
This next blog describes our experience with keeping necks straight during the sizing process. Any comments by contributors to this site on this subject are very welcomed. So here goes. All these observations were done in the 338 Lapua Mag case using Lapua brass.
Accuracy of copper bullets is quite dependent on alignment of the bullet to the rifling. A bullet entering the rifling eccentrically will move down the barrel eccentrically and proceed throughout it's flight with more precessional motion than is required by the twist rate of the barrel. This is not good for accuracy or BC, both will be degraded. Having the case aligned with the barrel central axis AND having the bullet alined to the central axis of the case is paramount to maximal accuracy and BC. A misaligned neck will misalign the bullet to the rifling. On the first firing, a piece of brass's neck is not only expanded to that of the chamber neck diameter, but also now is almost perfectly alined to the rifle central axis. The trick in reloading is resizing that brass's body and neck without changing that alignment, then seating a bullet as straight as possible in the neck.
Resizing the brass involves several goals. The first is reducing the body diameter sufficiently to allow enough clearance with the chamber to make bolt closure easy. The second is pushing the shoulder back 0.001-0.003" to achieve the proper head space but not work the brass excessively to cause excessive stretching and contraction at the base/body junction which will fatigue the brass there and eventually lead to a case head separation. The third is to narrow the neck diameter sufficiently to achieve enough neck tension to hold the bullet firmly enough in the neck to resist recoil forces of the rifle while in the magazine to not allow the bullet to move within the neck.
We are finding that neck alignment is best preserved if this resizing process is broken up into three steps. The first is body resizing simultaneously with shoulder bump WITHOUT RESING THE NECK. This is best accomplished with a dedicated body sizing die whose neck diameter will not narrow the neck diameter of the brass. The next step is to BEGIN to narrow the neck and remove the spent primer. I remove the expander ball so as not to touch the neck. I use a full length sizing die whose neck is honed to 0.363" diameter and whose shoulder area DOES NOT touch the shoulder by about 0.040" or so. The last step is to use again a full length sizing die whose neck area has been honed to 0.360-0.358." The rationale here is twofold. The first is by progressively narrowing the neck the brass there is not "worked" too quickly. We have seen that neck runout can increase to 0.003-0.005" if neck resizing is done too quickly. Using an expander ball can improve this runout some but not enough consistently. The second reason is that by leaving a portion of the neck base close to or at the chamber neck diameter helps align the cartridge to the rifle bore and offset the slight misalignment that plunger ejectors induce by canting the case upon full bolt closure.
One crucial point is you will need 1 or 2 custom honed full length sizing dies. I have had absolutely superb service in this regard from Forster. I have no connection to the company, but I simply think their customer service us absolutely superb and their pricing is reasonable.

Using this method of resizing we are able to keep neck runout to 0.00125" or less assuming we use brass with circumferentially uniform neck wall thickness. Last point is that the neck mouth is chamfered lightly with a chamfering tool. I like Lyman's hand chamfering tool. If one finds that neck turning is necessary to even up the neck thickness circumstantially, do the turning AFTER the first firing and BEFORE any attempt to resize. A double cutting dedicated electrical mini lathe is the best tool for the job, but it is a bit expensive. If you start out with high quality brass you may not need it.
If you are using a tighten or reduce chamber in the neck area. You would have to cut the or thin the neck down to start with.
I kind of stumble onto this a great many years ago with my 308 N.Mag. It has a longer neck than the 300 WM, and shorter to the shoulder. I was trying to get passed the case separation at the belt. I noted after firing the case the transition in the shoulder was to chamber size on a portion of the neck. That stop the separation completely. Lost the case from primer pockets getting to large after that.
It's been my understanding is better to thin your neck before firing the case. You are saying different than that. I just wonder why? I am not trying to pick a fight either I like very much what you have written about.
I was by accident able to only size my necks down part ways using a bushing die. So went to the smith I was working with and doing another build now. He quickly figure it out. O'well I have to get another 280AI bushing die to change my proceedures some.
I like very much. and other here are doing or have been doing the same or close to what you have done in managing you cases.
 
Anyone have any load data / experience running the 150gn BD2's in a 308Win?
 
If you are using a tighten or reduce chamber in the neck area. You would have to cut the or thin the neck down to start with.
I kind of stumble onto this a great many years ago with my 308 N.Mag. It has a longer neck than the 300 WM, and shorter to the shoulder. I was trying to get passed the case separation at the belt. I noted after firing the case the transition in the shoulder was to chamber size on a portion of the neck. That stop the separation completely. Lost the case from primer pockets getting to large after that.
It's been my understanding is better to thin your neck before firing the case. You are saying different than that. I just wonder why? I am not trying to pick a fight either I like very much what you have written about.
I was by accident able to only size my necks down part ways using a bushing die. So went to the smith I was working with and doing another build now. He quickly figure it out. O'well I have to get another 280AI bushing die to change my proceedures some.
I like very much. and other here are doing or have been doing the same or close to what you have done in managing you cases.
I appreciate your argument. No hostility taken. For the described procedure I am using a standard 338LM chamber. I had turned the necks to fit a custom chamber such that the wall thickness is 0.012" so that means the final narrowing of the neck has to be about 0.002" tighter. I have a custom honed FL sizer without an expander ball to get to the correct internal diameter. This procedure should apply to 0.014" thick necks as well. If you do any neck turning, it should be done before any resizing preferably on once fired brass.
 
I would call it a light crimp. I can sometimes barely see some light impressions in the brass. I need to do some crimp-Specific testing comparing various levels of crimp.
Would be interesting to see if that crimping has the effect of straightening any run out between the neck and bullet.
 
Thanks man. Interesting about the Leverevolution powder. May give that shot but interested to see how Varget does as well with the 150's. That temp stability is nice.
 
Thanks man. Interesting about the Leverevolution powder. May give that shot but interested to see how Varget does as well with the 150's. That temp stability is nice.
Any time. There is a third powder that is new with temp stability and burn rate similar to Varget that could also be good in the 308Win. I have some but not tried it yet as the weather here is preventing me from using my Lab Radar. It is promoted as a high energy temp stable ball powder, StaBall Match. I you or your buddies have a chance to try it out, please post the results.
 
Top