The first glass bedding job I did was on a Model 70 in 1971. At the time, I knew nothing other than what I had read in the acraglas instructions. I bedded the whole receiver with no clearance anywhere and kept the barrel floating as it was before. This worked out surprisingly well. The rifle shot better and was consistent in it's accuracy for the 10 years or so that I kept it.
Over the years, through contact with experienced gunsmiths, I varied my technique quite a bit but I can't honestly say things work much different than that rifle did.
The purpose of glass bedding is threefold. It seals the action area, it provides a perfect mating surface, and it strengthens the stock.
Generally speaking, I feel that the fiberglass is stronger and more stable than wood. Consequently, the more wood which is replaced with glass, the better.
I believe in casting fiberglass pillars at the screw locations. It is not necessary that these pillars goo all the way through the stock but it is preferable. If I don't go all the way through, I go to within 1/8 inch or so of the bottom metal inletting.
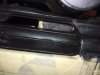
Having gotten that out of the way, I'll describe how I bed a Model 70. I apologize in advance for the lack of pictures.
To begin, I remove the barreled action from the stock and remove the trigger mechanism and bolt stop from the receiver. I wipe the barreled action down with varsol to remove grease and dirt. I then start by wrapping masking tape around the barrel at the fore arm tip to center the barrel in the barrel channel and establish clearance. This applies if the barrel is already free floated. If the stock has a pressure point, I will eschew the tape providing the barrel sits properly in the channel.
Next, I will apply two layers of masking tape to the front, sides, and bottom of the recoil lug. I will also apply one layer of tape to the sides of the trigger housing at the rear of the receiver and two layers at the flat surface at the back of the tang. The purpose for this is that I don't want any rear facing surface to contact other than the surface of the recoil lug. The tape on the sides is just to keep glass out of the trigger pin hole and the sear pivot hole. The clearance on the front and sides of the recoil lug is to make it easier to remove and replace the stock.
Once I've taped what I want taped, I apply release agent to the barrelled action. I use paste wax and I put it on the whole barreled action. I also make sure and coat the bottoom metal thoroughly. The Winchester screws, at least on the post-64 models are a rolled thread piece and the shank of the screw is smaller than the threads. This can created a bit of a problem so I put a couple of wraps of tape around the shank of the screws to bring them up to size. Then I wax them. Now for the stock.
I start by drilling a 5/8 inch diameter hole from bottom to top at the front and the rear hole locations. At the rear, this will break through into the trigger group inletting so I then tape the front of the hole to block off the inletting. If one doesn't want to do this, he can just drill down from the top with a 5/8 drill in the front and a 7/16 drill at the rear. Drill down about 5/8 deep. This makes a semi-pillar when it is filled with glass.
I remove the wood from the recoil lug mortise back to the hole to a depth equal to the bottom of the recoil lug mortise. From there, I angle up to the top of the magazine well. I remove about 1/8 inch of wood from the sides to within about 1/16 inch of the top of the stock. If I wish to bedd the whole action, I'll carry this back all the way to the tang. If I wish to bed only the receiver ring and tang, I will remove wood only at these locations. Ultimately, it's your choice. Either way will work well. When I do the full length of the action, I do so for the benefits of sealing the inletting as much as anything else. Also, it looks good when the action is out of the stock.
I apply a coating of wax to the outside of the stock and to the inside of the magazine well. Also to the trigger inletting. I then put the bottom metal into it's inletting and hold it there with some tape. The screws are installed and also held in with tape. everything is double checked.
I mix the epoxy then and add sufficient flock to leave it slightly runny. I coat the inletting which I have cut out with some of this mix and pour some into the holes around the front and rear screws. I then add more floc to thicken the mix and fill in the recoil lug mortise and the tang area. I apply some of the thickened mixture to the receiver behind the recoil lug and along the sides of the receiver and behind the flat at the rear of the tang. This eliminates voids which might form if air gets trpped in these areas. When I'm satisfied I have enough epoxy mix in place, I setb the barreled action into the stock and start the screws. I turn the screws in until the receiver is sitting at it's proper level. This level is established by the tape or the pressure point at the front and the very tip of the tang at the rear. The screws are turned in until the action is in place, then backed out about 1/8 turn or just enough that they are putting no pressure on the action. Now the stock is set aside until the epoxy sets up. If a lot of epoxy runs out over the sides, it can be wiped off or if the stock is well waxed, it will pop off after it has hardened. Do what makes you most comfortable. If I'm bedding the full length, I do like to wipe of the epoxy at the ejection port to make sure there is no mechanical lock which might make removal difficult.
You had asked about the center screw. Generally speaking, the center screw is used to hold up the front of the trigger guard and is not a part of the bedding system. It can become a part of the bedding system if the action is bedded in that area but there is not a lot of surface to work with becauseof the space taken up by the Model 70 sear. I like to bed the center but I can't honestly say doing so is of enough value to justify the extra effort.
I set the stock on a cardboard box with notches cut into the top edges for the stock to sit in. I let it sit for 24 hours if using acraglas at room temperature. Longer if it's cool.
Once the glass has set up, I check to make sure thre is no epoxy locking the action in place. I remove the screws which come out easily providing I remembered to wax them. I then place the butt of the rifle on the floor and the barrel on the edge of a low shelf under my bench and push down on the forend. The action comes out easily. Excess epoxy is chipped off. The barreled action is de-taped and cleaned with varsol then oiled. The trigger parts are re-installed and the rifle is re-assembled. If the stock had a pressure point in the fore arm, you have to shave that out before assembly and check to ensure clearance for the full length of the channel. I think you should have at least 1/32 inch of clearance on the sides and double that on the bottom. Seal the channel with stock finish or, better yet, with unadulterated Acraglas liquid. There you have it.
When the action is pu into the stock when bedding, the floorplate is closed to ensure alignment of the floorplate and trigger guard.
I don't think I've left anything out. If I bed a model 70 soon, I'll take some pictures and try and put them up.