Introducing New Hunters To The Sport
By Ronnie Johnson
I spend most of my spare time in the field hunting. I learned to love hunting and the outdoors because my father and grandfather introduced it to me at a very early age.
As Americans and sportsmen, we need to think about introducing more people to the sport of hunting, to help preserve our 2nd Amendment right, number one, and to endear to our youth the love of hunting.
Since ten years old, I dreamed of being a hunting guide, flying in and out the wilderness in a DeHavilland Beaver. I thought surely all young men had the same dream as me, and possibly some young women, but many had never been introduced to the real joy of hunting. I have enjoyed watching my daughters and my wife begin to grasp this joy and excitement. I continue to learn new ways to keep and increase their interest in hunting.
New hunters must feel competent shooting as well as comfortable and confident in the field. First and foremost, safe firearm handling must be taught and practiced at all times. The very young can be taught about gun safety and most states require a hunter’s safety course for a hunting license, but gun safety must be taught and practiced any time a firearm is being handled. At work, our craftsmen are required to complete a safe work checklist before they ever start a job. The same should occur anytime a person is carrying or handling a firearm, so my top four safety rules include: One, treat all weapons as if they are loaded and cocked. Two, never allow the muzzle to cover anything you are not willing to kill or destroy. Number three, keep your finger off the trigger until your sights are aligned on the target. And four, always know what is behind your target. These are very basic safety rules, but I go over them anytime I am handling firearms. Many good articles and books have been written on gun safety, and I will not expound on that subject for this article.
A new hunter must practice shooting -- the more the better. Brand new shooters should begin with small calibers. They are quieter (don’t ever forget hearing protection) and they have less recoil, making them less taxing on the nerves. I started my young girls with a .22 rifle and pistol. As their confidence increases, I start working towards the caliber I expect them to hunt with. For example, my daughters and wife use a .243 for deer hunting, and before they begin practicing with the .243 they have already become proficient with a .22 long rifle and the .223. I patiently watch their skills progress over a period of time, which will be different for each new hunter. I let them help me sight the rifles in, while I teach them about their scope. I always draw pictures on a tablet of paper showing how to line their target with the scope’s reticule. Never expect a new hunter to know what you are talking about. Draw a picture for them. A new hunter should have enough practice shooting until they are proficient and they exhibit all the safety skills needed to hunt in the field.
The next step is a hunting license for the state you are hunting, and of course, the tag for the game. Some tags must be applied for well in advance of the hunting season, so beware, most hunting trips should be planned for a year or more. The excitement of planning the hunt is almost as much fun as the hunt itself! Always study the hunting regulations for the state you are hunting. Some states have special requirements and seasons for youth hunting (generally from 12 to 17 years of age). Many states offer discounts for youth hunting as well as other incentives, so do your homework. All states have different requirements for tagging your downed game. Make sure you and your new hunter knows the laws. Receiving a ticket for a violation of the law would not be a good start for the young hunter.
Correct clothing should be addressed. New hunters may have no experience outdoors in the cold. Teach a new hunter about layering their clothing and always being prepared for wet weather. There are many new high tech fabrics out there. I have tried some and my daughters like some of them, but I still prefer wool. It is heavy, but still warm even when wet. A good rain suit, wool, and silk underwear, will ward off even the worst of storms. Two pairs of gloves are important, with one of them being heavily insulated. The same is true for a cap and ear covering, one for the extreme cold and another for wearing when the temperature rises some. But keep in mind, clothing is a personal preference, it must fit well and be comfortable.
Good foot gear is equally important. Boots must be fitted properly and broken in before hunting. Take into account the type of terrain you are hunting for the type of hunting boot your new hunter will need. If you are hunting in the snow, you must have good insulation as well. My daughters like to layer their socks as well. They prefer a sock liner much like Under Armour and then good padded wool socks. Do not scrimp on socks or boots; blisters will ruin a hunt. Keep in mind that friction causes blisters, so their socks and boots must fit perfectly. Make sure they wear them several times before hunting. In fact, make sure they wear their boots and hunting clothes on a few short hiking trips to assure comfort.
With my younger girls, there were things I did not give much thought to until I got them in the field. Like how to tell them to use the restroom while wearing enough clothes to make them look like a miniature Michelin man. Boys can have the same problem. So, think ahead. Make sure your young hunter knows how to use the restroom outside. A few discussions beforehand could save both embarrassment and time.
Now, we have the correct hunting license, the correct clothing and footgear for the season, and a tag for the game. Let’s dive deeper into the weapons and shooting. Make sure the weapon fits the shooter. The stock needs to be the correct length, and then the barrel needs to be the correct length to cause the weapon to balance easily. It should come to the shoulder quickly, and the sights or scope should align with the shooter’s eye. Too long of a butt stock seems to be the main culprit here. Verify that when they have their hunting clothes on that it still fits, as well as in all the different shooting positions. Make sure the safety can be operated quickly as well as positively, even with gloves on. Make sure the trigger is adjusted to break cleanly, and without too much weight, say at about 3½ to 4 pounds. This will need to be looked at for each shooter, because some may need it a little heavier. If it is crisp, without any creep, most people seem to do OK at the start. It can be adjusted as needed as when the new hunter becomes more proficient. Show them how to correctly grip the rifle, being firm and holding snugly against the shoulder, but not so tightly that they begin to shake.
The new hunter needs to be able to make clean shots on game under field conditions. We need to teach new hunters that as sportsmen, we owe the game animal a clean, swift demise. I have encountered many hunters who only practice shooting from the bench rest at the local range, but we need to test ourselves in field positions. If the hunter is going to be in a stand, which has a rest they can steady their weapon on, shooting from the bench may be OK. We need to be able to deliver a first round hit to the vitals on the game animal at an unverified distance from a field position set forth by the terrain. We need to have them shoot several groups from the different positions. This will need to be done over several trips to the range. Many times, too much shooting at any single time causes a new shooter to develop a flinch. By breaking the shooting up into several sessions and keeping it enjoyable, the new shooter’s enthusiasm will stay high.
Another of the most overlooked points is sighting in your ol’ smokepole. The weapon should be sighted in at an appropriate distance for the area to be hunted, as well as the game being pursued. Zeroing for a longer distance than needed makes the midrange trajectory too high for precise shot placement at a more normal range. Unless going to the field in the next day or so, the weapon should be cleaned after each range session. I am assuming most of us are using a rifle since we are at LongRangeHunting.com, but the same principle applies with a muzzle loader or a slug gun. We should dry the cleaned or fouled barrel with a couple of shots of the ammo to be used, Then test to KNOW that the weapon will shoot dead center the first time at the distance we had previously sighted in for. We then need to repeat this several times in a row. In recent years, sights have improved considerably, allowing our weapons to stay zeroed longer than they did in the past.

Now that we know our weapon is zeroed, we can then verify by fire what the drop and wind drift will be, not just relying on a computer table which may or may not be correct. Shooting positions, grip on the stock, and several other factors can cause the weapon to strike in a slightly different spot than when we had fired it from the bench at the range. The time the bullet spends in the barrel can also affect the impact point. The farther they can shoot at the targets before going hunting, the more easily they can see what effects different shooting positions, light, and the wind play in real game shooting.
Where to hit the animal in question is also of great importance, as the vital zone needs to be defined to the new hunter. Life size targets are very good for this. They normally have a small line drawn around the vital zone, but being hard to see from the firing position. I used several photos of deer with my daughters and my wife as we prepared for their first hunt. This seemed to help to remind them of correct aiming points under various angles that a shot may present itself. We always waited and hoped for the broadside shot, but with the right loads angling shots can be taken. As long as your bullets penetrate in a straight line, as the sight picture would indicate, you can calculate where to aim to get to the vitals. Much testing with water soaked newspaper and raw beef bones is done to test our hunting loads during the load development period to ensure this type of performance. Today we have great factory ammo also, but the testing of the rifle is still the same.
Study photos of the game animals being hunted. Study their tracks. Learn to read the tracks by going into the great outdoors anytime you have the opportunity, and observe how the elements change the way tracks look. Tom Brown’s books on field craft are excellent for this.
When firing in the field, the new hunter may feel they can’t keep their sights centered on the target, even at a moderate distance. Several good books about trigger control and sight picture have been written and will give you a good place to start.
We owe it to the game to be proficient with our chosen weapons. This includes shooting positions, use of the sling and bipod, as well as any improvised rest we can come up with. Once, while hunting elk in Colorado with my 14 year old daughter, we spotted a group of elk up the ridge from our position, using a small finger for cover to shield us from the many sets of wary eyes, we came to a small pile of rocks which proved to be about 285 yards from the elk. I used my daypack as a pad on top of the rock pile and helped her get into position to shoot. Her rifle had a bipod, but the rock pile did not lend itself for the bipod’s use. We verified the distance, talked about the correct point in the ballistic plex reticule, just to be sure she knew the correct point to hold for that distance. With the daypack under the forearm and leaning onto the rocks she had a very steady sight picture that she said look solid to her. She has taken several deer at similar distances. Just as she was about to fire the frozen rock pile fell apart. She still had the safety on, and was able to keep her rifle pointed in a safe direction. The elk looked our way, and we had to freeze for a few minutes until they went back to feeding before be could gather up our gear and move to a different spot to make the shot. Sometimes a branch on a tree, a fallen log, or other natural object can be pressed into service as a rest to steady our rifle.
Having been to many rifle ranges, shooting schools, and competed in tactical matches, I had an idea about setting up a field course, to tune my girl’s skills. A field course is a good way to teach the hunter, with the new hunter walking in the lead and a senior person following, ready to assist if anything happens which might be unsafe, and adding some coaching. Let them demonstrate to you how they will spot, then stalk the game, assume a stable shooting position and then if it can be arranged, allow them to fire at life size targets of the animal they are intending to hunt. After each stage, take time to discuss both their strong points as well as the ones that could use some improvement.
In the field, we must have a combination of manual dexterity, control over muscle and nerve, an understanding of the mechanics of shooting, and a positive attitude, which when put together equals the total effort needed to make a shot. Having rehearsed this will strengthen in their own minds what they can do.
Study your ballistic tables. Know how much drop and wind drift there will be for your particular rifle and load. Young hunters should avoid shooting at moving game until their shooting skills are honed, and even then should be avoided if possible. If possible, at the range or field course, construct a moving target frame with a life size animal target for the new hunter to test themselves on. A cable and roller is an inexpensive way of building a moving target, set up in a gully allowing gravity to do the work of moving the target. Adding weight or increasing the down angle the cable is set at will cause the target to move faster. Let the shooting be a fun, low stress time of learning.
Next, work with your binoculars to be able to focus them quickly and without thinking. If a rangefinder is to be used it also should be trained with to aid in having a good amount of skill in its use. Looking across a canyon and getting a distance and inclination reading is pretty reliability with one of the better laser rangefinders, whereas looking across the prairie in Wyoming at antelope, one can let the beam hit the hill before and give a short reading. Being up higher on a hillside and ranging down to the target is better, as long as you take the time to check your inclination reading and compensate for gravity distance for that angle. You must still use the total distance for wind correction.
Once the game is down, the congratulations are done, and the camera is full of pictures, they also need to be able to care for the game animals or fowl they have harvested. There are many good books on proper field care of game, such as the Stoneydale Press Field Care Handbook for the Hunter and Fisherman. Much can be learned from watching or helping others clean and dress game animals, seeing how people from different areas of the country handle this chore.
Verbal communications should be agreed on ahead of time and practiced outside of the field when it is not so critical. When trying to show a new hunter a game animal on the side of a hill in the timber, it is a good idea to have the basic terms you will be using gone over ahead of time. Decide if you will direct their view with directions referencing a clock face, or also use natural landmarks to direct them onto the game animal. Go over hand signals too, to acquaint the new hunter with their use if too close even for a whisper.
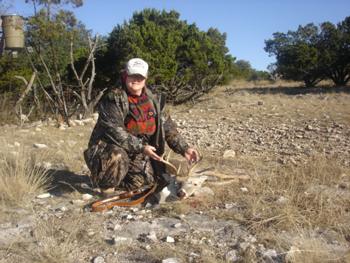
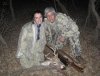
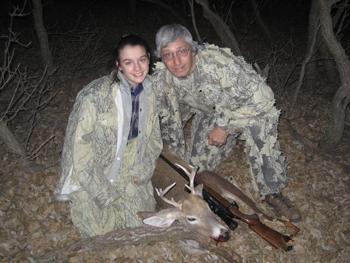
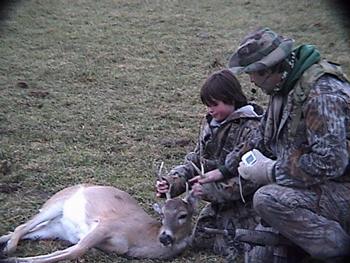
I remember taking my 11 year old after whitetail deer in Texas in the late youth season. We saw a small buck go into a scrub oak thicket. We worked our way within about 35 yards of the buck when we saw there where about 4 or 5 much bigger bucks already there. I spotted a large buck walking just inside the thicket. He circled then bedded down 10 yards inside the edge of the thicket. My daughter was having a heck of a time finding him. First, I directed her eyes to a larger tree, then to a smaller tree at 3:00 from the larger tree. Then to the white sticks at the base of the smaller tree at three o'clock. These, of course, were the antlers of the buck. Then, finally, I directed her to the ears and the head. She suddenly became very excited because she had put it together and realized THAT was the buck. When she turned to tell me she finally had seen him, she again had a hard time finding him. Coaching her back on did not take even a third of the time.
I like to remind the shooter to practice trigger control and breathing when making the shot. Sometimes this seems to help with calming down their nerves and overcoming the dreaded BUCK FEVER. At her first shot, using a post and barbed wire with a heavy mitten over the wire for a rest, my daughter hit a sapling next to the buck’s head. He jumped up, and in a frenzy of milling deer she got a second shot which put him on the table. It was a nice 135 class whitetail shot at about 45 yards, and even better, my best friend was along doing the filming. The stalk took about 45 minutes to cover about 150 yards to get to a spot where the deer were visible in the brush.
A last thought is to help the new hunter to put together a few things to be kept in their daypack. Some items may not be necessary if only a short distance from your vehicle or camp, but become more important the farther out in the hills you get from support. A first aid kit with extra blister meds, like New-Skin and moleskin, will keep you moving. They need a small amount of fire-making gear, like a metal match, and a waterproof container of matches. A fire starter stick is also a good idea, as well as a cable saw and 2 or 3 space blankets of the larger sizes. A multi-tool is good also. A compass and map are always my back up to a GPS. Bring a small flashlight with extra batteries and a second small light to be able to change batteries or the bulb in the dark.
Again, looking back in the past, being in the timber in the dark in a rain storm, it is mighty comforting to have a headlamp and mini mag on a string around your neck and a second in a pommel bag. The same thought applies to knives and a small axe. A 26” handled 2 ½ pound axe is a great piece of gear if you are in the back country. If you are just walking a half mile to and from a stand some of this equipment is overkill, but still nice to have if you don’t have more than you can carry. I also found that a folding type saw with both bone and wood blades is handy for quartering and skull plating game, and for clearing branches from trees to allow hosting the head and cape to a safe place for the night in areas where bears and wolves roam.

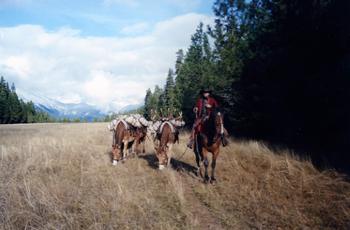
A good friend of mine and a GREAT outfitter is Mike Richie and his wife Dawn (RichieOutfitters.com) who operate in the Selway Bitterroot Wilderness area. This is one of the most remote designated wilderness areas in the lower 48. Mike is a second generation outfitter in the Selway and uses a cut down double bit axe tied to his daypack. With it he can make a shelter, get a good size fire going and keep it that way, as well as quarter and skull plate game.
In closing, I hope that each of you get to introduce a new hunter to the sport this year. It is a blessing to see them develop and grow to have a love of the outdoors, and if they also happen to be your better half, son or daughter, you will have some special times that you can relive later on. I am also blessed in having great friends in John and his wife Kim Huot, who help me with these special hunts and have filmed several of them. We get to replay these great times with the rest of our family and friends on the big screen. Sometimes we get a good laugh at some of our moves and mistakes. Take care, and good hunting!
By Ronnie Johnson
I spend most of my spare time in the field hunting. I learned to love hunting and the outdoors because my father and grandfather introduced it to me at a very early age.
As Americans and sportsmen, we need to think about introducing more people to the sport of hunting, to help preserve our 2nd Amendment right, number one, and to endear to our youth the love of hunting.
Since ten years old, I dreamed of being a hunting guide, flying in and out the wilderness in a DeHavilland Beaver. I thought surely all young men had the same dream as me, and possibly some young women, but many had never been introduced to the real joy of hunting. I have enjoyed watching my daughters and my wife begin to grasp this joy and excitement. I continue to learn new ways to keep and increase their interest in hunting.
New hunters must feel competent shooting as well as comfortable and confident in the field. First and foremost, safe firearm handling must be taught and practiced at all times. The very young can be taught about gun safety and most states require a hunter’s safety course for a hunting license, but gun safety must be taught and practiced any time a firearm is being handled. At work, our craftsmen are required to complete a safe work checklist before they ever start a job. The same should occur anytime a person is carrying or handling a firearm, so my top four safety rules include: One, treat all weapons as if they are loaded and cocked. Two, never allow the muzzle to cover anything you are not willing to kill or destroy. Number three, keep your finger off the trigger until your sights are aligned on the target. And four, always know what is behind your target. These are very basic safety rules, but I go over them anytime I am handling firearms. Many good articles and books have been written on gun safety, and I will not expound on that subject for this article.
A new hunter must practice shooting -- the more the better. Brand new shooters should begin with small calibers. They are quieter (don’t ever forget hearing protection) and they have less recoil, making them less taxing on the nerves. I started my young girls with a .22 rifle and pistol. As their confidence increases, I start working towards the caliber I expect them to hunt with. For example, my daughters and wife use a .243 for deer hunting, and before they begin practicing with the .243 they have already become proficient with a .22 long rifle and the .223. I patiently watch their skills progress over a period of time, which will be different for each new hunter. I let them help me sight the rifles in, while I teach them about their scope. I always draw pictures on a tablet of paper showing how to line their target with the scope’s reticule. Never expect a new hunter to know what you are talking about. Draw a picture for them. A new hunter should have enough practice shooting until they are proficient and they exhibit all the safety skills needed to hunt in the field.
The next step is a hunting license for the state you are hunting, and of course, the tag for the game. Some tags must be applied for well in advance of the hunting season, so beware, most hunting trips should be planned for a year or more. The excitement of planning the hunt is almost as much fun as the hunt itself! Always study the hunting regulations for the state you are hunting. Some states have special requirements and seasons for youth hunting (generally from 12 to 17 years of age). Many states offer discounts for youth hunting as well as other incentives, so do your homework. All states have different requirements for tagging your downed game. Make sure you and your new hunter knows the laws. Receiving a ticket for a violation of the law would not be a good start for the young hunter.
Correct clothing should be addressed. New hunters may have no experience outdoors in the cold. Teach a new hunter about layering their clothing and always being prepared for wet weather. There are many new high tech fabrics out there. I have tried some and my daughters like some of them, but I still prefer wool. It is heavy, but still warm even when wet. A good rain suit, wool, and silk underwear, will ward off even the worst of storms. Two pairs of gloves are important, with one of them being heavily insulated. The same is true for a cap and ear covering, one for the extreme cold and another for wearing when the temperature rises some. But keep in mind, clothing is a personal preference, it must fit well and be comfortable.
Good foot gear is equally important. Boots must be fitted properly and broken in before hunting. Take into account the type of terrain you are hunting for the type of hunting boot your new hunter will need. If you are hunting in the snow, you must have good insulation as well. My daughters like to layer their socks as well. They prefer a sock liner much like Under Armour and then good padded wool socks. Do not scrimp on socks or boots; blisters will ruin a hunt. Keep in mind that friction causes blisters, so their socks and boots must fit perfectly. Make sure they wear them several times before hunting. In fact, make sure they wear their boots and hunting clothes on a few short hiking trips to assure comfort.
With my younger girls, there were things I did not give much thought to until I got them in the field. Like how to tell them to use the restroom while wearing enough clothes to make them look like a miniature Michelin man. Boys can have the same problem. So, think ahead. Make sure your young hunter knows how to use the restroom outside. A few discussions beforehand could save both embarrassment and time.
Now, we have the correct hunting license, the correct clothing and footgear for the season, and a tag for the game. Let’s dive deeper into the weapons and shooting. Make sure the weapon fits the shooter. The stock needs to be the correct length, and then the barrel needs to be the correct length to cause the weapon to balance easily. It should come to the shoulder quickly, and the sights or scope should align with the shooter’s eye. Too long of a butt stock seems to be the main culprit here. Verify that when they have their hunting clothes on that it still fits, as well as in all the different shooting positions. Make sure the safety can be operated quickly as well as positively, even with gloves on. Make sure the trigger is adjusted to break cleanly, and without too much weight, say at about 3½ to 4 pounds. This will need to be looked at for each shooter, because some may need it a little heavier. If it is crisp, without any creep, most people seem to do OK at the start. It can be adjusted as needed as when the new hunter becomes more proficient. Show them how to correctly grip the rifle, being firm and holding snugly against the shoulder, but not so tightly that they begin to shake.
The new hunter needs to be able to make clean shots on game under field conditions. We need to teach new hunters that as sportsmen, we owe the game animal a clean, swift demise. I have encountered many hunters who only practice shooting from the bench rest at the local range, but we need to test ourselves in field positions. If the hunter is going to be in a stand, which has a rest they can steady their weapon on, shooting from the bench may be OK. We need to be able to deliver a first round hit to the vitals on the game animal at an unverified distance from a field position set forth by the terrain. We need to have them shoot several groups from the different positions. This will need to be done over several trips to the range. Many times, too much shooting at any single time causes a new shooter to develop a flinch. By breaking the shooting up into several sessions and keeping it enjoyable, the new shooter’s enthusiasm will stay high.
Another of the most overlooked points is sighting in your ol’ smokepole. The weapon should be sighted in at an appropriate distance for the area to be hunted, as well as the game being pursued. Zeroing for a longer distance than needed makes the midrange trajectory too high for precise shot placement at a more normal range. Unless going to the field in the next day or so, the weapon should be cleaned after each range session. I am assuming most of us are using a rifle since we are at LongRangeHunting.com, but the same principle applies with a muzzle loader or a slug gun. We should dry the cleaned or fouled barrel with a couple of shots of the ammo to be used, Then test to KNOW that the weapon will shoot dead center the first time at the distance we had previously sighted in for. We then need to repeat this several times in a row. In recent years, sights have improved considerably, allowing our weapons to stay zeroed longer than they did in the past.
Now that we know our weapon is zeroed, we can then verify by fire what the drop and wind drift will be, not just relying on a computer table which may or may not be correct. Shooting positions, grip on the stock, and several other factors can cause the weapon to strike in a slightly different spot than when we had fired it from the bench at the range. The time the bullet spends in the barrel can also affect the impact point. The farther they can shoot at the targets before going hunting, the more easily they can see what effects different shooting positions, light, and the wind play in real game shooting.
Where to hit the animal in question is also of great importance, as the vital zone needs to be defined to the new hunter. Life size targets are very good for this. They normally have a small line drawn around the vital zone, but being hard to see from the firing position. I used several photos of deer with my daughters and my wife as we prepared for their first hunt. This seemed to help to remind them of correct aiming points under various angles that a shot may present itself. We always waited and hoped for the broadside shot, but with the right loads angling shots can be taken. As long as your bullets penetrate in a straight line, as the sight picture would indicate, you can calculate where to aim to get to the vitals. Much testing with water soaked newspaper and raw beef bones is done to test our hunting loads during the load development period to ensure this type of performance. Today we have great factory ammo also, but the testing of the rifle is still the same.
Study photos of the game animals being hunted. Study their tracks. Learn to read the tracks by going into the great outdoors anytime you have the opportunity, and observe how the elements change the way tracks look. Tom Brown’s books on field craft are excellent for this.
When firing in the field, the new hunter may feel they can’t keep their sights centered on the target, even at a moderate distance. Several good books about trigger control and sight picture have been written and will give you a good place to start.
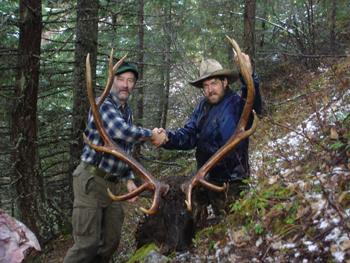
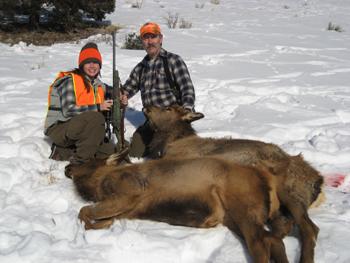
We owe it to the game to be proficient with our chosen weapons. This includes shooting positions, use of the sling and bipod, as well as any improvised rest we can come up with. Once, while hunting elk in Colorado with my 14 year old daughter, we spotted a group of elk up the ridge from our position, using a small finger for cover to shield us from the many sets of wary eyes, we came to a small pile of rocks which proved to be about 285 yards from the elk. I used my daypack as a pad on top of the rock pile and helped her get into position to shoot. Her rifle had a bipod, but the rock pile did not lend itself for the bipod’s use. We verified the distance, talked about the correct point in the ballistic plex reticule, just to be sure she knew the correct point to hold for that distance. With the daypack under the forearm and leaning onto the rocks she had a very steady sight picture that she said look solid to her. She has taken several deer at similar distances. Just as she was about to fire the frozen rock pile fell apart. She still had the safety on, and was able to keep her rifle pointed in a safe direction. The elk looked our way, and we had to freeze for a few minutes until they went back to feeding before be could gather up our gear and move to a different spot to make the shot. Sometimes a branch on a tree, a fallen log, or other natural object can be pressed into service as a rest to steady our rifle.
Having been to many rifle ranges, shooting schools, and competed in tactical matches, I had an idea about setting up a field course, to tune my girl’s skills. A field course is a good way to teach the hunter, with the new hunter walking in the lead and a senior person following, ready to assist if anything happens which might be unsafe, and adding some coaching. Let them demonstrate to you how they will spot, then stalk the game, assume a stable shooting position and then if it can be arranged, allow them to fire at life size targets of the animal they are intending to hunt. After each stage, take time to discuss both their strong points as well as the ones that could use some improvement.
In the field, we must have a combination of manual dexterity, control over muscle and nerve, an understanding of the mechanics of shooting, and a positive attitude, which when put together equals the total effort needed to make a shot. Having rehearsed this will strengthen in their own minds what they can do.
Study your ballistic tables. Know how much drop and wind drift there will be for your particular rifle and load. Young hunters should avoid shooting at moving game until their shooting skills are honed, and even then should be avoided if possible. If possible, at the range or field course, construct a moving target frame with a life size animal target for the new hunter to test themselves on. A cable and roller is an inexpensive way of building a moving target, set up in a gully allowing gravity to do the work of moving the target. Adding weight or increasing the down angle the cable is set at will cause the target to move faster. Let the shooting be a fun, low stress time of learning.
Next, work with your binoculars to be able to focus them quickly and without thinking. If a rangefinder is to be used it also should be trained with to aid in having a good amount of skill in its use. Looking across a canyon and getting a distance and inclination reading is pretty reliability with one of the better laser rangefinders, whereas looking across the prairie in Wyoming at antelope, one can let the beam hit the hill before and give a short reading. Being up higher on a hillside and ranging down to the target is better, as long as you take the time to check your inclination reading and compensate for gravity distance for that angle. You must still use the total distance for wind correction.
Once the game is down, the congratulations are done, and the camera is full of pictures, they also need to be able to care for the game animals or fowl they have harvested. There are many good books on proper field care of game, such as the Stoneydale Press Field Care Handbook for the Hunter and Fisherman. Much can be learned from watching or helping others clean and dress game animals, seeing how people from different areas of the country handle this chore.
Verbal communications should be agreed on ahead of time and practiced outside of the field when it is not so critical. When trying to show a new hunter a game animal on the side of a hill in the timber, it is a good idea to have the basic terms you will be using gone over ahead of time. Decide if you will direct their view with directions referencing a clock face, or also use natural landmarks to direct them onto the game animal. Go over hand signals too, to acquaint the new hunter with their use if too close even for a whisper.
I remember taking my 11 year old after whitetail deer in Texas in the late youth season. We saw a small buck go into a scrub oak thicket. We worked our way within about 35 yards of the buck when we saw there where about 4 or 5 much bigger bucks already there. I spotted a large buck walking just inside the thicket. He circled then bedded down 10 yards inside the edge of the thicket. My daughter was having a heck of a time finding him. First, I directed her eyes to a larger tree, then to a smaller tree at 3:00 from the larger tree. Then to the white sticks at the base of the smaller tree at three o'clock. These, of course, were the antlers of the buck. Then, finally, I directed her to the ears and the head. She suddenly became very excited because she had put it together and realized THAT was the buck. When she turned to tell me she finally had seen him, she again had a hard time finding him. Coaching her back on did not take even a third of the time.
I like to remind the shooter to practice trigger control and breathing when making the shot. Sometimes this seems to help with calming down their nerves and overcoming the dreaded BUCK FEVER. At her first shot, using a post and barbed wire with a heavy mitten over the wire for a rest, my daughter hit a sapling next to the buck’s head. He jumped up, and in a frenzy of milling deer she got a second shot which put him on the table. It was a nice 135 class whitetail shot at about 45 yards, and even better, my best friend was along doing the filming. The stalk took about 45 minutes to cover about 150 yards to get to a spot where the deer were visible in the brush.
A last thought is to help the new hunter to put together a few things to be kept in their daypack. Some items may not be necessary if only a short distance from your vehicle or camp, but become more important the farther out in the hills you get from support. A first aid kit with extra blister meds, like New-Skin and moleskin, will keep you moving. They need a small amount of fire-making gear, like a metal match, and a waterproof container of matches. A fire starter stick is also a good idea, as well as a cable saw and 2 or 3 space blankets of the larger sizes. A multi-tool is good also. A compass and map are always my back up to a GPS. Bring a small flashlight with extra batteries and a second small light to be able to change batteries or the bulb in the dark.
Again, looking back in the past, being in the timber in the dark in a rain storm, it is mighty comforting to have a headlamp and mini mag on a string around your neck and a second in a pommel bag. The same thought applies to knives and a small axe. A 26” handled 2 ½ pound axe is a great piece of gear if you are in the back country. If you are just walking a half mile to and from a stand some of this equipment is overkill, but still nice to have if you don’t have more than you can carry. I also found that a folding type saw with both bone and wood blades is handy for quartering and skull plating game, and for clearing branches from trees to allow hosting the head and cape to a safe place for the night in areas where bears and wolves roam.
A good friend of mine and a GREAT outfitter is Mike Richie and his wife Dawn (RichieOutfitters.com) who operate in the Selway Bitterroot Wilderness area. This is one of the most remote designated wilderness areas in the lower 48. Mike is a second generation outfitter in the Selway and uses a cut down double bit axe tied to his daypack. With it he can make a shelter, get a good size fire going and keep it that way, as well as quarter and skull plate game.
In closing, I hope that each of you get to introduce a new hunter to the sport this year. It is a blessing to see them develop and grow to have a love of the outdoors, and if they also happen to be your better half, son or daughter, you will have some special times that you can relive later on. I am also blessed in having great friends in John and his wife Kim Huot, who help me with these special hunts and have filmed several of them. We get to replay these great times with the rest of our family and friends on the big screen. Sometimes we get a good laugh at some of our moves and mistakes. Take care, and good hunting!