Bob Wright
Well-Known Member
Interesting trip to try and figure out what caused that weird case head rupture on the Lapua 308 to 7-08AI journey
I received the cases from Gingerman. I went back thru every post gathering the LRH forums contributors, 2 1/2 notebook pages later I had a plan to measure, cut and photograph the following.
-De-primed all brass while looking for pressure signs on primers. All looked acceptable.
-Took a no go pin to measure pockets. 2 of 10 would accept the no go on 2x fired brass. (Important for later...)
-Measured brass between extractor groove and near the .200 line with a mic. Those measured .4728-4733. Nothing wild here.
-OP finished neck wall thickness after fire forming to AI and turning to obtain .007 diametral neck clearance. OP did this due to inability to slide a new bullet into the fired AI neck. Donuts present after neck sizing 308 to 708. OP used a mandrel to push donuts to the o.d., then turn necks. Op had almost zero diametral neck clearance after fire forming. Here is a contributor to pressure craziness. (Important to note later...)
- On the second reload, to run an accuracy test, OP used the same powder charge of RE17 and up to 1 grain higher looking for that node. Groups were scattering with signs of velocity changes. Then, case rupture at the head at the corner of extractor groove. Another crazy pressure variable. (Important to note later...)
We texted quite a bit this evening on sequence of sizing, donut issues, turning work on the neck.
Earlier today, I milled some standard 308 cases, 1 REM UMC, and 1 Remington case. Also did an '06 case setting up the mill. I needed to know a typical shape at the bottom to compare to Lapua.
This first photo is a Lapua 708AI he formed.

Next the same case with the fracture direction in red.

Notice there is no typical case stretch in the upper portion of cartridge. These all measured about .035 the tapering gently towards shoulder.
Next picture shows the blown head of cartridge.

Here you can see the remains of the head upper left, and the case lower right.
T= Tear as I was milling it
F=Remaining fracture
H=Head
C= Case body
The next photo shows the case fracture and the shape of it. Notice arced path F and the melted surface M. There is no ragged fracture here.

It appears this was an over pressure that found its way out the longest way, .110 from inside radius diagonally to the outside corner of extractor groove.
To find the donuts, I set up the brass in the mill and ran a .0001 indicator down the neck. I found a bump on the inside neck near the shoulder on about half the cases ranging from .0007 to .0012. Double that for the neck dia. At .0014 to .0024 donut. The turning and mandrel push was not correcting or it reappeared after firing.

So, here are the contributing factors as I see it, not the "end all discussion" answer.
After necking 308 to 708 the donuts may have formed and the wall was too thick.
OP fired these to form AI shoulder. OP still had great groups settling on the RE17 powder.
OP noticed he had no neck clearance and could not slip a new bullet in the cartridge. Here he should have had crazy pressure variations. When FL sizing he used a mandrel to expand the donut and machine the neck o.d. The donuts were still there when I inspected them. So too were 2 of 10 brass with expanded primer pockets. OP was unable to see typical pressure signs. Primer pockets were within .0002 of being discarded. Primers looked normal.
On the final firing he didn't reduce his powder charge, now that the brass was fully formed. He should have backed off a couple of grains (or 3) and worked back up.
It was here that the groups were terrible due to pressure. It split the case head 80% around. Since the bolt face doesn't support the entire rim the head looks the way it does, partially detached and un-wound.
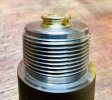
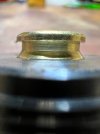
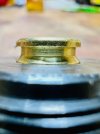
I'll add a few photos I have that went somewhere else in my phone.
Comments?
Bad brass?
Evil lurks here?
Lol.
Brad is a great guy as I had long conversations and texts. Sorry to see him go!
I received the cases from Gingerman. I went back thru every post gathering the LRH forums contributors, 2 1/2 notebook pages later I had a plan to measure, cut and photograph the following.
-De-primed all brass while looking for pressure signs on primers. All looked acceptable.
-Took a no go pin to measure pockets. 2 of 10 would accept the no go on 2x fired brass. (Important for later...)
-Measured brass between extractor groove and near the .200 line with a mic. Those measured .4728-4733. Nothing wild here.
-OP finished neck wall thickness after fire forming to AI and turning to obtain .007 diametral neck clearance. OP did this due to inability to slide a new bullet into the fired AI neck. Donuts present after neck sizing 308 to 708. OP used a mandrel to push donuts to the o.d., then turn necks. Op had almost zero diametral neck clearance after fire forming. Here is a contributor to pressure craziness. (Important to note later...)
- On the second reload, to run an accuracy test, OP used the same powder charge of RE17 and up to 1 grain higher looking for that node. Groups were scattering with signs of velocity changes. Then, case rupture at the head at the corner of extractor groove. Another crazy pressure variable. (Important to note later...)
We texted quite a bit this evening on sequence of sizing, donut issues, turning work on the neck.
Earlier today, I milled some standard 308 cases, 1 REM UMC, and 1 Remington case. Also did an '06 case setting up the mill. I needed to know a typical shape at the bottom to compare to Lapua.
This first photo is a Lapua 708AI he formed.
Next the same case with the fracture direction in red.
Notice there is no typical case stretch in the upper portion of cartridge. These all measured about .035 the tapering gently towards shoulder.
Next picture shows the blown head of cartridge.
Here you can see the remains of the head upper left, and the case lower right.
T= Tear as I was milling it
F=Remaining fracture
H=Head
C= Case body
The next photo shows the case fracture and the shape of it. Notice arced path F and the melted surface M. There is no ragged fracture here.
It appears this was an over pressure that found its way out the longest way, .110 from inside radius diagonally to the outside corner of extractor groove.
To find the donuts, I set up the brass in the mill and ran a .0001 indicator down the neck. I found a bump on the inside neck near the shoulder on about half the cases ranging from .0007 to .0012. Double that for the neck dia. At .0014 to .0024 donut. The turning and mandrel push was not correcting or it reappeared after firing.
So, here are the contributing factors as I see it, not the "end all discussion" answer.
After necking 308 to 708 the donuts may have formed and the wall was too thick.
OP fired these to form AI shoulder. OP still had great groups settling on the RE17 powder.
OP noticed he had no neck clearance and could not slip a new bullet in the cartridge. Here he should have had crazy pressure variations. When FL sizing he used a mandrel to expand the donut and machine the neck o.d. The donuts were still there when I inspected them. So too were 2 of 10 brass with expanded primer pockets. OP was unable to see typical pressure signs. Primer pockets were within .0002 of being discarded. Primers looked normal.
On the final firing he didn't reduce his powder charge, now that the brass was fully formed. He should have backed off a couple of grains (or 3) and worked back up.
It was here that the groups were terrible due to pressure. It split the case head 80% around. Since the bolt face doesn't support the entire rim the head looks the way it does, partially detached and un-wound.
I'll add a few photos I have that went somewhere else in my phone.
Comments?
Bad brass?
Evil lurks here?
Lol.
Brad is a great guy as I had long conversations and texts. Sorry to see him go!
Last edited:


