my homemade brass annealing machine

gunlover05

Well-Known Member
Joined
Sep 23, 2015
Messages
46
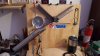
So I decided to make my own brass annealing machine, but didn't want to take the time to order a bunch of parts such as motors, ac/dc converters, and controllers. I'm not a high volume reloader, so it didn't have to be fully automatic. But having consistent time on the flame is important as I learned. So I watched a lot of youtube videos on annealing machines, and decided to make my own powered by my cordless drill, using gear reduction principles. I did buy a $5 lazy susan bearing from ace hardware. Pardon the mess on my bench too :rolleyes:.

I put some nonslip tape on the back of the 9" cake pan, and some gorilla tape on the drill chuck to grip better. I used a pipe clap to control the speed of the drill, which was on the low speed setting, and I can just hold it against the back of the pan to power the pan. Most everything I had in my garage to build it, except the cake pan ($8). below is a short youtube clip of a few cycles. I'm sure there are easier ways, but it was fun to build on a cold winter weekend.

https://www.youtube.com/watch?v=K6sm4cmNADw
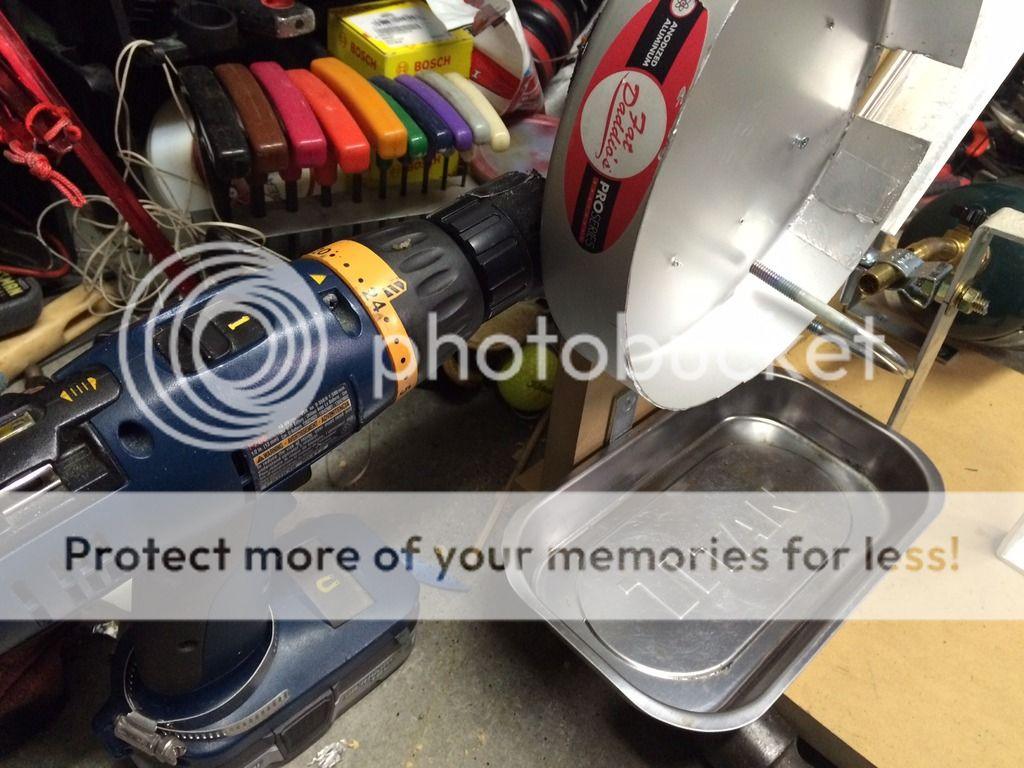


Last edited:
I love mine. Dual controls for feed and pan.
 

Attachments

  • 20150517_062225.jpg
    20150517_062225.jpg
    166.4 KB · Views: 227
I built one like tbrice23 but I'm having issues with it feeding cases into the cake pan and the cases staying in the pan. What size cases are you guys feeding your machines? I'm trying to feed mine RUM and belted mag cases.
 
I'm feeding from 300WM to 6br with the exact same set up. The only thing that changes is the ramp (from hopper to pan) is made of thin gage steel . You can bend it slightly to accommodate the speed and/or shape of the cartridges.

It's important to build/have the entire unit tilted back 15°or so. So that the cartridges roll and rotate against the backboard.
 
yes mine is tilted back too (you can see the hammer underneath the base that I used to do this sticking out in one of the pictures), I had the same problem of the cases falling out before I tilted it.
 
I built one like tbrice23 but I'm having issues with it feeding cases into the cake pan and the cases staying in the pan. What size cases are you guys feeding your machines? I'm trying to feed mine RUM and belted mag cases.

I originally wanted my feed ramp made of a rigid aluminum plate, but I didn't have any on hand for the original mock-up. So I used what material I had.
It turns out that different tapers and (belted vs non-belted) cases need slightly different slopes to travel on in order to arrive at the pan correctly. So the thin sheet metal allows me to alter the travel to suit the cartridge I'm running at the time.
 
OP,

That's my kind of innovation!

I have a shop full of that kind of stuff.

More power to ya!

But why not drop 'em in water?

Thanks much!

After doing a lot of reading, it became clear that dropping them in water did not accomplish anything.
 
Thanks for all of the comments. Here are some more lessons learned for those thinking of building something like this.

- cake pan: the real cheap ones ($0.88/e) at walmart have a lip that I believe is angled too much and I don't think will work. I bought one made of thicker metal and much shallower angle on the sides which cost @ $8-10. Cutting the lip off of the pan with a dremmel tool is a real pain in the rear. I went through probably 10 disks, most wore down or broke off within 2" of cutting.

- entrance/exit slot. I cut mine too big early on, so you will see it taped back on there. suggest to start small and don't cut more than 1" until you have tried everything else!

- case ramp - made mine from bent aluminum sheet. do not screw it down, experiment with different angles and use a clamp. You will also need some kind of spacer to move the case up to the level of the pan. I just put a hollow rod there with another clamp as you can see. Will need to fix something more permanent.

- Timing - this was the tricky part. motor speed, angle of ramp, case stop position. This just takes lots of trial and error imo, just don't get frustrated.

- Forget the position of the propane torch until the very end. you will want some ability to move/tweak the position a little, esp with different case sizes.

- drill- again needed something on the chuck and back of the plate for grip. Also a 2 speed drill is probably needed to get it slow enough, and I used a hose clamp around the trigger to adjust speed. This is touchy, but once I got the right speed it stayed constant.

- I was using 260 and 308 brass as my focus. I tried 30-06 and it worked too. just need to tweak positioning of the propane, mine is not too rigid.

- Leaning the whole thing back 15 degrees or so was needed to keep the cases from falling out.

- bearing- I used a cheap lazy susan bearing for the pan ($5 at ace), but it is possible to use something else i'm sure.

- I may eventually put a dedicated motor on here with a controller, I think the parts are @ $75 or so. Anyhow, yes it is kind of crude as a first shot, but was fun to make. With some knowledge I learned I may improve it one day, but for now it works fine.
 
Great job. I am pretty handy myself. After seeing this I did some searching around and found several more home made annealers. I think I can do pretty well at one. So I'll post what I come up with later.
 
A question for those of you who anneal their own brass, how many seconds does it usually take in the flame?? Just trying to decide what gears to use to build my machine.
 
Warning! This thread is more than 8 years ago old.
It's likely that no further discussion is required, in which case we recommend starting a new thread. If however you feel your response is required you can still do so.
Top