top predator
Well-Known Member
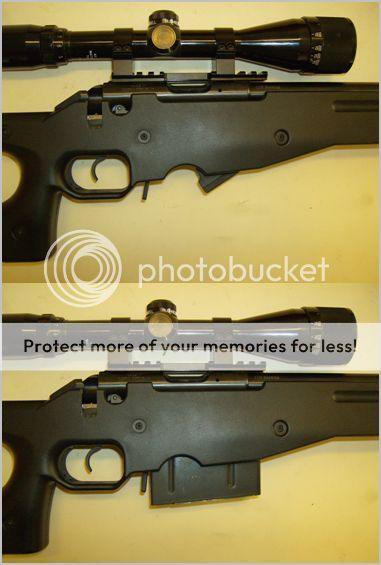
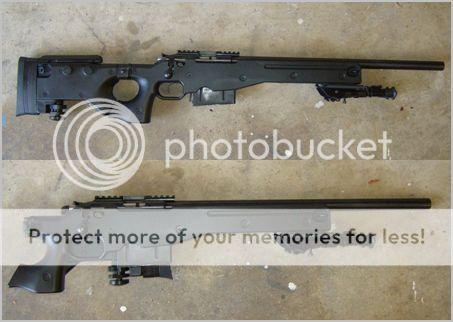
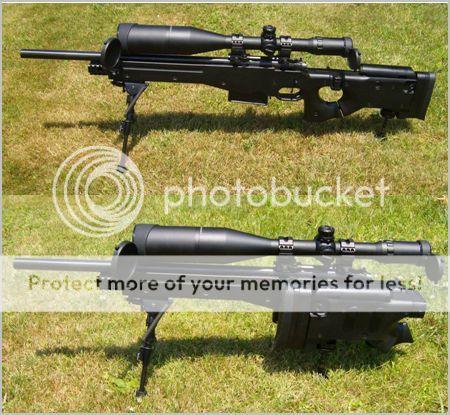
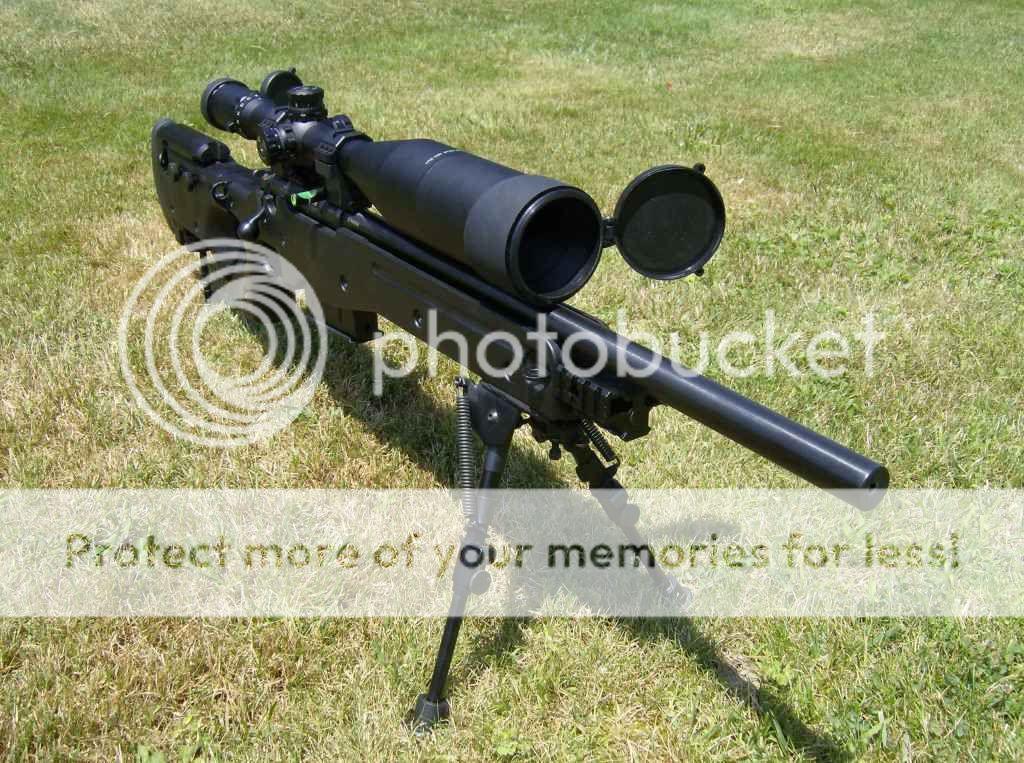
A few projects posted on a few sites concerning putting a rimfire rifle into an AICS stock had really grabbed my attention, and when I finally decided on getting a CZ 455 Varmint I figured it would make the perfect conversion.
So I scanned the airsoft suppliers websites everyday and did some research finding that the Well G96 folding stock has the most features replicated from the oringinated AICS, further reviewd here: http://www.longrangehunting.com/forums/f33/aics-airsoft-stock-rimfire-conversion-review-94021/
In theory, the weight and the aluminum bedding block should provide a solid platform to mount the action, which should also increase accuracy / consistancy.
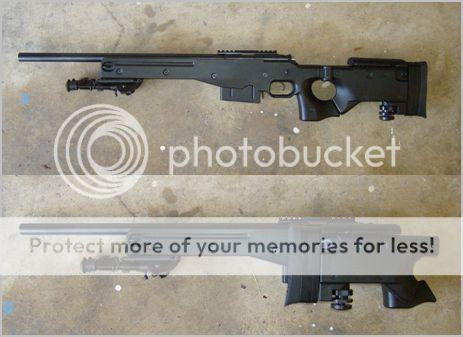
The installation wasn't hard at all, It was mostly time consuming - trim a little, fit a little, assemble, disasemble, reassemble, repeat. It's really not harder than installing a doorknob, just take a little patience and time.
Remove the rear stock section from the hinge. Unscrew the 2 set screws (you'll need metric hex wrenches) and tap out the hinge pin. Be careful not to loose the pin or the metal sleeve that it goes in.
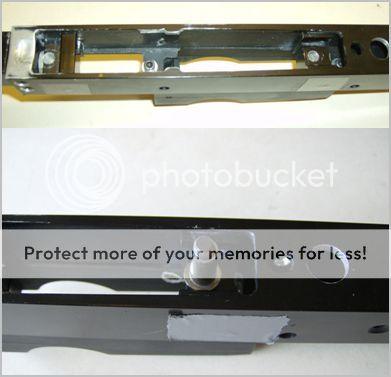
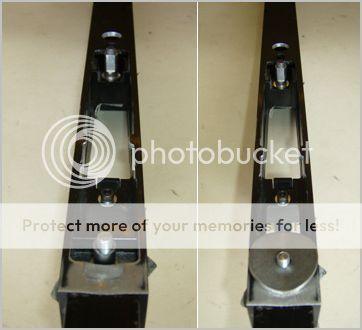
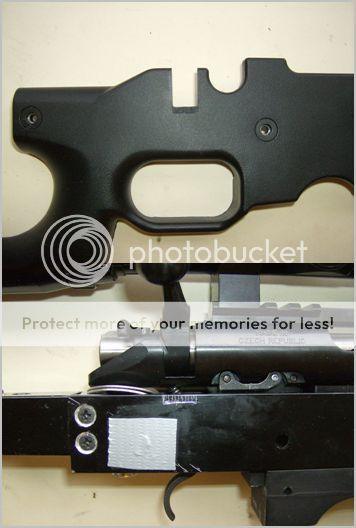
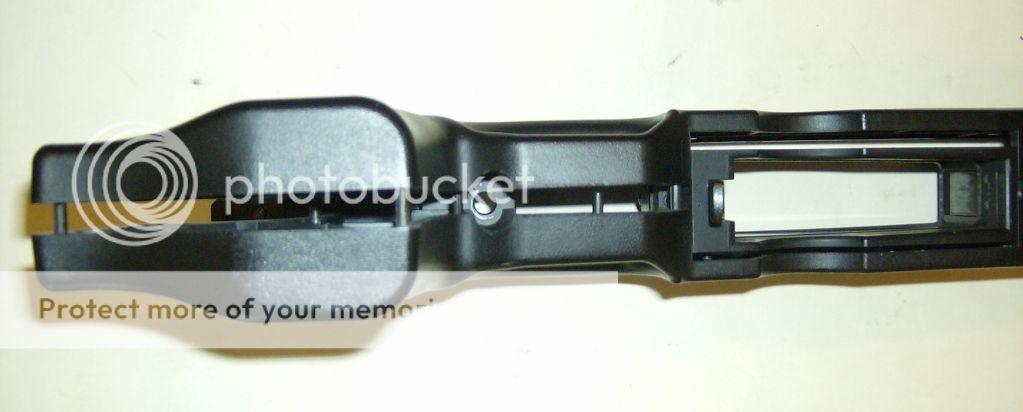
Remove the skins from the front stock section. Start by removing the screws and the latching knob that locks the folded butt stock in place. CAREFULLY seperate the skin from the aluminum block. lightly pry with a flat screwdriver the skins around the trigger guard and grip. There are several pins throughout, be careful not to crack the plastic or deform the plastic while prying apart.
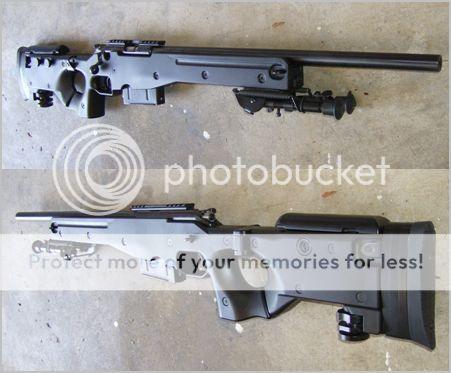
I originally took all of the stock apart and "shimmed" all of the interlocking parts with a quick wrap of electrical tape to make sure all the parts mated solidly. There was a little play here and there, the tape stopped that "slop" and cured a few rattles. I put the subframes back together - use clear nail polish or Loc tite on them and be careful not to strip out the screws and treads.
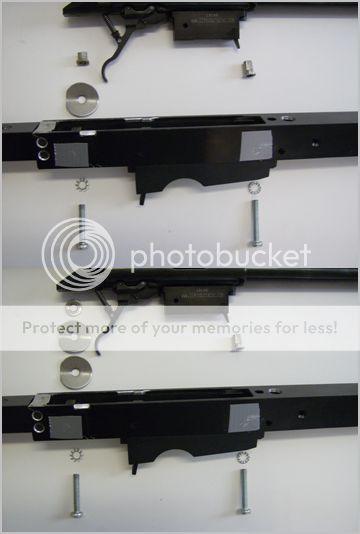
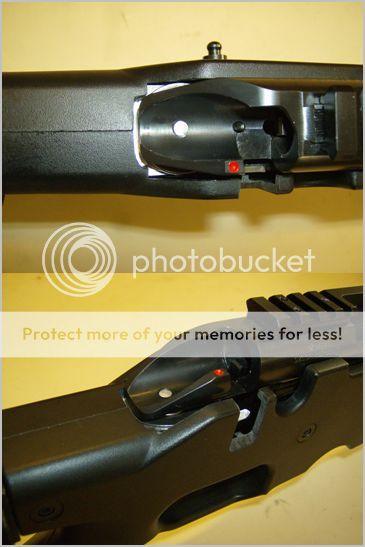
WHAT I CONSIDER THE MOST IMPORTANT - position the action in the aluminum block, taking into consideration the trigger position in the trigger guard. All of your other modifications will be based off that. As the action will be going in and out of the block numerous times, put a piece of duct tape at the top front end of the block to protect the bottom of the barrel from being scratched or marked up during fitting, or just wrap the barrel itself to protect it.
Also when positioning and fitting the action to the block, take your time when screwing in the action screws. Do not take a chance of stripping outthe action treads just to get it done quickly...if it doesn't line up the first or second time that you try it, don't force it.
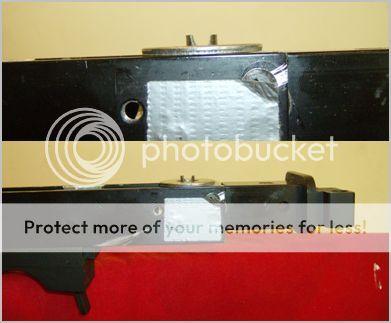
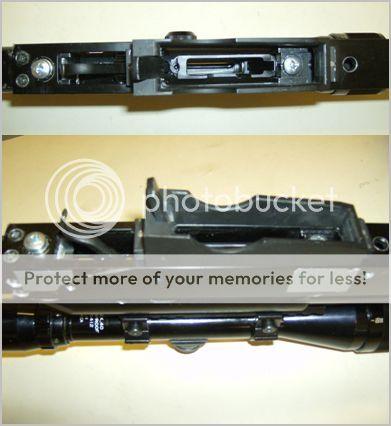
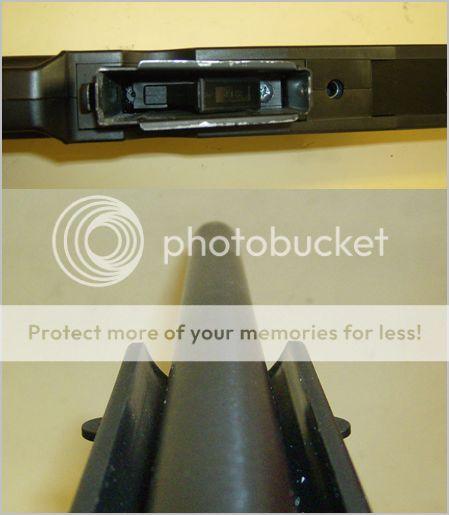
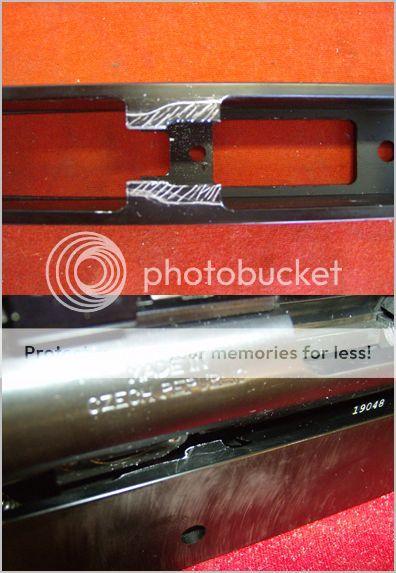
Mark any place you have to trim, with the 455, I had to remove the crossmember shown below, then further trim out to allow clearance of the trigger sear. Those areas marked with scratched lines beow.
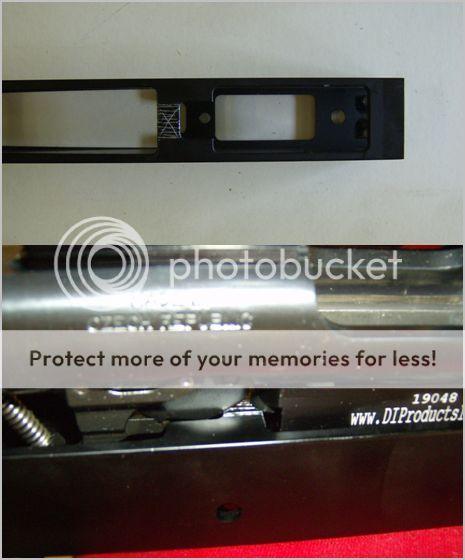
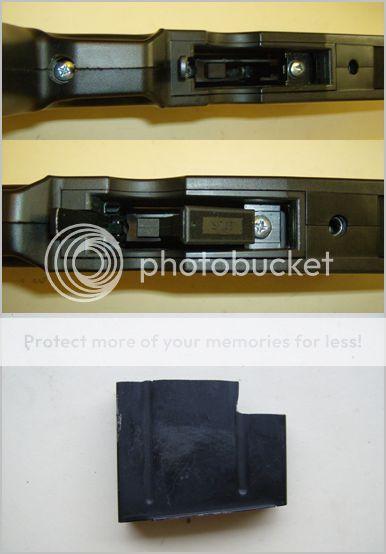
I then beveled the edges with a file the best that I could to match the rest of the beveled edge on the block.

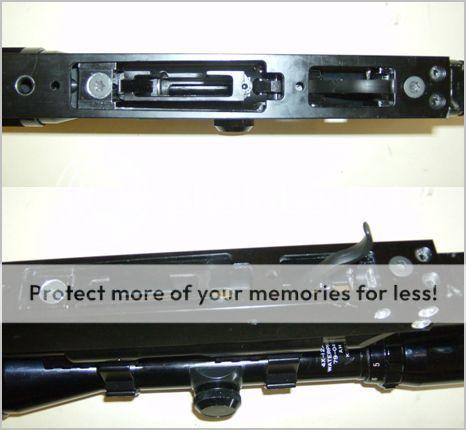
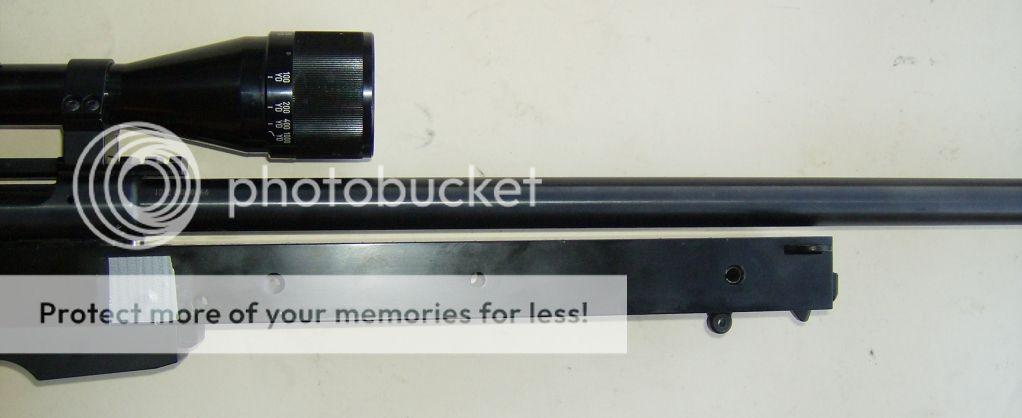
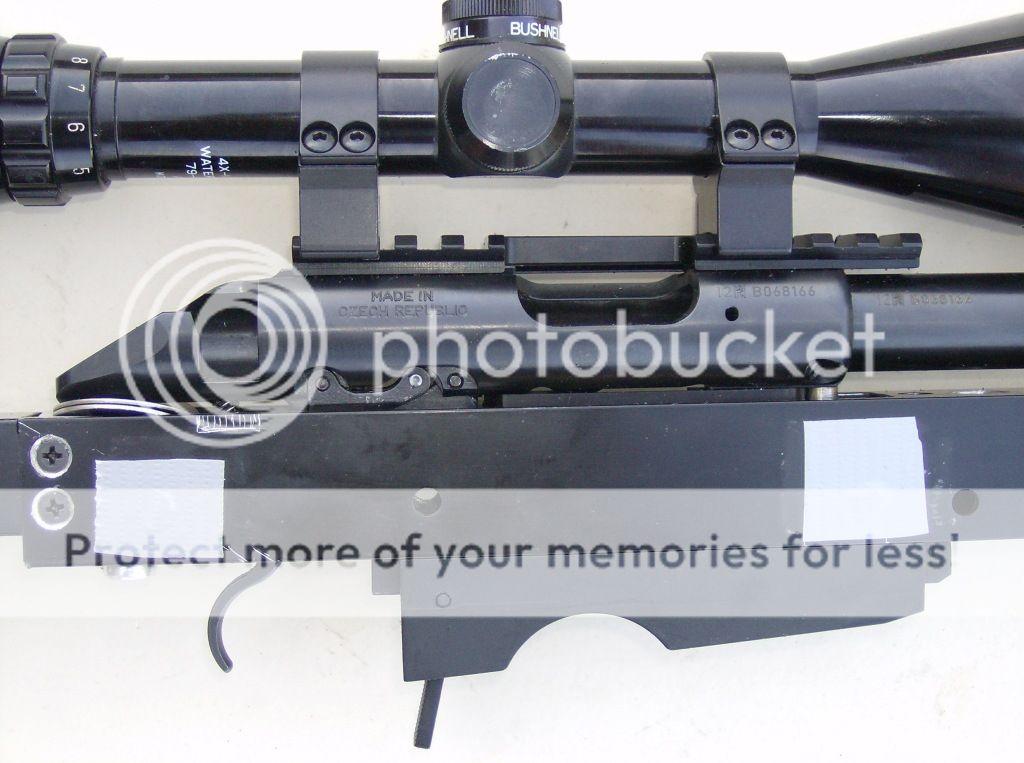
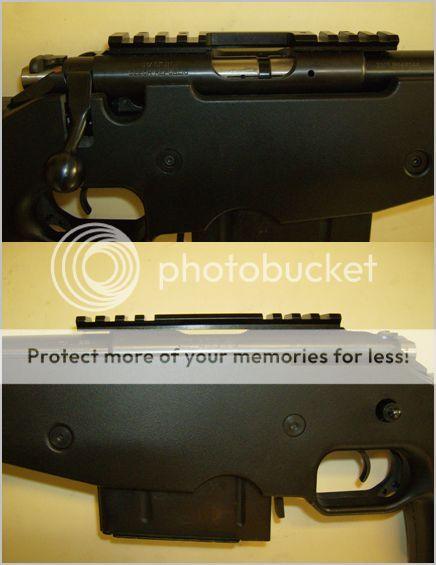
Use the mounting blocks that was used to mount the airsoft action to mount your rimfire action. Below you can see that I chamfered the block in order to use the original mounting bolts of the CZ.
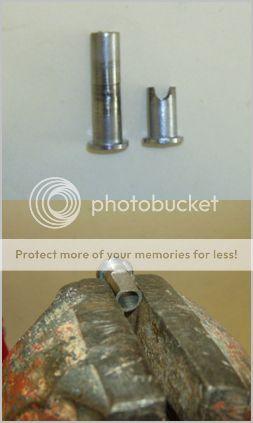
Note the extra hole on the side. It was used to allow the skin mounting screw pass through to the other side. So to help stiffen up the aluminum block and have less movement of the mounting blocks, I drilled holes in the sides of the aluminum block and put in tension pins to hold the action blocks in place.

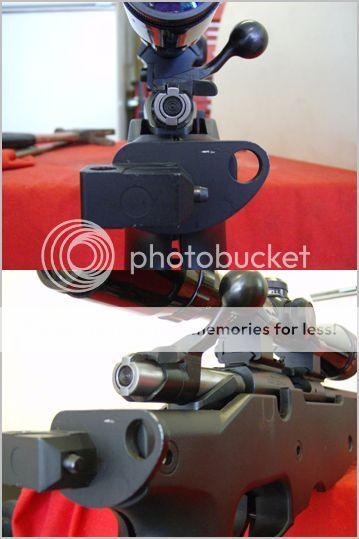
Also note above the pillars I was to use. They are called rivnuts, they have treads inside that must be drilled out. You can find these in many hardware stores, or simply use a spacer also found in the nut and bolt section.
You will have to trim these to length. Once you have a feel for how high your action will sit above the bedding block, you can cut to length. Also try to V notch them so they center themselves on the rounded action.
***CONTINUED***
So I scanned the airsoft suppliers websites everyday and did some research finding that the Well G96 folding stock has the most features replicated from the oringinated AICS, further reviewd here: http://www.longrangehunting.com/forums/f33/aics-airsoft-stock-rimfire-conversion-review-94021/
In theory, the weight and the aluminum bedding block should provide a solid platform to mount the action, which should also increase accuracy / consistancy.
The installation wasn't hard at all, It was mostly time consuming - trim a little, fit a little, assemble, disasemble, reassemble, repeat. It's really not harder than installing a doorknob, just take a little patience and time.
Remove the rear stock section from the hinge. Unscrew the 2 set screws (you'll need metric hex wrenches) and tap out the hinge pin. Be careful not to loose the pin or the metal sleeve that it goes in.
Remove the skins from the front stock section. Start by removing the screws and the latching knob that locks the folded butt stock in place. CAREFULLY seperate the skin from the aluminum block. lightly pry with a flat screwdriver the skins around the trigger guard and grip. There are several pins throughout, be careful not to crack the plastic or deform the plastic while prying apart.
I originally took all of the stock apart and "shimmed" all of the interlocking parts with a quick wrap of electrical tape to make sure all the parts mated solidly. There was a little play here and there, the tape stopped that "slop" and cured a few rattles. I put the subframes back together - use clear nail polish or Loc tite on them and be careful not to strip out the screws and treads.
WHAT I CONSIDER THE MOST IMPORTANT - position the action in the aluminum block, taking into consideration the trigger position in the trigger guard. All of your other modifications will be based off that. As the action will be going in and out of the block numerous times, put a piece of duct tape at the top front end of the block to protect the bottom of the barrel from being scratched or marked up during fitting, or just wrap the barrel itself to protect it.
Also when positioning and fitting the action to the block, take your time when screwing in the action screws. Do not take a chance of stripping outthe action treads just to get it done quickly...if it doesn't line up the first or second time that you try it, don't force it.
Mark any place you have to trim, with the 455, I had to remove the crossmember shown below, then further trim out to allow clearance of the trigger sear. Those areas marked with scratched lines beow.
I then beveled the edges with a file the best that I could to match the rest of the beveled edge on the block.
Use the mounting blocks that was used to mount the airsoft action to mount your rimfire action. Below you can see that I chamfered the block in order to use the original mounting bolts of the CZ.
Note the extra hole on the side. It was used to allow the skin mounting screw pass through to the other side. So to help stiffen up the aluminum block and have less movement of the mounting blocks, I drilled holes in the sides of the aluminum block and put in tension pins to hold the action blocks in place.
Also note above the pillars I was to use. They are called rivnuts, they have treads inside that must be drilled out. You can find these in many hardware stores, or simply use a spacer also found in the nut and bolt section.
You will have to trim these to length. Once you have a feel for how high your action will sit above the bedding block, you can cut to length. Also try to V notch them so they center themselves on the rounded action.
***CONTINUED***