My .300wsm Build

bigtoy302

Active Member
Joined
Jul 10, 2008
Messages
31
Location
Eugene, Or
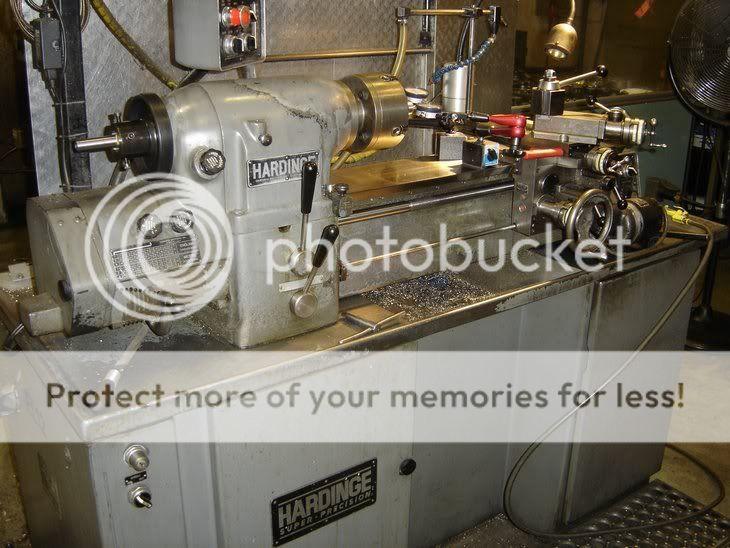
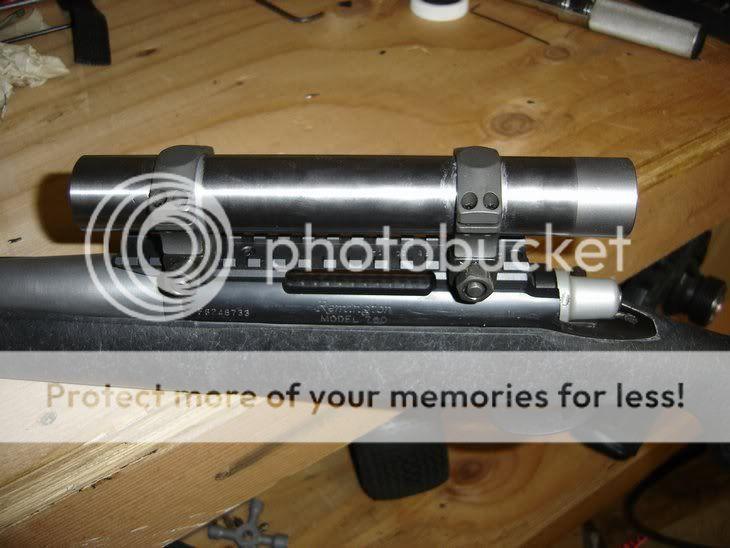
So this is my first rifle project. I will be doing all the work to the rifle myself. I am not a gunsmith but a machinist with just enough knowledge to hurt something. I am sure I will be doing some stuff differently from some of you real gunsmiths, but like I said before this is all new to me. Don't be affriad to comment on my ways of doing things. I am always up for new ideas. I am starting with a Remington 700 VS in .22-250. Specs for this build.
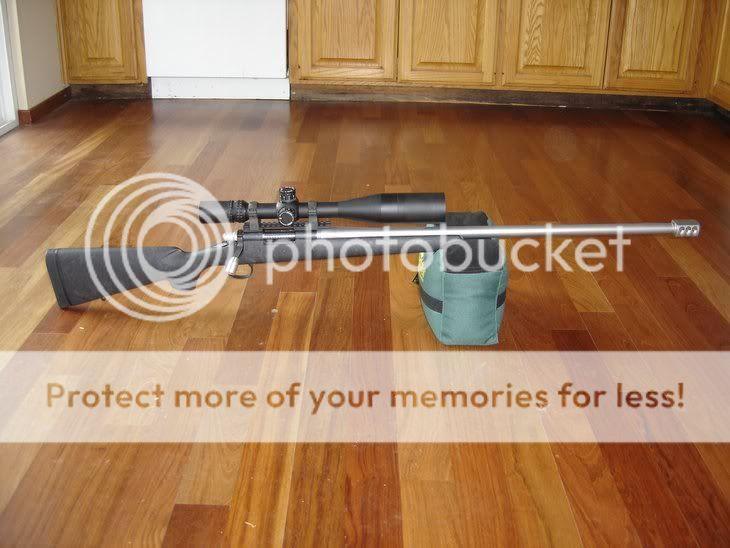
.300wsm
Factory hs-stock
blueprinted action and bolt
Sako extractor
Wyatt's extended mag box
28" Shilen select match grade stainless barrel #17 contour
muzzle brake
Badger recoil lug
Nightforce nsx 5.5x22x50 mil-dot
nightforce steel rings
Nightforce 20 moa base.

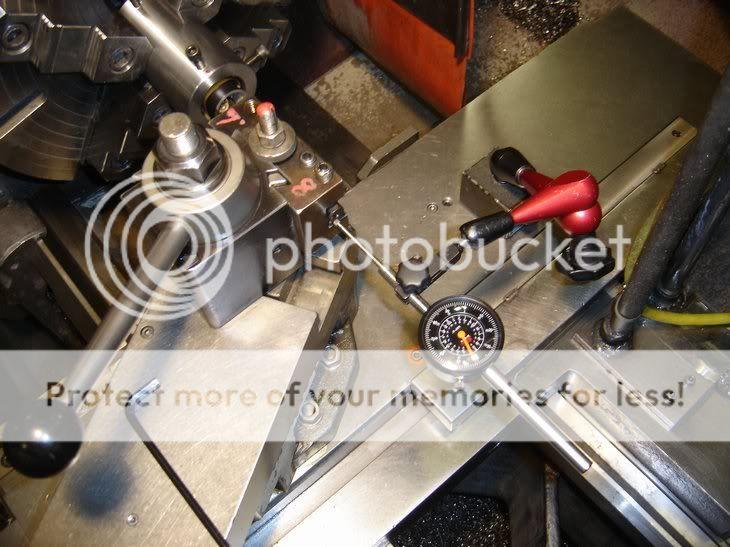
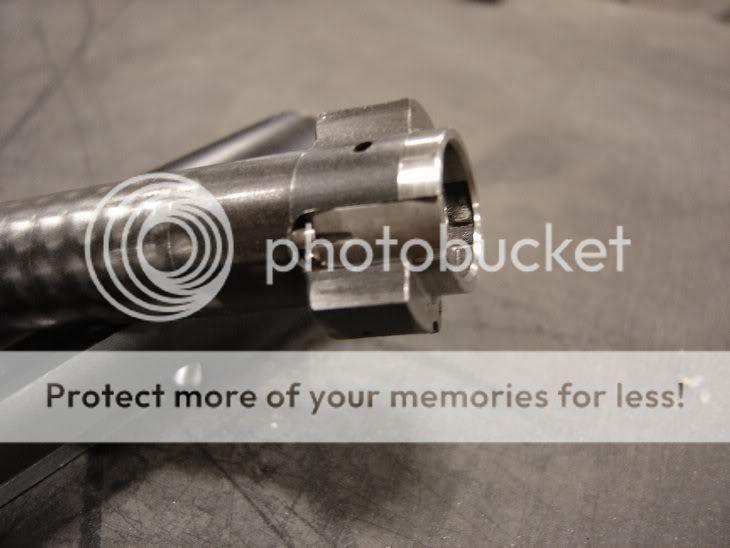
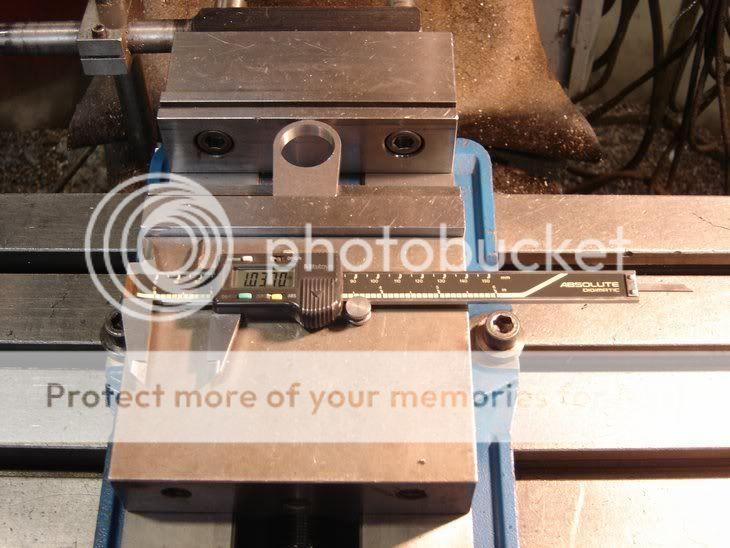
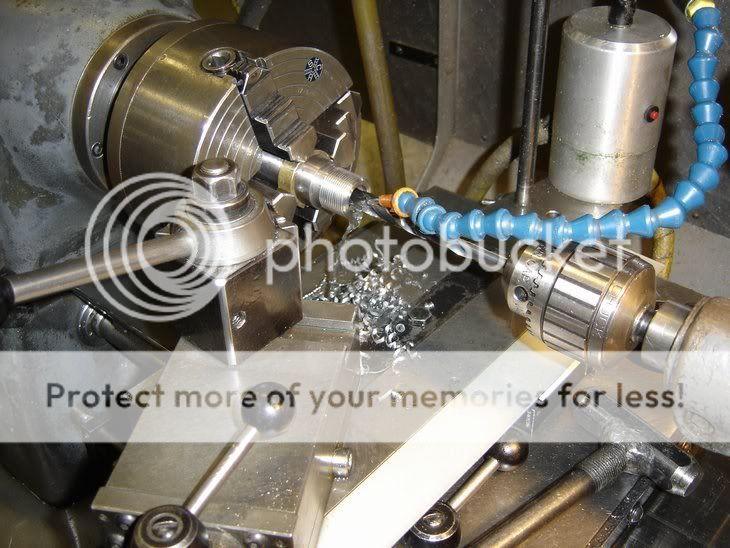
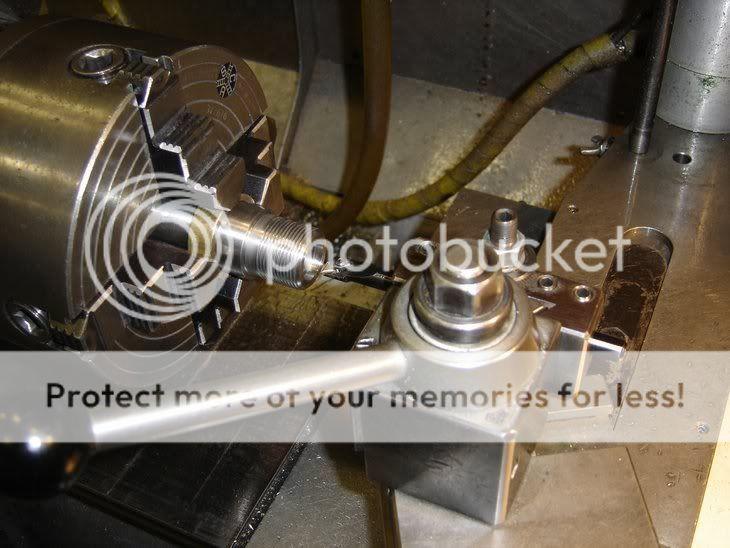
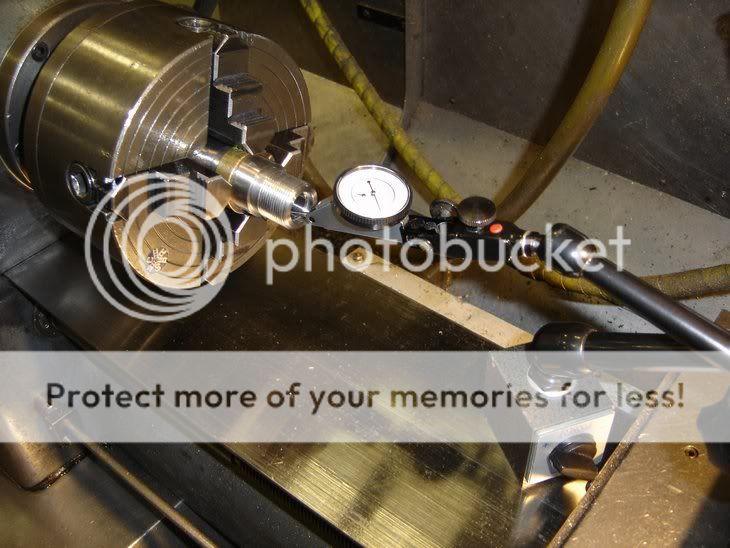
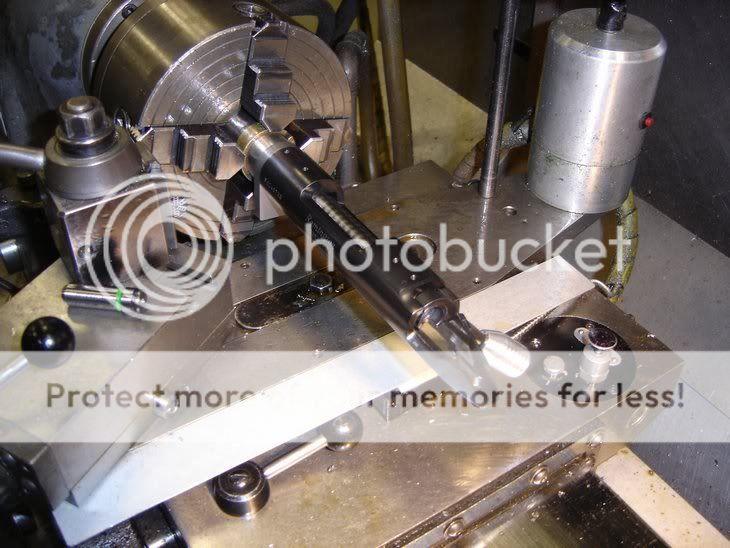
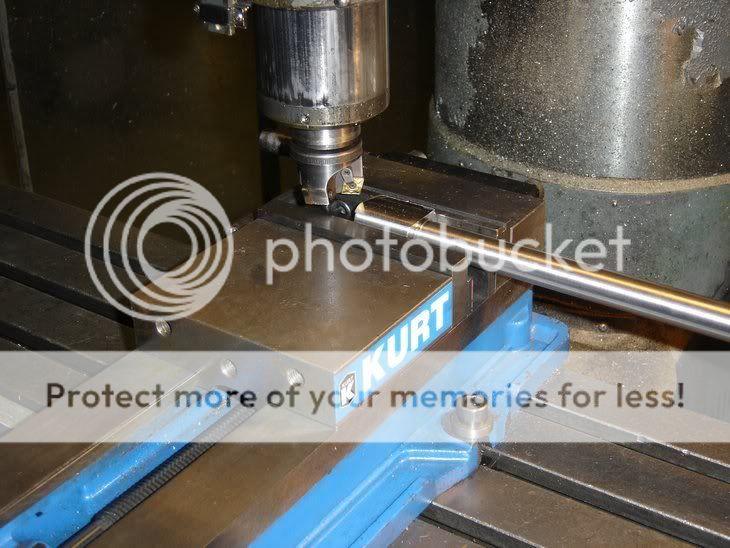
first I made a cat head for the action and ground a .7018 arbor to fit snuggly into the action. I chucked it up, dialed it in and faced the front and the bolt lug face.
DSC01179.jpg

DSC01180.jpg


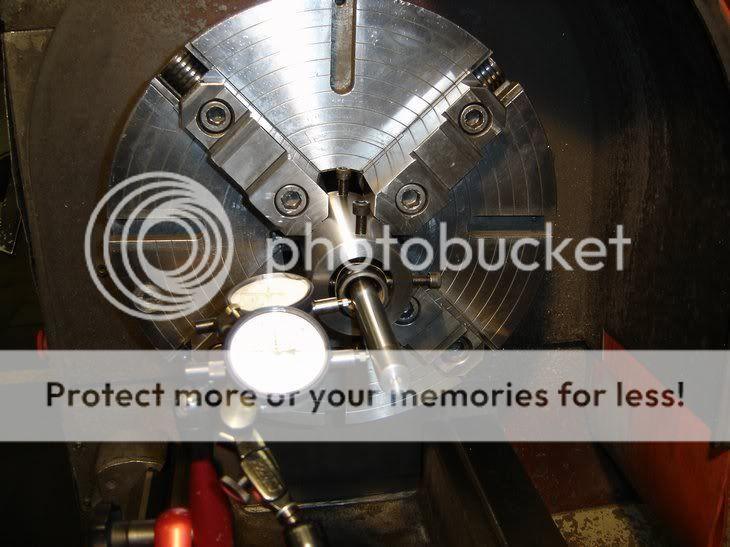
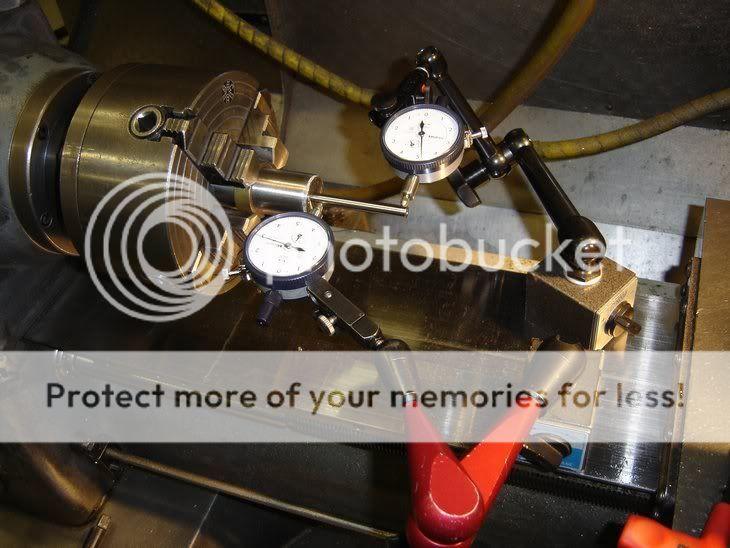
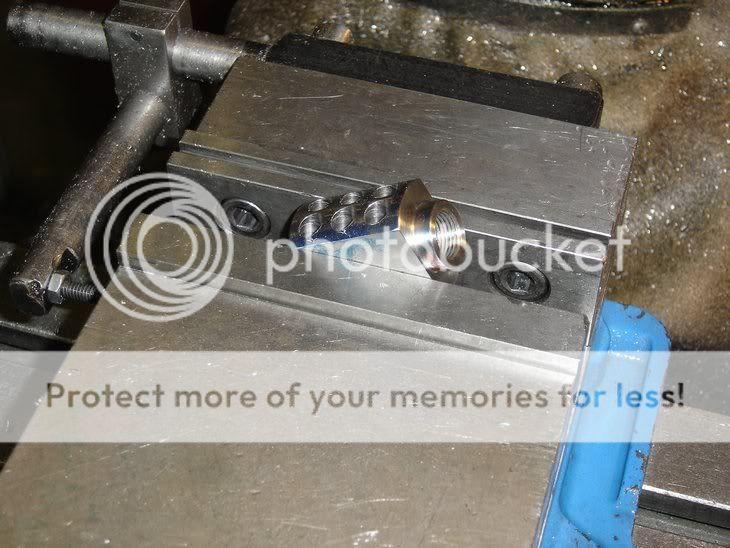
Then I used my indicator to fid the center of the threads, then cleaned them up
DSC01182.jpg

DSC01183.jpg


Ryan
 
Last edited:
Ryan,

I think you are well on your way to having a nice piece when your done.

There's more than a few guys out there "truing" threads with nothing more than a tap that has a long penis sticking out the front of it.

Good job for doing it right.

Are you going to use a pinned recoil lug? I really like these due to the fact that they locate the recoil lug in the same place every time. No tools touching the receiver during final assembly is also nice, especially on actions that have been coated with something. (prone to scratches and nicks)

Have you considered an external bolt release? The one Nesika makes will drop right in and it's not too expensive. It won't match though as its made from SS. It sure makes for an easy way to drop a bolt out of a gun. Just a thought.

Scope holes. 8-40's are nice. If you can though, use that arbor and indicate the action CL off of it and then mill your holes for the screws instead of just chasing the existing ones with a drill. Then you KNOW your on bore CL when you put the bases on.

I like a big chamfer on my recoil lugs so that I can use a healthy radius on my barrel tennons. Just a personal thing, I seriously doubt it really does much.

When you fit the barrel, how much breech clearance do you plan to run?

Do you have access to a CNC with a 4th axis? Helical fluted bolts look cool as hell and they do help with giving grit a place to go when out in the field. Helps to keep the action from lapping itself to bits. Just an idea. . .

Anyways.

Nice job.

Good luck.

~C


Chad Dixon
Gunmaker
LongRifles, Inc. (Coming Soon)
 
Are you going to use a pinned recoil lug?

The lug is not pinned now but I might pin before I put it in.

Have you considered an external bolt release?

I never thought of it. I dont think I am going to use one on this build.

Scope holes. 8-40's are nice.

I think I am going to thread them 8-40.

When you fit the barrel, how much breech clearance do you plan to run?

I plan on .005 on the bolt shoulder and on the bolt lug face unless there is some other magic number.

Do you have access to a CNC with a 4th axis?

No acces to a 4th axis. all are machining centers are only 3-axis.

Ryan
 
Bummer on the 4th axis.

Breech clearances are much like opinions so take what I say with some salt as well.

If it's a "trailer queen" bench gun that will spend its life in a controlled environment then run that sucker as tight as you dare. I don't understand why, but if you run a bench gun loose, the customer takes on a strange look when making eye contact with you. They don't like it.

If it is a rifle that runs out in the world, then I'd suggest loosening things up a bit. I set my field guns up to run at about .020". It has NO effect on accuracy, but it does provide some room for fungus and grit during the course of the day.

Some feel that is too much, so put it in comparison; an 03 springfield has so much you can parallel park a car between em', have no fear. Cases are not going to rupture.

Have fun.

C
 
So I got a little bit more done on the action and bolt.
I milled out the back of the action for the Wyatt's extended mag box.
DSC01185.jpg

DSC01192.jpg


Then I put the bolt in the lathe and trued it all up. I opened the bolt face up to magnum size. I forgot my camera at home so no pictures of the bolt in the lathe or mill. After that I tossed it in the mill and put in the Tubbs sako extractor and milled off the bolt nob so I could put on my custom nob.
DSC01189.jpg

DSC01190.jpg

DSC01191.jpg

DSC01186.jpg
 
So today I got the barrel done. It took a little longer than I wanted but this was my first one so I did not want to mess it all up.

I started my measuring up the action so I could determine what length I needed to make everything.
DSC01193.jpg


I then checked the thread pitch diameter with a MTG gage so I know the exact size to make the thread. This action was way out. So I had to enlarge the threads to 1.081-16.
DSC01195.jpg


Next I bored the recoil lug to match the new thread size.
DSC01196.jpg


I then chucked up the barrel in the lathe dialed it in and cut the threads.
DSC01198.jpg

DSC01200.jpg

DSC01202.jpg
 
I then ruff drilled the chamber then went back and cleaned up the hole with a boring bar. I then reamed the chamber to size.
DSC01203.jpg

DSC01205.jpg


After is was chamber was cut I put my indicator back in and checked to make sure there was no runt out.
DSC01208.jpg


Checking the the head space with a gauge.
DSC01206.jpg


I put some shim stock on the front of the bolt so I know how much clearance is on the head space gauge.
DSC01207.jpg


I then flipped it around and did the crown and cut the threads for the muzzle brake.
DSC01209.jpg
 
So after torquing the muzzle brake on and leveling the the action I milled the flats on the muzzle brake. I then flipped it around and did the other side.
DSC01212.jpg


I then rotated it 90 degrees and pre-drilled the holes for the slots.
DSC01213.jpg


I then put in a 3/8 carbide end mill and milled out the slots.
DSC01216.jpg


After that I took everything home and started on the stock. I had to open up the stock for the Badger recoil lug, then I bedded it with Devcon plastic steel epoxy. I first covered all the holes with Play-doh. After that I coated everything with kiwi shoe polish.
DSC01217.jpg


I held it all together with masking tape because I did not have a surgical tubing.
DSC01218.jpg
 
I had to cut off the old rubber recoil pad and sand it all down so I could install A Limbsaver pad. Luckily the pad for a normal 700 synthetic stock fit perfect.
DSC01219.jpg


I ground up a lapping bar and lapped the new rings in.
DSC01222.jpg


Here she is all done. I glass beaded the barrel and brake for a nice matte finish.
DSC01223.jpg


I liked the looks of the Pain killer brakes, so I had to make my own ( Sorry Kirby.:D)
DSC01224.jpg
 
Looks like you could easily go to work as a gunsmith if you decided to leave the machinist job - hey aren't they in essence the same thing?


I have built a few rifles for myself, I started out with no machining experience (except from high school about 20 yrs ago)

I read lots of books and saw a few videos - which explained alot.

Took things slowly and the resulst certainly shoot well enough and more importantly have passed proof testing.


Its a very satisfying feeling creating something yourself and seeing the end results - you have done yourself proud - final test is how it shoot though!
 
Great Job:) I am waiting on a range report. I am in the process of doing my first solo build using lay around parts, kind of a frankingun. My machine skills are a little lacking but I am learning. My barrel is chucked up and indicated in right now. As soon as the electricity is restored I am going to make some chips.

One question? How did you bore your recoil lug in the mill? I bought a lathe fixture for that purpose. What tooling did you use?

Another question.....did trueing those threads scare you any? It scared the heck out of me. I ordered the PTG/KIFF kit to use in the future it scared me so bad. Mine came out real nice, but I do not think I will be doing anymore in the lathe until I get a bit more experiance. I was a nervous wreck whe I got through.

How did you chuck up and indicate your bolt? I was so frazzled from trueing up those threads that I havent attempted that yet. I turned a fixture to screw into the back of the bolt body and a sleeve to hold the front of the bolt in the steady rest. Do you think that is the best way?
 
One question? How did you bore your recoil lug in the mill? I bought a lathe fixture for that purpose. What tooling did you use?

I dialed it in with a coax indicator then I bored it out with a criterion boring head.

Another question.....did trueing those threads scare you any? It scared the heck out of me.
It was a little scary because I had to open then up almost .025. I indicated it, turned the lathe on and it looked all messed up so I put the bar back in and it was still good so I went ahead and cleaned everything up.

How did you chuck up and indicate your bolt? Do you think that is the best way?
I put a bolt in the back of the bolt to chuck on, then I put the steady rest directly on the bolt just behind the lugs so I could still machine the back of the lugs. I indicated right off the bolt body. I think most people use some kind of collar on the lugs to put the steady rest on but it is way easier to put it on the bolt itself. I just made sure that I used lots of lindsey lube on the steady rest to keep from scratching the bolt.

Ryan
 
Warning! This thread is more than 16 years ago old.
It's likely that no further discussion is required, in which case we recommend starting a new thread. If however you feel your response is required you can still do so.
Top