My action truing jig.

bigngreen

Well-Known Member
Joined
Nov 24, 2008
Messages
8,830
Location
SW Montana
I finished up my action truing jig today, I'm kinda proud of it as it is my first cuts on a real lathe not a mini. I trued the outside and bored the inside true to it and faced it off. Then put it in the dividing head and drilled and tapped the holes.
I learned that you can't screw around dial in a good cut and let'er rip, carbide tooling is my friend, .050 cut like butter then a .020 smooth, I had a perfect finish till a piece of the ribbon slung around and then I had to give it a light polish!!
I don't think I'll see any flex in it, all I need is something to dial in the action with and brass tips in my bolts and I'm in business!!:D
Let me know if you have any suggestions!!

002.jpg


005.jpg
 
Looks very nice. I built one that looks just like that about 8 years ago and still use it to this day. The only thing I did was add another row of holes towards the rear for short actions. From from front to rear holes, center to center mine are 5" for long actions. The another row of holes from front to rear, 4" center to center for short actions. Use a thick enough brass tip and make some extras. Every now and then I have one break off. I replace the brass tips about once a year also. I use GTR's bushings and mandrel for blueprinting actions, it's the only way to really true up a action correctly. Good luck !!:D Here's a photo of mine.


Fixture.jpg
 
Last edited:
Thanks for the replies guys!! I'm going to have to get a mandrel to get things lined out, that's the next PTG order I'm thinking.
 
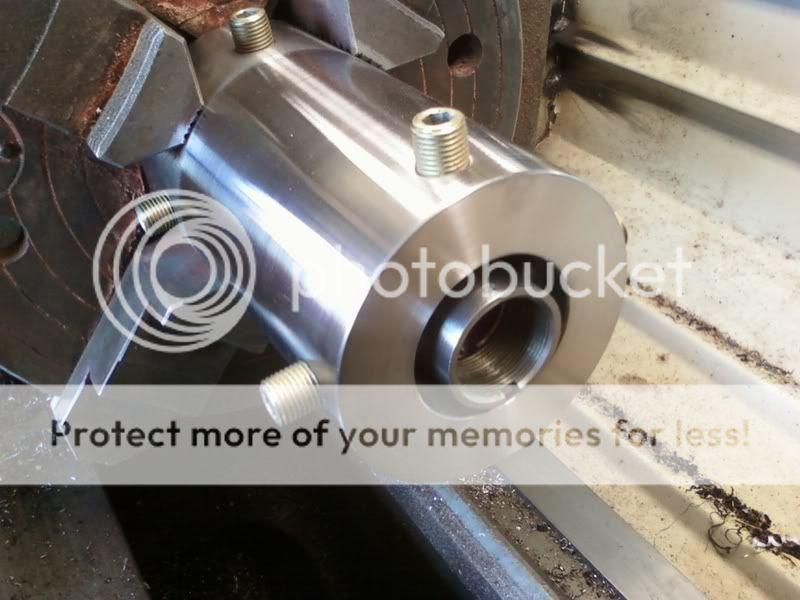
Looking good! Real good. While you have it in the chuck and centered, mark the chuck jaws so you can get it back real close when you need to put it back in the chuck. You might also use a large cone center in the tail stock to help align it with the headstock when you are installing it in the 4J.

I made my own mandrel and bushings.

I bought a piece of 1/2" precision ground shafting to use for a mandrel, and a 1/2" chucking reamer. Using the reamer to finish the ID and the compound set at a 2.5 degree angle to permit accurately setting very fine depths of cut I made my own set of bushings in .0002" sizes to use for aligning receivers in the fixture.

How the bushings are made is important. It is critical to have the ID and OD as close to perfectly concentric with each other as is possible. I chucked the raw material (12L14) in the 3J, center drilled and then drilled the rod 1/32 undersize, then used a boring bar to enlarge the ID within a thou undersize with the surface being perfectly concentric to the lathe spindle centerline. The drill will wander around, the single point cutting boring bar assures the hole is straight and true and centered on the lathe axis so that when the OD is turned it is perfectly concentric with the ID. Then with the lathe running as slow as it will go using lots of cutting oil I carefully reamed the hole to to exactly 0.500" which made it a perfect barely sliding fit on the precision ground shaft which measured 0.4995". After reaming and before turning the OD I checked it with the same .0001" test indicator I use for aligning barrels in the headstock. I only had one that showed any morement at all following this procedure - I cut it off and made another one which didn't show any movement. I checked the OD for concentricity with the same indicator after it was turned and polished.

The OD of the bushings in the set were turned to diameters spanning the useful range (I forget the exact dimensions) in increments of approximately 0.0002". It took me a while to make the 12 or 14 bushings but they work great. With the shafting between centers I can spin a bushing on it and see essentially no indicator movement which is what I was looking for.

Greg's mandrel and bushings are world class, hardened and precision ground to perfection. I just couldn't afford them, and since I work with Savages I don't need to ream the bolt bore and sleeve bolts, so I made my own mandrel and bushings.

I concurr with the suggestion to make a second set of holes for short actions. I did that on one of the two I made.

ReceiverSleeves-3.jpg


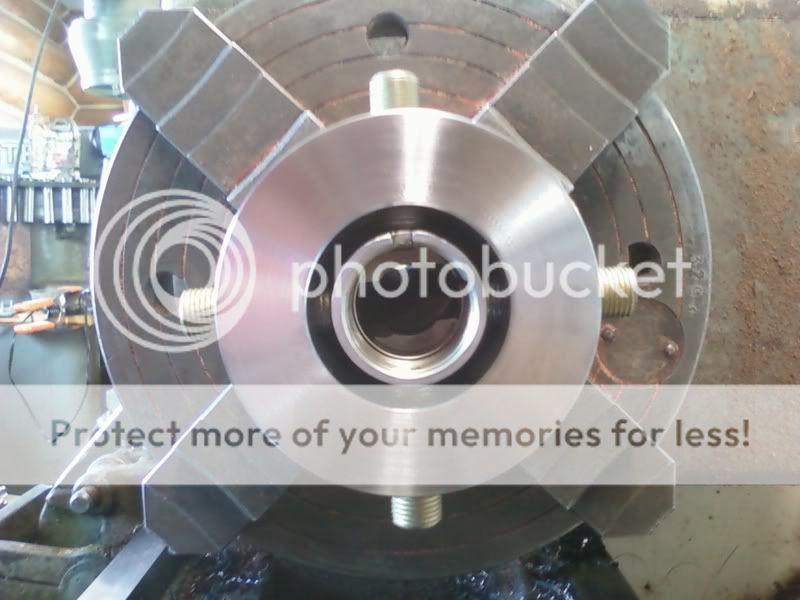
I put the original set of holes too far back so I ended up with three sets of holes on the chuck end. The shorter fixture is used with an internal collet like this:

Modifiedreceivertruingfixture-RS.jpg


Looks to me like you're rolling!

Fitch
 
Last edited:
Fitch, that post was perfect timing!! I was looking at the reamer and bushings and I realized how much coin I was going to drop and I just about dropped :rolleyes:

I'm setting up for Savages so I was also thinking there is a step that isn't neccesary unless I wanted a PTG bolt to go with it and then, I figure you just defeated the purpose of shooting a Savage over a custom action anyway.

The jig has a Savage short action in it, I spaced the holes so the bolts were right over the most meat in the action, I didn't have a long action on hand to check it out. I want to make another one that uses the split sleives like your short one for long actions. It's good practice for my general lathe opperating skills to make tools anyway.

Do you think you could post the O.D. of the bushings you made for your mandrel or PM them to me, I'll search out a mandrel right now.

By the way I made it out of a truck axle tube, I priced out some heavy walled tubing and they quoted me 23 bucks and inch, I sprinted out of there before I had to give them a cover charge to come in the store!!!
 
Hey, you gun-handy guys. Why don't a couple of you write some "feature articles" for LRH on what an ordinary guy can do in the way of simple do-it-yourself, common gunsmith projects. gun)
 
Looks very nice. I built one that looks just like that about 8 years ago and still use it to this day. The only thing I did was add another row of holes towards the rear for short actions. From from front to rear holes, center to center mine are 5" for long actions. The another row of holes from front to rear, 4" center to center for short actions. Use a thick enough brass tip and make some extras. Every now and then I have one break off. I replace the brass tips about once a year also. I use GTR's bushings and mandrel for blueprinting actions, it's the only way to really true up a action correctly. Good luck !!:D Here's a photo of mine.


Fixture.jpg
This jig built my rifle I feel like I ow it something.......
 
I would like to know how those guys built thier jigs!

I found a section of truck axle and chucked it in my father in-laws lathe and started in on it. One thing that I didn't think about when I started was that I only had what I wanted to use, I should have allowed 2 extra inches for the chuck and then cut it off. I had to turn it over and get it lined back up and turn the last two inches, it came out good as you can't even tell with a test indicator, the short end is not the one in the chuck, but I spent over an hour getting it lined back up.
I turned the largest part true inside with a boring bar and then outside so the largest part was true and I could hold it and indicate of it, then cleaned the rest up.
Then I put it in a dividing head on the mill and punched 8 holes and tapped them in the mill before moving to the next hole.

I spent days on the internet looking at every jig I could find and read every thread on jigs and watched every youtube vid and picked every brain I could, and then threw the switch and did it. My father in-law was a great help and he had a jig but it had to much flex in it and was thin and not up to my anal retentive way. So I'm making all my tools and buying tooling that I can use on my lathe when I get the coin to buy it out right so I don't start in the hole with a new hobby. Still paying of the last one :D Right or wrong that's how I did it!!
 
Looks LIke you did a good job. results are what matter most of the time how you got there. I think I will be building one of these soon. what are your dimensions on it?
 
I used aluminum tubing for the sleeve. Turned and bored then split it. Loose fit because it gets marred up from the Allen screws. Remember, you can bend an action just like a barrel when dialing in.
keep up the good work.
 
Warning! This thread is more than 14 years ago old.
It's likely that no further discussion is required, in which case we recommend starting a new thread. If however you feel your response is required you can still do so.
Top