Yes you did send me that email on the ladder test. I still haven't ordered any wildcat bullets but when I do I will be working up my load this way. Im hoping to see your target so I have some idea as to how obvious the resonant groupings are. I would bet that you do your test before I get around to ordering my bullets so take your time.
You are using an out of date browser. It may not display this or other websites correctly.
You should upgrade or use an alternative browser.
You should upgrade or use an alternative browser.
meplat uniformer....99cents
- Thread starter abinok
- Start date
Jimm
Well-Known Member
Abinok,and I thought 26400 was molasses! /ubbthreads/images/graemlins/crazy.gifYes, you did mention monitor rifles but my search did'nt find any thing on them .Are they sold through a dealer or the individual?BTW ,what does satellite internet cost out there?
Jimm,
Throw kevin a email at
[email protected]
I think if you look at the spelling of the address you will see the problem...
Its a nice tool, he has pics if you ask.
Im not sure what sat. internet costs out here, but thats an option now that we have dish network...
ive got 26400 now, ill convert the pics to jpg and wait for the fast connection. Sometimes at night ill get 31400.... and its time to load pics.
As bad as the sloooow internet connection is, ive got a 400 yd range 100yds north of the house to offset it a bit...
Gotta go rezero in a few... having coyote problems again... anybody know what a 110VMax at 3700fps does to a coyote? /ubbthreads/images/graemlins/grin.gif
Should be a DRT situation... haven't shot one with the 110 VMax yet, should know shortly.
Jimm
Well-Known Member
Abinok ,The range is more than enough compensation /ubbthreads/images/graemlins/grin.gifOne thing I do after Iload my digital pix is open the hpdirector(for photos )and resize them down to about 5x7.then they load a lot faster.I dont know about a coyote but on fox its abit nasty /ubbthreads/images/graemlins/smile.gif
ricka0
Well-Known Member
epoxy release agent
4ked Horn writes: [ QUOTE ]
<font color="red"> epoxy, I prefer JB Quick, a faster setting version of JB weld. A grease or other substance that will function as a release agent for your epoxy.
Tape, electrical, or masking. </font>
[/ QUOTE ]
Should I just use white lithium grease, Crisco or is there a commercial release agent?
abinok writes in another thread: [ QUOTE ]
<font color="red"> with a thin layer of grease, or bedding release agent, add your weight and epoxy and let it cure. </font>
[/ QUOTE ]
Jerry Teo writes in another thread: [ QUOTE ]
<font color="red"> Use a good release agent like <font color="blue"> PVA. </font>
</font>
[/ QUOTE ]
If I'm making my own pre-CANT (MOA) rails with shims (and using epoxy to get a custom fit - can I use saran wrap or AL foil? I'll re-drill the holes so they are 90 deg to the CANTed rail.
Re: epoxy release agent
b1g_bore,
I think both of those first two qoutes are mine /ubbthreads/images/graemlins/wink.gif
Litium will work ok, and im betting crisco will work with most epoxies as well. I usually use proshot pro gold grease, its the same grease I use on my locking lugs. There are a number of commercial release agents. Midway and brownells are great sources.
[ QUOTE ]
can I use saran wrap or AL foil?
[/ QUOTE ]
If you want to use something like that, id lean towards wax paper... youre probably not going to be able to remove all the saran wrap, and the al foil, if the epoxy don't stick, is gonna be awfully thick. Grease or a commercial release agent has given me the best results. The ken farrel base on my 300WM was epoxy bedded with JB weld, and the progold grease was used as a release agent. I don't think there is any way to get a better fit.
The progold is pretty thick (high viscosity) and as I mentioned makes a great locking lug grease. Its about $4 for 4oz if you can find it locally. Good stuff.
Anyone know if Kevin is still in business or is he hard to get in touch with? I have e-mailed him several times at [email protected] with no success. Thanks.
G
Guest
Guest
Help! I can't open the pics on page one. When I click on "Image 1" I get to photobucket.com and "The page you are requesting cannot be found!" is all I get. Did I do something wrong?
Harv
Harv
Harv,
Since sam11 brought this post back from the dead with his question, maybe ill try posting it again with the different picture format... ill see if I can get it done by 11-12 tonight.
As a little update, ive uniformed over 200 bullets with this rig since my origional post, and am nothing but amazed at the differance it makes past 600yds. Improvements are noticable, but not dramatic at as little as 400yds.
Okay,
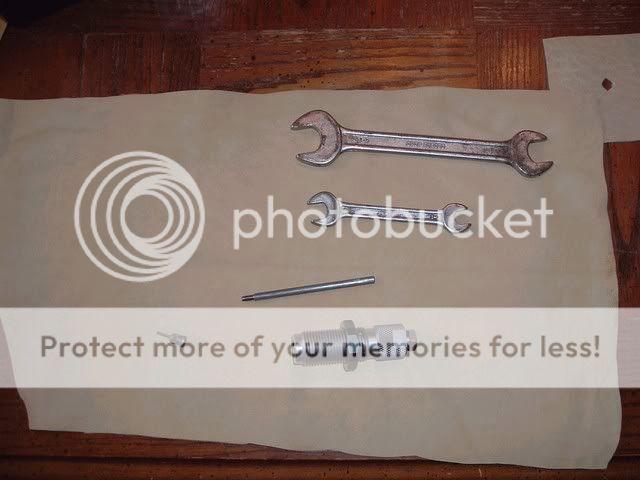
I guess the title is a little misleading, but if you are a reloader, with a few modest hand tools, and about an hour, you can have a very cheap, and very effevtive meplat uniforming tool.
What you Need:
Any bottlenecked rifle reloading die
A piece of brass at the end of its useful life for that die
Hacksaw
Bastard mill file wider than the die base, or as wide as the die base.
Epoxy, I prefer JB Quick, a faster setting version of JB weld
A grease or other substance that will function as a release agent for your epoxy.
Tape, electrical, or masking.
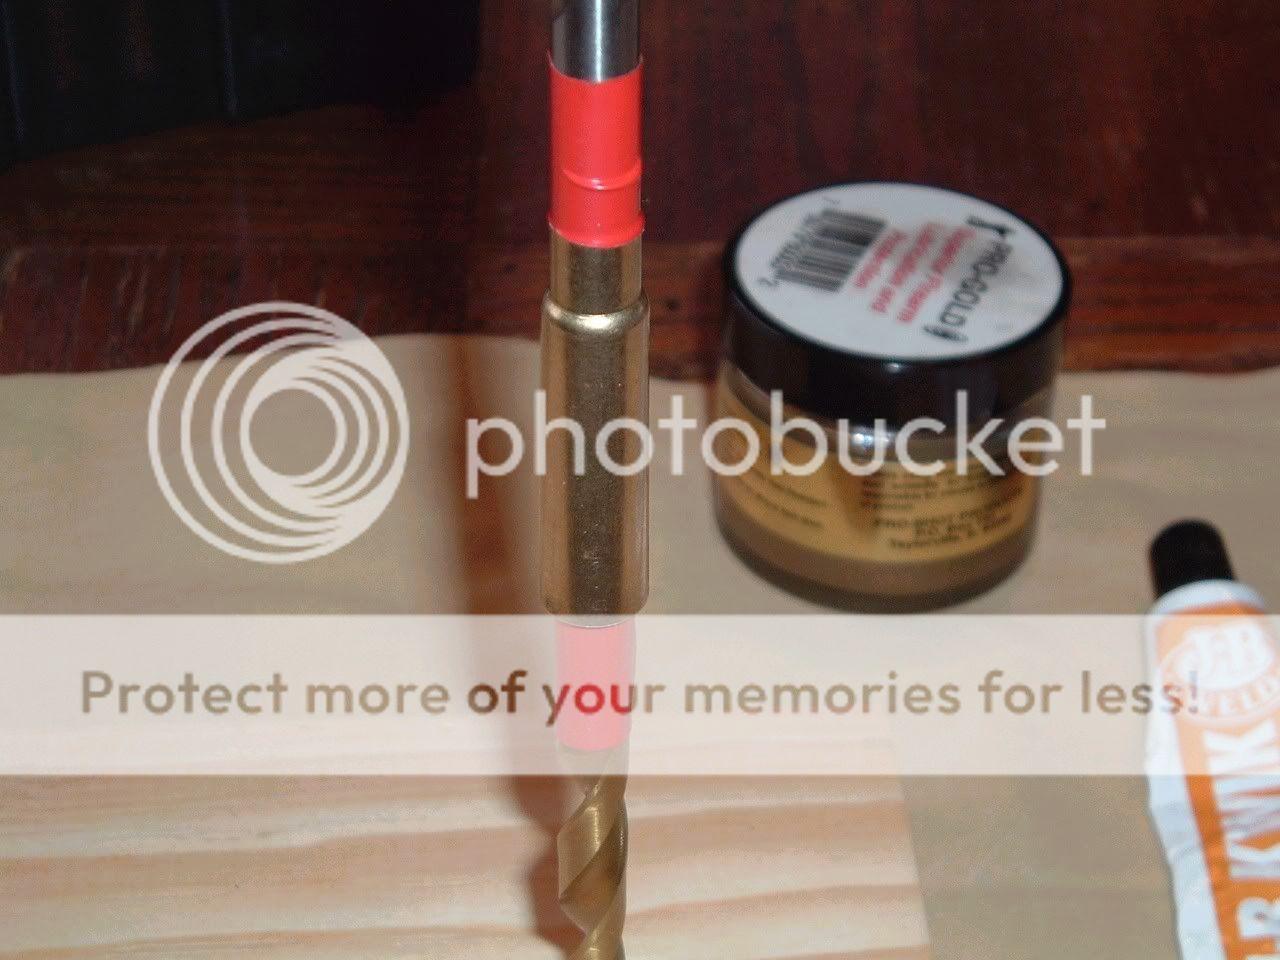
A pair of dowels a couple of thousandths larger than your bullet size. For this 30 caliber explination, thats a pair of 5/16 drillbits, with a shank size of .310.
High Speed Steel Bit Shank Sizes
15/64 .232
1/4 .248
17/64 .265
9/32 .279
19/64 .295
5/16 .310
11/32 .341
Masonary Bit Shank Sizes
3/8 .294
5/16 .249
1/4 .200
3/16 .176
Wood Bit Shank Sizes
3/8 .371
5/16 .308
1/4 .244
1/16 .184

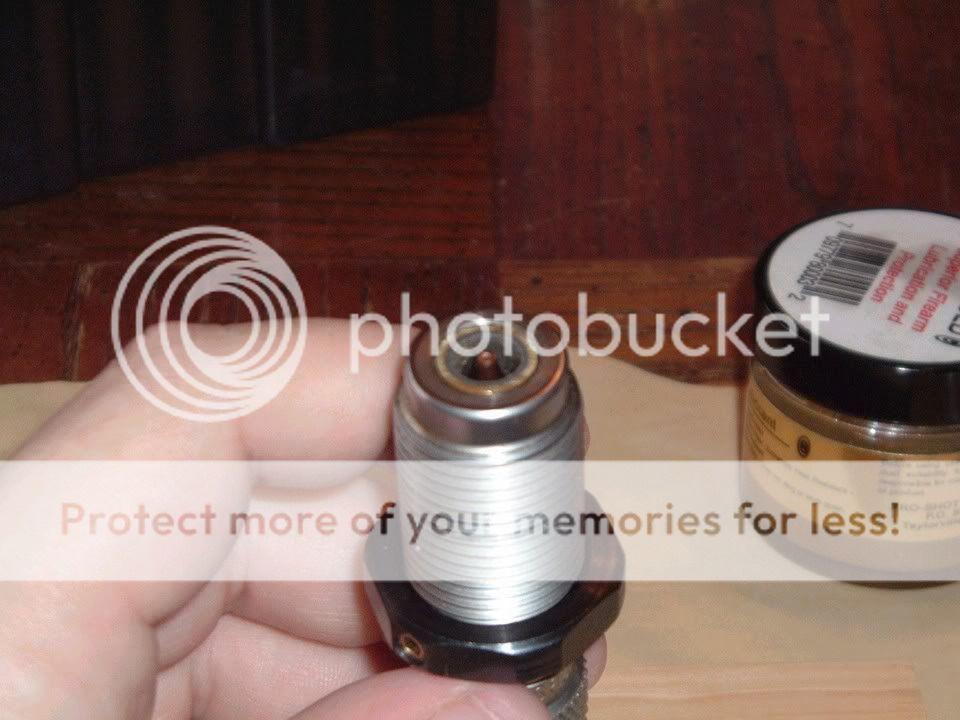
Remove the decapping rod from the die, if the decapping pin is removeable as in RCBS dies, remove the pin from the rod as well.
Insert your case into the die. At some point, the case will be stoped, and leave a portion of the case body, and the head exposed. Cases with lots of taper will stop faster.
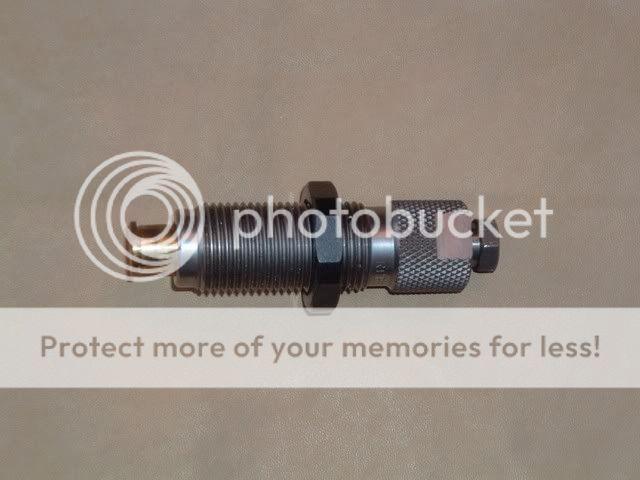
Mark this exposed section, and cut it off.
use the file to cut the brass down flush with the die. Don't be afraid to bear on the die base, its hardened steel, and you aint gonna scratch it. You want the brass just a bit lower inside the die, not exactly flush, but you do want it square.
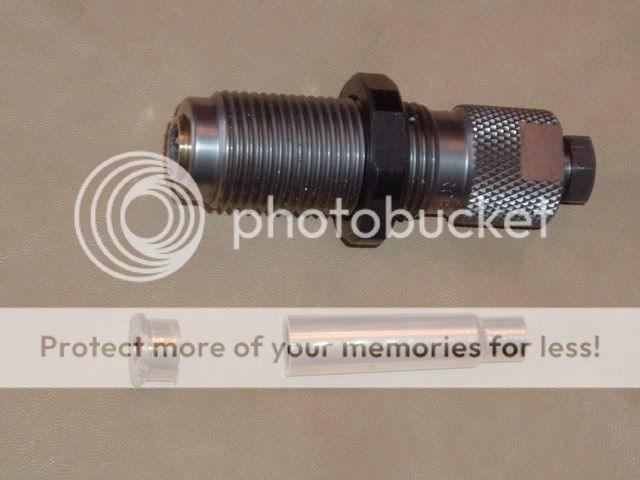
Next you need to test fit the dowel you are using into the case. If you are doing a small diameter bullet on a large diameter case, such as, 270 in a 30-06, you will have to wrap the dowel with tape to bring it up to a friction fit. you want the end of the shank to be about .4-.5 inside of the end of the case when its in place, so wrap in an approprate location.
After carefully coating your dowel with release agent, fill the .4-.5 depth opening between the end of the case and the end of the dowel wih epoxy. once filled, you are going to invert the whole assembly, and press the filed case end on a firm surface, and press the dowel through the epoxy, and into contact with the same firm surface.
This has the effect of squeezing the epoxy around the dowel, and up into the case. Leave the case and dowel in place untill the epoxy cures, for the first couple of hours, give the dowel a quarter turn twist ever 15min to half hour, to ensure that the dowel remains free.
Depending on the specific case, and dowel you are using, you may get a nearly full length fill in one pour, and a second pour, and a second dowel will not be needed. The easiest way to test this is to reinsert the decapping rod (minus the decapping pin) a short distance, and drop a bullet into the hole, point up. If its only tight fitting at the top of the case (with most of the bullet sticking out)
its time for another pour, if its tight all the way down, youre almost done. For a second pour, insert the origional dowel into its previous hole (again, coated with your release agent) and mark its depth with masking tape. you are going to repeat the same steps as before, except this time you are going to push the second dowel through the epoxy, and into contact with the first dowel. Mark the depth to the first dowel with tape on the second, so you can be sure to get it pushed all the way down.
Twist once in a while as before. If you use too much epoxy, it will fill the void around the dowel, and still have a but of thickness of epoxy between the dowels. Not a ig problem, just drill it out when its dry.
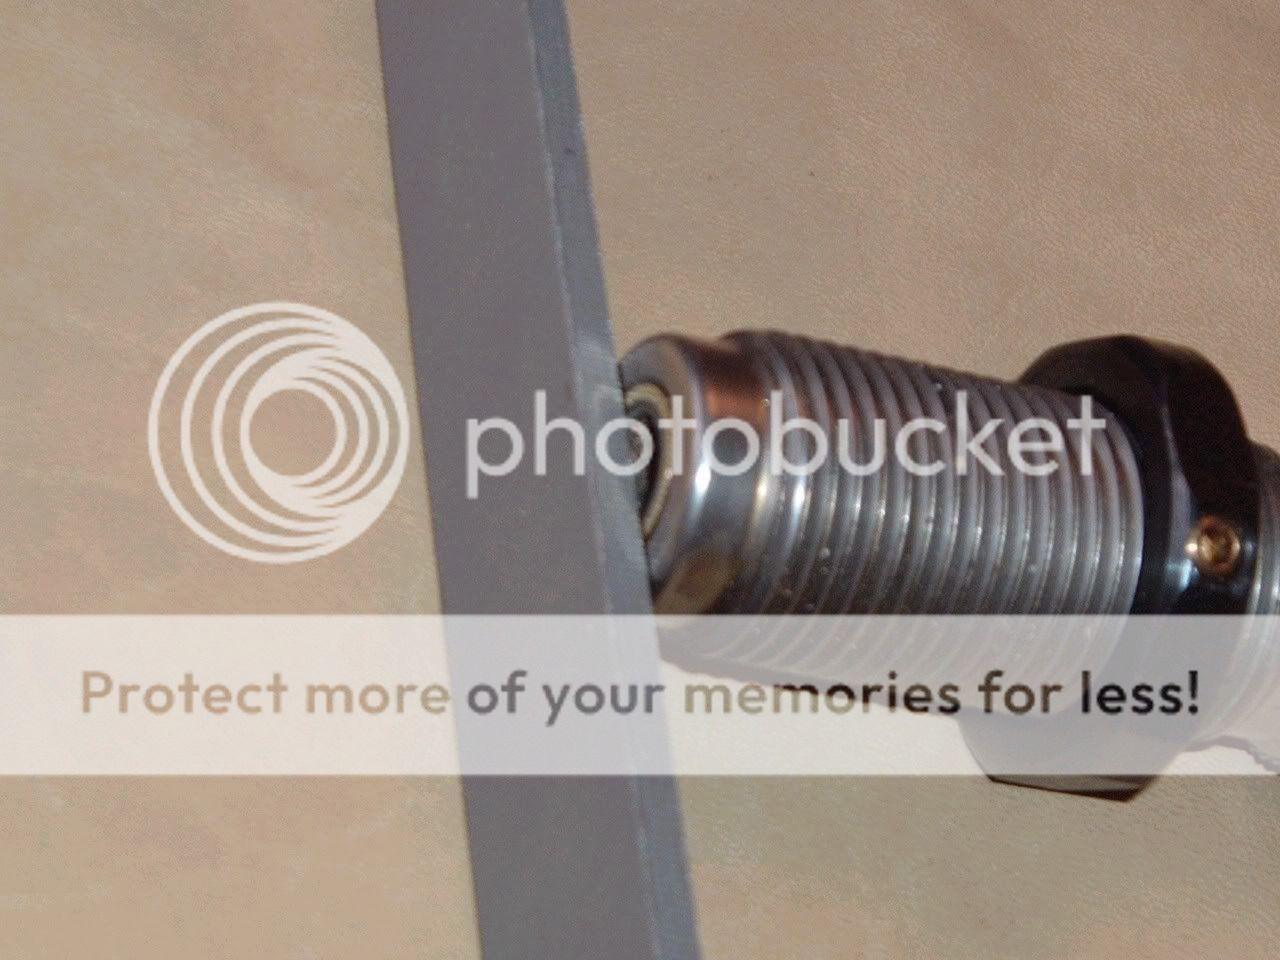
Now, a bullet should fit snug all the way to the botom of the die.
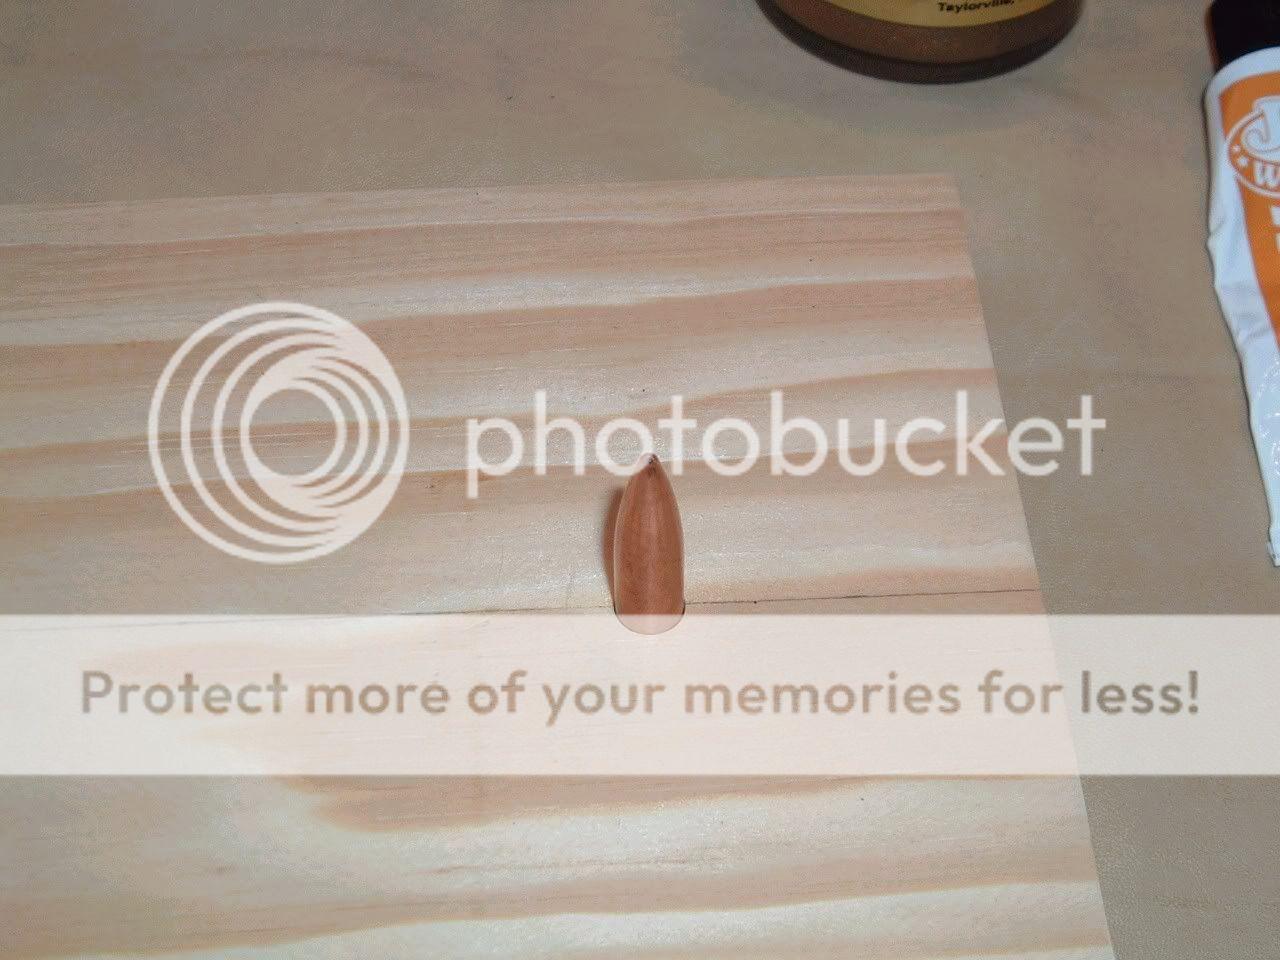
To use, drop a bullet into the case in the die, and use the decapping rod to push it up untill the bullet just pokes out of the top. Adjust the rod for the amount of protrusion (the amount you want trimmed) and lock down the collet that holds it in place.
After that, a couple of seconds with the file, and you're done.
If in use your case falls out too easily, slip a small piece of paper (.25x.25 or smaller) between the case and die.
I will admit that this tool is probably inferior to all other meplat uniformers. Some readers will probably even consider this whole thing a bit childish. However, I have been able to demonstrate reductions in vertical dispersion at 1350yds to the tune of 60% using this tool. OAL of uniformed bullets typically shows less than .0001" of variation.
If you have been considering trying some meplat uniformed bullets, give this design a try, then buy the monitor rifles version, its the best on the market, and not much more expensive than the various plastic ones being distributed.
All that being said, I can configure a variety of "caliber specific case inserts" for VERY little money, especially when compared with the price of buying all of the tools to trim those same calibers.
I guess the title is a little misleading, but if you are a reloader, with a few modest hand tools, and about an hour, you can have a very cheap, and very effevtive meplat uniforming tool.
What you Need:
Any bottlenecked rifle reloading die
A piece of brass at the end of its useful life for that die
Hacksaw
Bastard mill file wider than the die base, or as wide as the die base.
Epoxy, I prefer JB Quick, a faster setting version of JB weld
A grease or other substance that will function as a release agent for your epoxy.
Tape, electrical, or masking.
A pair of dowels a couple of thousandths larger than your bullet size. For this 30 caliber explination, thats a pair of 5/16 drillbits, with a shank size of .310.
High Speed Steel Bit Shank Sizes
15/64 .232
1/4 .248
17/64 .265
9/32 .279
19/64 .295
5/16 .310
11/32 .341
Masonary Bit Shank Sizes
3/8 .294
5/16 .249
1/4 .200
3/16 .176
Wood Bit Shank Sizes
3/8 .371
5/16 .308
1/4 .244
1/16 .184
Remove the decapping rod from the die, if the decapping pin is removeable as in RCBS dies, remove the pin from the rod as well.
Insert your case into the die. At some point, the case will be stoped, and leave a portion of the case body, and the head exposed. Cases with lots of taper will stop faster.
Mark this exposed section, and cut it off.
use the file to cut the brass down flush with the die. Don't be afraid to bear on the die base, its hardened steel, and you aint gonna scratch it. You want the brass just a bit lower inside the die, not exactly flush, but you do want it square.
Next you need to test fit the dowel you are using into the case. If you are doing a small diameter bullet on a large diameter case, such as, 270 in a 30-06, you will have to wrap the dowel with tape to bring it up to a friction fit. you want the end of the shank to be about .4-.5 inside of the end of the case when its in place, so wrap in an approprate location.
After carefully coating your dowel with release agent, fill the .4-.5 depth opening between the end of the case and the end of the dowel wih epoxy. once filled, you are going to invert the whole assembly, and press the filed case end on a firm surface, and press the dowel through the epoxy, and into contact with the same firm surface.
This has the effect of squeezing the epoxy around the dowel, and up into the case. Leave the case and dowel in place untill the epoxy cures, for the first couple of hours, give the dowel a quarter turn twist ever 15min to half hour, to ensure that the dowel remains free.
Depending on the specific case, and dowel you are using, you may get a nearly full length fill in one pour, and a second pour, and a second dowel will not be needed. The easiest way to test this is to reinsert the decapping rod (minus the decapping pin) a short distance, and drop a bullet into the hole, point up. If its only tight fitting at the top of the case (with most of the bullet sticking out)
its time for another pour, if its tight all the way down, youre almost done. For a second pour, insert the origional dowel into its previous hole (again, coated with your release agent) and mark its depth with masking tape. you are going to repeat the same steps as before, except this time you are going to push the second dowel through the epoxy, and into contact with the first dowel. Mark the depth to the first dowel with tape on the second, so you can be sure to get it pushed all the way down.
Twist once in a while as before. If you use too much epoxy, it will fill the void around the dowel, and still have a but of thickness of epoxy between the dowels. Not a ig problem, just drill it out when its dry.
Now, a bullet should fit snug all the way to the botom of the die.
To use, drop a bullet into the case in the die, and use the decapping rod to push it up untill the bullet just pokes out of the top. Adjust the rod for the amount of protrusion (the amount you want trimmed) and lock down the collet that holds it in place.
After that, a couple of seconds with the file, and you're done.
If in use your case falls out too easily, slip a small piece of paper (.25x.25 or smaller) between the case and die.
I will admit that this tool is probably inferior to all other meplat uniformers. Some readers will probably even consider this whole thing a bit childish. However, I have been able to demonstrate reductions in vertical dispersion at 1350yds to the tune of 60% using this tool. OAL of uniformed bullets typically shows less than .0001" of variation.
If you have been considering trying some meplat uniformed bullets, give this design a try, then buy the monitor rifles version, its the best on the market, and not much more expensive than the various plastic ones being distributed.
All that being said, I can configure a variety of "caliber specific case inserts" for VERY little money, especially when compared with the price of buying all of the tools to trim those same calibers.
G
Guest
Guest
Thanks. I will build one soon.
Harv
Harv
Similar threads
Recent Posts
-

-
-
 Whats the worse rifle or gun you ever bought ? I hsve several tied
- Latest: Old Hickory 45
-

-
