HEADSPACE GAUGES QUESTION

DUSTY NOGGIN

Well-Known Member
Joined
Mar 18, 2015
Messages
940
Location
salt lake city
so a headspace chamber dimension for belted magnums is between .220 & .227

i am guessing here , so please correct me

is a no go gauge is going to be .220 ??
is a go gauge .2235 ???
is a field gauge .227 ???

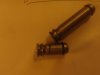
i thought id try and build some , since no gos are back ordered
 

Attachments

  • saami-standardized-7mm-remington-magnum-chamber-dimensions1 (1).png
    saami-standardized-7mm-remington-magnum-chamber-dimensions1 (1).png
    95 KB · Views: 133
Last edited:
Normally the Go gauge is minimum chamber size, No Go is the maximum chamber size and Field is slightly longer than the No Go. Generally a good action should not close on a No Go gauge.
 
The go gauges are .220 minimum and .227 maximum. ammo/brass manufactures are required to stay within these dimensions. That being said, some are in the middle of these dimensions and some are at the extreme limits (Maximum length of .227 and may not fit in the chamber that is near the minimum.

If you use one brand of brass it is prudent to check it at the minimum (.220)and increase the minimum until it will chamber. Don't go over the maximum of .227 though because if you buy brass or ammo that is minimum (.220) you will have to much head space and other problems will show there ugly head.

I have had this problem before and found brass that was maximum (.227) + and would not chamber in a chamber with less than max belt head space. This brass was rejected because with the .010 possible head space of the shoulder typical of belted cases before firing( and the .007 at the belt it could be possible to end up with .017 total head space (Not good). If minimum dimension ammo was used.

I like to set the minimum head space with the head space go gauge and then test the brass. (most are somewhere in the middle of the minimum and the maximum belt width) then deepen the chamber until it head spaces with .001 clearance on the belt (This is the belt head space with this brass) This will give a maximum possible head space to the shoulder of .011 for the first firing/forming. After that I neck size only as long as it will chamber to minimize the case growth.

After this first firing, I can bump the shoulder .001 thousandths and utilize the belt if I want, with a total of .002 head space to the shoulder, or head space off the shoulder with essentially .000 head space for longer case/brass life.

Depending on the cartridge no go gauges will normally be .005 to .006 for maximum chamber size/head space and will indicate that if the no go gauge can be closed on, it should be considered marginal.

The field gauge is a rejection gauge and if the bolt can close on it, the barrel/chamber should be replaced.

I only use go gauges and shim stock to head space so I can get any required head space between the go and the no go gauge. My preferred head space is .0005 to .0015 and can only be achieved/set by using A go gauge and the appropriate shims.

Just My recommended method for setting belted case head space and gauge use.

J E CUSTOM
 
so i built a couple.
one at .227 (( long one ))
and another at .2235

made from drill rod , should i harden them or could that mess with the dimensions ,do you think they will be hard enough the way they are

i ordered a remage type barrel which should be here soon, and they sell all the tools if you need them , they had everything except for the gauges , i thought gauges would be readily available elsewhere , but they were out midway brownells and forester ,

i found some others at 50+ each plus the shipping

i kinda messed up the shorty , but think it will still work . the belt lip goes up to an angle rather than being a 90 degree - but the diameter right there is still only .005 less than the extractor ring (at .535).. the start of the case wall closest to the belt is supposed to be .5135 so i should still have .15 to make contact -- if it doesn't work ill build another to match the long one
 

Attachments

  • IMAG4371.jpg
    IMAG4371.jpg
    193.9 KB · Views: 256
  • IMAG4372.jpg
    IMAG4372.jpg
    156.8 KB · Views: 273
Last edited:
so i built a couple.
one at .227 (( long one ))
and another at .2235

made from drill rod , should i harden them or could that mess with the dimensions ,do you think they will be hard enough the way they are

i ordered a remage type barrel which should be here soon, and they sell all the tools if you need them , they had everything except for the gauges , i thought gauges would be readily available elsewhere , but they were out midway brownells and forester ,

i found some others at 50+ each plus the shipping

i kind mess up the shorty , but think it will still work . the belt lip goes up to an angle rather than being a 90 degree - but the diameter right there is still only .005 less than the extractor ring at .535 the start of the case wall closest to the is supposed to be .5135 so i should still have .15 to make contact -- if it doesnt work ill build another to match the long one


It is fun to build tools but the cost of buying a precision ground one, limits my desire to build them. I found the same thing when I started building my own dies. So I stopped on everything but Wildcats where delivery was slow and they were costly.

I wouldn't recommend hardening them (Not needed and lots harder than the chamber. When closing the bolt on a head space gauge, I don't recommend applying any force to the bolt handle and also pre engauge the head space gauge in the extractor while inserting the gauge in the chamber. and always remove the ejector plunger.

Some gauges are shorter or longer depending on there need (Like the AI gauges,but i still believe that using the standard head space gauge is best and safest. and adding shims to achieve the desired head
space.

I have even ground .004 thousandths off a standard go gauge to use for a AI chamber, But then engraved AI in big letters so it would not be used for any other chamber.

J E CUSTOM
 
thanks man

this is just something to do in the garage, i am far from precision .. just need something that will work

i also gotta thank the guy out there biting his lip , that didnt say how bad that finish is :D
 
thanks man

this is just something to do in the garage, i am far from precision .. just need something that will work

i also gotta thank the guy out there biting his lip , that didnt say how bad that finish is :D


I am also a tool builder and have built most of my tools for gun smithing. Not because of cost, but because I wanted to. I found out long ago that If you realy want to understand what a tool does, Build one (Or two). I look at all the elements of the tool and try to improve it. Sometimes I do, and sometimes I don't

Keep on building (And you will learn more about what you are trying to do) As I get older I start looking at time compared to cost and sometimes chose the buy. PS: the finish is fine for what you want to do. If you want/need better finishes, experiment with grinding tools and using different tool materials and spindle speeds.

J E CUSTOM
 
Last edited:
Warning! This thread is more than 6 years ago old.
It's likely that no further discussion is required, in which case we recommend starting a new thread. If however you feel your response is required you can still do so.
Top