Do I need to turn necks again?

  • Thread starter Deleted member 107666
  • Start date
Vandy321
Bushing dies work best with custom tight neck chambers where the neck doesn't expand as much as a factory SAAMI chamber.

If you have a standard off the shelf factory rifle and turn your necks they will expanded even more and need to be sized back down. Meaning it will work the necks more than unturned brass.

If I turn my necks I only skim turn the necks 50% to 75% to remove the thicker sections.

Bottom line, and adding to what Warbird2006 said above. More people use the Lee collet die because they do not need to turn the necks and have less neck runout than using bushing dies.

The Redding bushing FAQ tells you when you reduce the neck diameter .004 or more you will induce neck runout. And they recommend reducing the neck diameter in two steps to reduce the neck runout. It also states that if the neck thickness varies over .002 to use the expander that comes with the Redding dies. So again bushing dies work best with custom tight neck chambers with neck turned brass.

Bushing dies can induce neck runout the more the neck diameter is reduced, and turning the necks let the neck expand more. And my advice is if you do neck turn with a factory chamber is to only skim turn the necks.

Below is a image of a Redding bushing die, look at the sides of the bushing and the clearance between the bushing and die body. This clearance allows the bushing to move from side to side and even tilt when reducing the neck diameter. Also if you look at the area of the red arrow below this area is not sized. And I believe this is to prevent sizing the area that donuts form.


O5m9mBL.jpg


Reloaders Corner: Outside Case Neck Turning by Glen D. Zediker
http://www.mssblog.com/2017/02/03/reloaders-corner-outside-case-neck-turning/

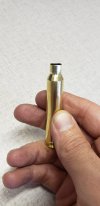
Here's how my cases look after neck turning. A little splotchy, but my goal is not a universal reduction of wall thickness, just "better is better." So instead of a case being over 0.001 out of spec, now it's about 0.0005 variation, but decidedly not perfect. Those with the smallest visible cut area were better from the start. I do this way mostly to preserve the sizing die dimensions and effect the same on all my brass. Thinner neck walls tend to crack easier, so it's safe enough to say that, with a standard-type rifle chamber (not done with a "tight-necked" Benchrest-style reamer) case life will shorten. Notice the shoulder cut. Removing a little material from this area alleviates case neck donuts.


MSSS_neck_turning_2.jpg
 
I did manage to get the neck turned to match that depth up the shoulder (from that pic above)...I'd stopped short last time, right at the junction, not understanding the purpose and scared I'd thin the shoulder too much. They looks good now.

Awesome info, thanks. I don't have a way to measure what the necks expanded too when fired.

The necks are turned to .013 (too late to go back now. That is .334 with a bullet seated. After firing I used a .331 bushing to compress back down, and a .306 expander mandrel from 21st century in their die to set final tension of .002 (give or take with spring back)

I'm vest $250+ in the redding dies, bushings and the expander mandrels. Too late to change now, but if there is a better way, or better sized I can use to reduce run-out and overworking brass, I'm all ears.

The chamber was ground on a custom reamer, I'd have to ask Mike at Mile High the specifics on it, they ground the chamber.

Pics below as they sit ready to prime/seat bullets.
 

Attachments

  • 20190827_134626.jpg
    20190827_134626.jpg
    652.5 KB · Views: 82
I did manage to get the neck turned to match that depth up the shoulder (from that pic above)...I'd stopped short last time, right at the junction, not understanding the purpose and scared I'd thin the shoulder too much. They looks good now.
Pics below as they sit ready to prime/seat bullets.
Looks like you stopped way short originally, and may have gone just a wee bit too far into the shoulder this time around. (Looks like you went about 1/3 the way down the shoulder.... See what others say, but I think if you stop halfway down the shoulder (1/6th) (compared to this cut) on the next batch of brass, you should be perfect.
 
Looks like you stopped way short originally, and may have gone just a wee bit too far into the neck this time around... See what others say, but I think if you stop halfway down the necks (compared to this cut) on the next batch of brass, you should be perfect.

The new turn started forward on the necks (I guess it expanded behind where the neck bushing sizes

down to. I cut exactly to the shoulder/neck junction the first time. This time, at the same depth, it started cleaning about where the neck bushing stops sizing, and I went up on the shoulder a bit based on some photos I'd found on accurate shooter.

Where you see new brass start on the neck is not where I originally turned too, I went passed that to the junction.

Will stop just prior to where I did on this turn next time around.
 
Last edited by a moderator:
The new turn started forward on the necks (I guess it expanded behind where the neck bushing sizes

down to. I cut exactly to the shoulder/neck junction the first time. This time, at the same depth, it started cleaning about where the neck bushing stops sizing, and I went up on the shoulder a bit based on some photos I'd found on accurate shooter.

Where you see new brass start on the neck is not where I originally turned too, I went passed that to the junction.

Will stop just prior to where I did on this turn next time around.

Sounds about how I turned mine the first time, right down to the neck shoulder junction. Set up the cutter to turn to .014 and with some PPU brass it took mostly nothing off while with Norma brass it took 100% with nearly every case. I'd probably not turn Norma brass in the future, esp. just for hunting ammo.

With the cutter angle one could go past the neck shoulder junction I expect.

3GEuSve.jpg


OC4H8CB.jpg
 
I did manage to get the neck turned to match that depth up the shoulder (from that pic above)...I'd stopped short last time, right at the junction, not understanding the purpose and scared I'd thin the shoulder too much. They looks good now.

Awesome info, thanks. I don't have a way to measure what the necks expanded too when fired.

The necks are turned to .013 (too late to go back now. That is .334 with a bullet seated. After firing I used a .331 bushing to compress back down, and a .306 expander mandrel from 21st century in their die to set final tension of .002 (give or take with spring back)

I'm vest $250+ in the redding dies, bushings and the expander mandrels. Too late to change now, but if there is a better way, or better sized I can use to reduce run-out and overworking brass, I'm all ears.

The chamber was ground on a custom reamer, I'd have to ask Mike at Mile High the specifics on it, they ground the chamber.

Pics below as they sit ready to prime/seat bullets.

Is the .334 a calculated measurement from .013 + .013 + .308 or caliper measured? One can get calipers likely suitable for what you need for around $10 off of eBay.

https://www.ebay.com/itm/6-LCD-Digi...604094&hash=item1efd3843c7:g:PpQAAOSwKDBdFgjc
 
Looks like your cutter has an angled part to match the shoulder angle. That means if you cut the neck diameter to far past the shoulder junction of the cutter you'll be thinning too much of the shoulder. As outlined here, the neck should be turned about 0.030 or so past the junction. The goal isn't to thin the shoulder but to prevent a thicker portion of the shoulder to become the neck at some point down the road.

My brass is all turned to 0.013 which is plenty of thickness if you are worried about it.
 
The new turn started forward on the necks (I guess it expanded behind where the neck bushing sizes down to...
Will stop just prior to where I did on this turn next time around.
Sounds good. But keep an eye on this brass because it sounds like you recut the area below where the bushing sized, which means it is probably very thin there now..
 
Nothing wrong with .013" necks so long as your chamber neck isn't much bigger. I turn necks on hunting rifles roughly .003"-.004" under the chamber neck.

If your cutter was designed to cut that shoulder angle your fine. Otherwise that brass is ruined. My KM has a universal angle. My Sinclair has specific 30* and 40* cutters

For future reference turn your necks after fireforming and FL sizing. This will get them as straight as possible and flow quite a bit of material into the neck to be cut off. Perform only a 70-80% cleanup unless it's a tight neck chamber

CD75E135-C669-44F9-A456-1A5E064A334F.jpeg
 
Thanks all, yes, the 21st century tury cutter has an angled cutter as well, to cut the shoulder that way.

The brass that was turned before where the bushing die sizes was the thicker brass pushed out from the case during body sizing. It did not cut anything thinner than the rest of the neck (.013)

Lesson learned on turning AFTER fire forming next time.
 
I was wondering why you could measure the neck of a loaded round, but not the neck of a fired case.

I must have missed it if someone asked for a fired neck size, I never thought to measure the diameter of the once fired brass to see how much the neck diameter expanded! That's my bad. I do have a tubing mic as well as regular dial calipers.
 
I must have missed it if someone asked for a fired neck size, I never thought to measure the diameter of the once fired brass to see how much the neck diameter expanded! That's my bad. I do have a tubing mic as well as regular dial calipers.

I expect it was too late to go back and do it after you sized the necks back down.
 
Warning! This thread is more than 5 years ago old.
It's likely that no further discussion is required, in which case we recommend starting a new thread. If however you feel your response is required you can still do so.

Recent Posts

Top