Southernfryedyankee
Well-Known Member
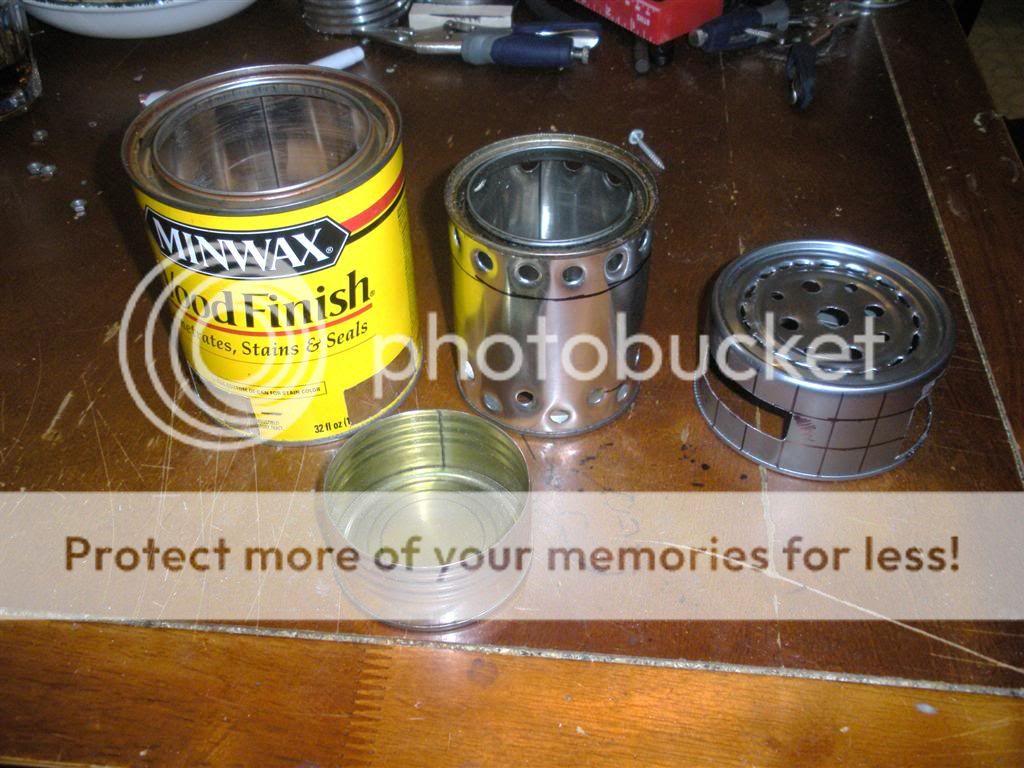
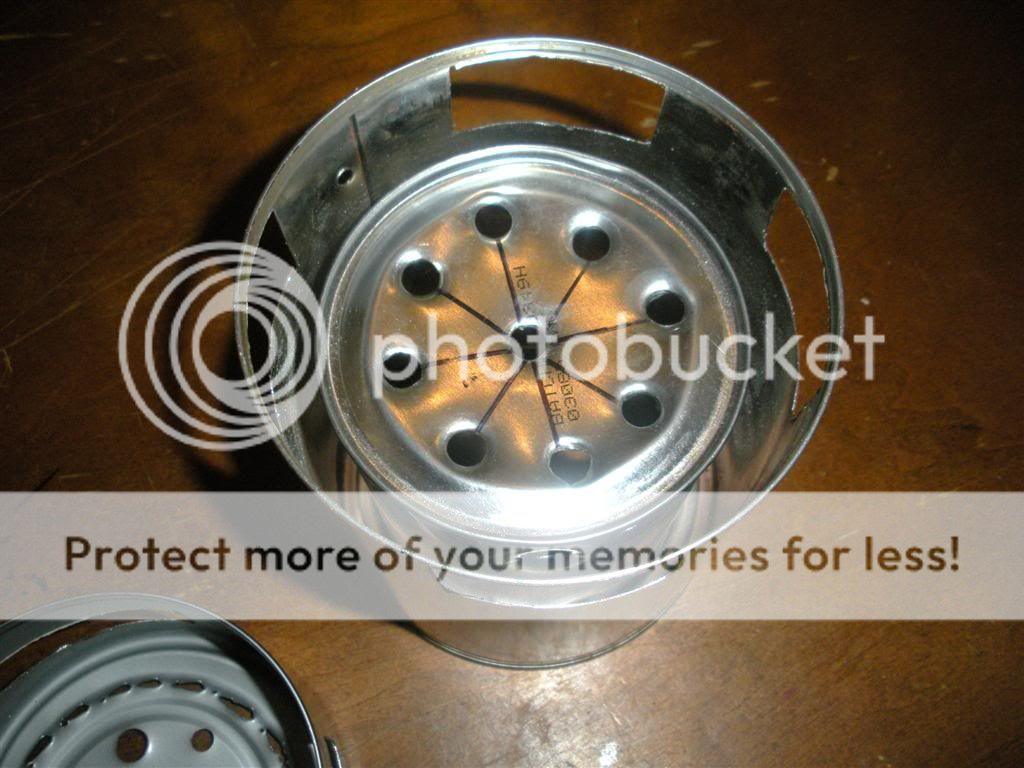
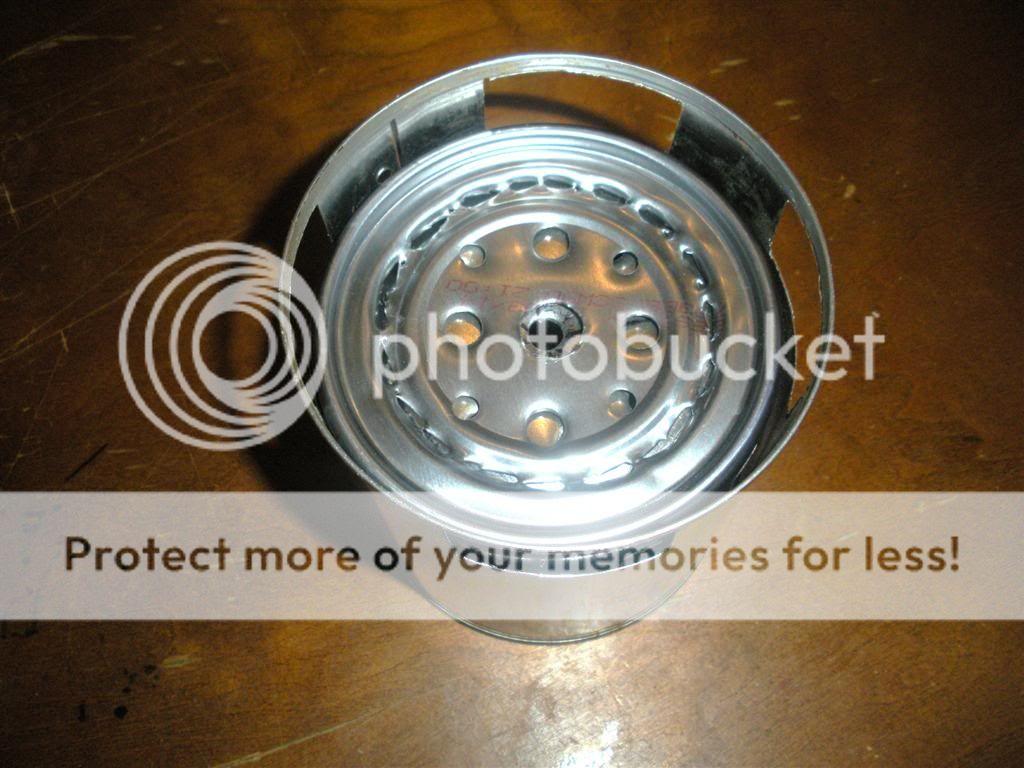
SOOOO I took a stab at building my own backpacking/survival stove. I had gone looking online because I was in a tinkering mood and found a similiar one of these stoves for $35 and I was like NOOOOPE. I started looking around my house for materials and since I do some woodworking and I eat on a daily basis I happened to have 99% of the materials here. The material list is
1 QT Minwax stain (Any)
1 PT Minwax wood conditioner (I am sure any 1 PT MINWAX container will work though)
1 LG Tuna can
1 can if Campbells Chunky soup.
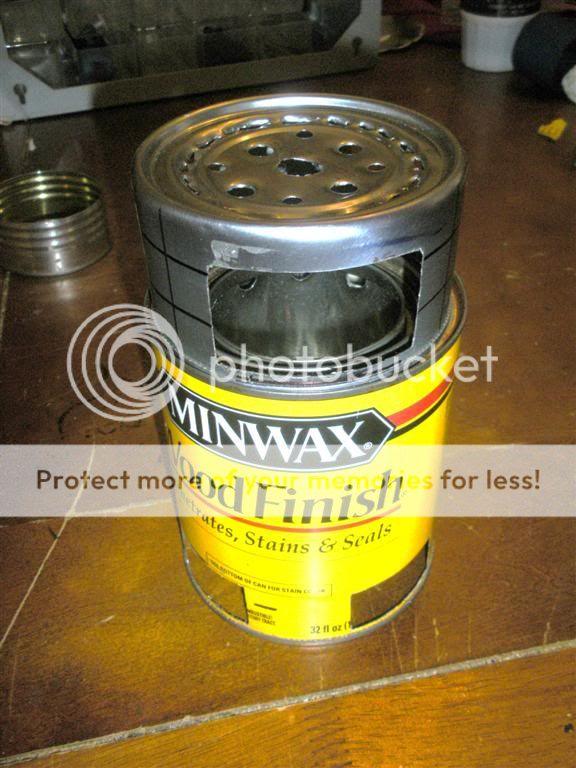
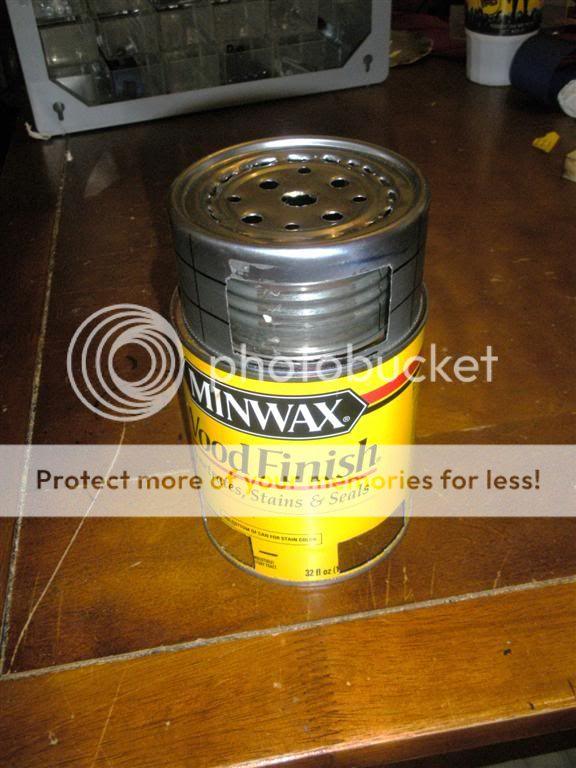
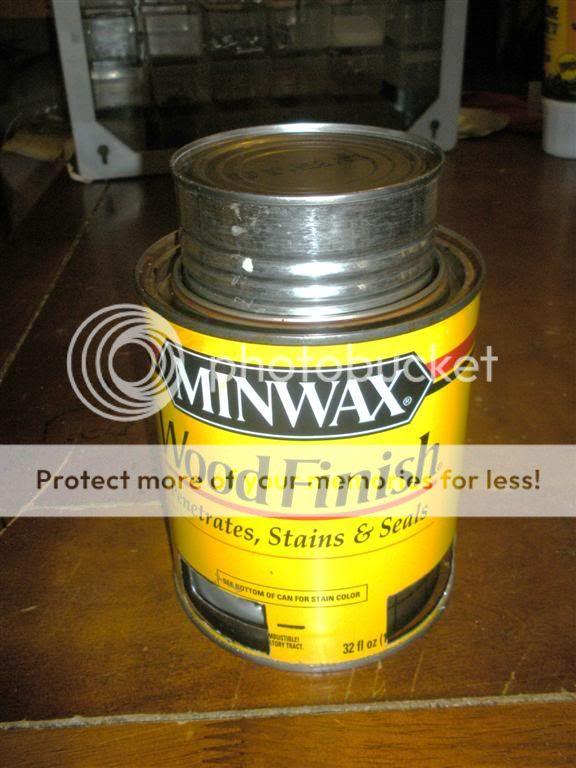
Basically I cut off the bottom of the QT container with a can opener and press fit the pint container into the center to check for fit, good fit but a little loose, so I flared the edges of the PT can a little. After getting a good tight fit, I popped the PT can out and drilled the holes in the bottom and sides as shown in pictures. I then cut my QT can bottom air intake holes with my dremel and used the same method for my tuna can stove topper except on the top where I used my drill press. If you have a dremel, use the cutoff wheel to cut your square holes as it cut through the metal like a hot knife through butter. The larger hole on the side of the grill topper is to add more material to burn without having to take anything off the top.The extra piece of can you see in the picture I just made should I decide to use Alcohol or clean burning fuel to cook the food or MOST importantly boil questionable water. I liked the way I can make the top fit into the bottom to gain some added space which is obviosly a plus, whats even cooler than that is you can still utilize the QT container lid to keep extra kindling or fire starting material in the burn chamber (DRYER LINT IS AWESOME AND FREE) I will be painting this badboy with grill high temp paint to aid in rust prevention and just for looks.
I would like to mention that if someone does decide to make this type of DIY stove that FIRST AND FOREMOST, you dispose of the material contents (stain, paint etc.) in a responsible matter. Second if using a drill press SLOOOOW AND STEADY IS YOUR FRIEND, these cans bend EASILY. I find that a good brad point drill bit worked PERFECTLY. Hit me up with any questions you may have but ANYONE could build 1 just by looking at the pictures.
1 QT Minwax stain (Any)
1 PT Minwax wood conditioner (I am sure any 1 PT MINWAX container will work though)
1 LG Tuna can
1 can if Campbells Chunky soup.
Basically I cut off the bottom of the QT container with a can opener and press fit the pint container into the center to check for fit, good fit but a little loose, so I flared the edges of the PT can a little. After getting a good tight fit, I popped the PT can out and drilled the holes in the bottom and sides as shown in pictures. I then cut my QT can bottom air intake holes with my dremel and used the same method for my tuna can stove topper except on the top where I used my drill press. If you have a dremel, use the cutoff wheel to cut your square holes as it cut through the metal like a hot knife through butter. The larger hole on the side of the grill topper is to add more material to burn without having to take anything off the top.The extra piece of can you see in the picture I just made should I decide to use Alcohol or clean burning fuel to cook the food or MOST importantly boil questionable water. I liked the way I can make the top fit into the bottom to gain some added space which is obviosly a plus, whats even cooler than that is you can still utilize the QT container lid to keep extra kindling or fire starting material in the burn chamber (DRYER LINT IS AWESOME AND FREE) I will be painting this badboy with grill high temp paint to aid in rust prevention and just for looks.
I would like to mention that if someone does decide to make this type of DIY stove that FIRST AND FOREMOST, you dispose of the material contents (stain, paint etc.) in a responsible matter. Second if using a drill press SLOOOOW AND STEADY IS YOUR FRIEND, these cans bend EASILY. I find that a good brad point drill bit worked PERFECTLY. Hit me up with any questions you may have but ANYONE could build 1 just by looking at the pictures.