Dialing in bore for threading and chamber?

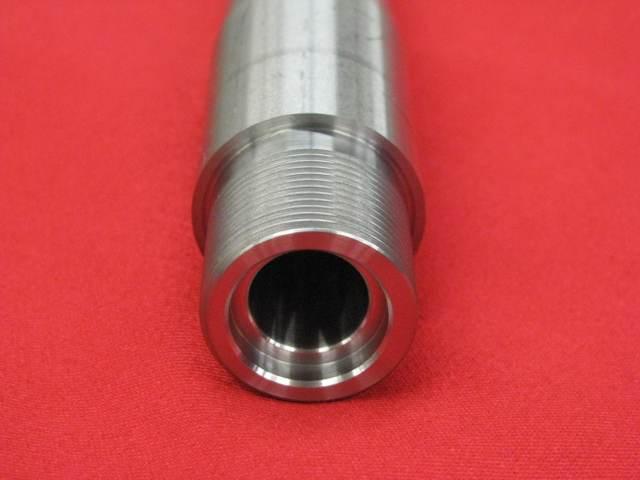
Do you feel the HSS give you a better finish than carbide, what RPM?
Jeff
Yes Jeff at low speeds 60-120RPM the HSS is the best. I don't do this for a living so time doesn't really matter to me. I thread slow and take my time with light passes.

I have used carbide internal boring bar in reverse to thread away from the tenon at 480RPM and 640RPM which lease a great finish and never worry about crashing into the shoulder. Either way works good for me and my skill set
I thread the same way :) i use the tool brownells sells and really like the way it cuts
To make sure I understand??? If the bore has a bow (they all will to some degree) you should time the action so the the barrel shoots up 12 o'clock. Another question, PTG is the only company the has a rotating piloted reamer in stock (for 7mm RM), is that the way I should go?

Thanks,

Jeff
you want the loft up not left or right. Once i get the barrel dialed i use a range rod and an indicator at the muzzle and i clock the loft up and time it with the action I use pt&g alot ( i dont want to start a bashing thread here)and have had decient results but I definitely have had to check my reamers and have had to have a couple re-do's moslty on a couple custom reamers. All in all they took care of me, it took a lil time but i dont do this for a living, make sure you get the reamer print and check things like neck size (diameter and legth)and belt placement and diameter although i will set the belt a lil deep and use the shoulder on realoads for head space
 
When it comes to holding a barrel, doing it without bending it is very important to me. If your outboard spider is holding the barrel against tension your bending the blank. A very easy way to know this is to loosen the outboard spider, did the barrel move? The v-block style chuck is the best way I have found. Its stress free holding power is excellent. I once accidentally forgot to tighten my outboard spider. I did not notice until I went to hook up my flush system at the muzzle. I had cut the entire thread tenon holding the barrel only with my v-block spider chuck. The bore was no more than .0003" out. Try that with a copper ring. The key to any method is to have the barrel where you want it before you tighten the spiders. They should be used to hold the barrel where its at, not to force and hold it. Use the screws to push the barrel, them back them off until the barrel is how you want it, then just snug them to support the muzzle end. I like to indicate in a way that ensures the chamber is concentric to the bore just in front of the throat, and the crown is perpendicular to the last inch of barrel. I feel this has helped achieve very consistent accuracy results for me. I have a little more info on my web site if your interested.
 
Last edited:
When it comes to holding a barrel, doing it without bending it is very important to me. If your outboard spider is holding the barrel against tension your bending the blank. A very easy way to know this is to loosen the outboard spider, did the barrel move? The v-block style chuck is the best way I have found. Its stress free holding power is excellent. I once accidentally forgot to tighten my outboard spider. I did not notice until I went to hook up my flush system at the muzzle. I had cut the entire thread tenon holding the barrel only with my v-block spider chuck. The bore was no more than .0003" out. Try that with a copper ring. The key to any method is to have the barrel where you want it before you tighten the spiders. They should be used to hold the barrel where its at, not to force and hold it. Use the screws to push the barrel, them back them off until the barrel is how you want it, then just snug them to support the muzzle end. I like to indicate in a way that ensures the chamber is concentric to the bore just in front of the throat, and the crown is perpendicular to the last inch of barrel. I feel this has helped achieve very consistent accuracy results for me.

This was the advice that Alex told me about a year ago. My rifles and chambering has improved a lot after his advice. I take zero credit in this I just copied a great idea and it works for me and my skills. A big thanks to Alex for the help, but like I have heard Alex say many times if you are mechinacly inclinded and are passionate about rifles you can see things like this easy. After my first Half dozen chamber jobs I knew something was wrong and I started asking top smiths what I was doing wrong. Long story short I knew I was bending the barrel into place and this setup fixed all my issues. Big To Alex for his help
 
I have a spare 4 jaw layin around I Can mill the jaws for the steel balls and make some v-blocks and give this a try but one thing i see right away with the spider in calhunters pics is i would get another few inches of room for shorter barrels if i just used a cam plate and that spider and did away with the chuck :) Alex or CH805 if you don't mind a couple questions, did you silsolder those steel balls in and do you think aluminum v's would work?

I for one really like these threads and just would like to say thanx :)
 
Last edited:
I have a spare 4 jaw layin around I Can mill the jaws for the steel balls and make some v-blocks and give this a try but one thing i see right away with the spider in calhunters pics is i would get another few inches of room for shorter barrels if i just used a cam plate and that spider and did away with the chuck :) Alex or CH805 if you don't mind a couple questions, did you silsolder those steel balls in and do you think aluminum v's would work?

I for one really like these threads and just would like to say thanx :)
My chuck threads on the spindle, so it is about as close to the front bearing as I can get it. The bearings stay put with a dab of grease on them. The point of this setup is a bind free way to hold something round that wont move. We do not need or want sacrificial metal in the mix anymore. Soft metal allows the barrel to shift during the chambering process as its fighting that bend thats probably induced in the barrel. Use all steel and you will be able to chamber a barrel and the indicator will still read the same in the bore as it did before you started. Thats what led to me make this thing in the first place, checking my work, I couldn't eliminate small movements during the machining process. This style chuck solved all my problems. This is after the work is done, bore in front of the chamber, freebore of the chamber and the back of the chamber are all concentric.
 
Last edited:
My chuck threads on the spindle, so it is about as close to the front bearing as I can get it. The bearings stay put with a dab of grease on them. The point of this setup is a bind free way to hold something round that wont move. We do not need or want sacrificial metal in the mix anymore. Soft metal allows the barrel to shift during the chambering process as its fighting that bend thats probably induced in the barrel. Use all steel and you will be able to chamber a barrel and the indicator will still read the same in the bore as it did before you started. Thats what led to me make this thing in the first place, checking my work, I couldn't eliminate small movements during the machining process. This style chuck solved all my problems.
That Makes perfect sense! Thanx Alex!
 
I've used a setup similar to the Vipers jig and used copper rod for the bearing surface. I do get about .0005" of runout after I run my rough tenon and chamber prebore. I'll try switching to aluminum to see how it fares as a harder material yet softer than steel.
 
My chuck threads on the spindle, so it is about as close to the front bearing as I can get it. The bearings stay put with a dab of grease on them. The point of this setup is a bind free way to hold something round that wont move. We do not need or want sacrificial metal in the mix anymore. Soft metal allows the barrel to shift during the chambering process as its fighting that bend thats probably induced in the barrel. Use all steel and you will be able to chamber a barrel and the indicator will still read the same in the bore as it did before you started. Thats what led to me make this thing in the first place, checking my work, I couldn't eliminate small movements during the machining process. This style chuck solved all my problems. This is after the work is done, bore in front of the chamber, freebore of the chamber and the back of the chamber are all concentric.

very Nice Alex, Awesome work for sure!
 
I use spiders on both ends with 3/8-24 threads with brass tips pointed up to a 1/8th inch contact points. I dial to zero run out at the throat and 2" ahead of that. I use a long rod held lightly in an o-ring in a drill chuck on the tailstock by the tail and on the barrel end a fitted bushing and a small weight to take up any clearance and a Starrett .0001" indicator riding on top of the rod as close as possible to the barrel. We only dial in the end we are working on in an effort to get the bullet into the bore as straight as possible. This method is commonly referred to as the Gordy Gritters method.

Any other method will show up in the bore scope as the rifling starting almost to the neck and the other side going out twice as far as it should before the rifling starts. The worse the curve the more exaggerated this will appear. With the chamber cut this way it is impossible to get the bullet to engrave the rifling perfectly square or at the same time. I believe it is a very big deal to keep the throat and chamber as square to the actual bore as straight as possible. We dial in the muzzle the same way 1/8th inch behind the exit and 2" back into the barrel to get the crown as square to the bore exit as possible. Dialing both ends at the same time it is impossible to achieve this level of precision. Even though both ends appear centered in the blank throughout the length of the barrel the bore wanders all over the place.

The lathe is a high precision Taiwan custom that weighs 2200 pounds on a 6" thick 5/8" rebar on a 12" grid slab of 4500 psi cement. It is checked every couple months or during the season changes with a Starrett 16" machinist level. It cuts threads we are very proud of. No, fancy threads do not do anything for accuracy but they are nice to look at and they make me feel good if someone ever were to disassemble one of our rifles looking for flaws.

To combat distortion none of the spider screws are set very tight. The brass gets a very firm grip on the barrels. In 9 years doing this full time we have never had one slip. Just taking nice light cuts and a fairly heavy lathe seems to be the key. The tennon is threaded without a relief cut so the barrel is as thick as possible in the chamber area. We use indexable carbide threading tools. Without sanding or lapping we can hold a cotton ball against the threads and they pull no visible lint. This lathe is only used for gunsmithing so it doesn't get beat up with heavy projects. I have access to a 16" Clausing Colchester for heavy stuff.


When it's time to clock the barrel in the action the curve is set to exactly 12 o'clock on the muzzle end. The flush system provides filtered and magnetic screened Rigid Extreme Performance cutting fluid at 100 psi. It's not about speed but in quality to keep all shavings and swarf away from the cutting edges. The chamber is single pointed to between .005" and .010" final chamber diameter at the same taper as the actual finished chamber. Only JGS reamers are used because as far as I know they are the only company that uses staggered spacing on the flutes along with other features to keep them from chattering. This is how they look before polishing. We have tried other brands and so far nothing else compares. I have pictures showing the difference and they are not pretty.


One last little tip. We don't use carbide reamers. They are commonly oversize for production use and allow more touch ups and resharpening. You have to either check for yourself or ask because it's not marked on them or noted anywhere and is not common knowledge.
 
Warning! This thread is more than 7 years ago old.
It's likely that no further discussion is required, in which case we recommend starting a new thread. If however you feel your response is required you can still do so.

Recent Posts

Top