Recoil lug question

Jeffrthehunter

Well-Known Member
Joined
Nov 27, 2016
Messages
215
Location
Portland Oregon
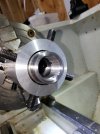
I am in the process of blue printing a Remington action (first time). I have ordered a recoil lug with two pre drilled pin holes and a 1.075" hole for oversized threads. I have the action threads opened up to 1.075" and plan on running a barrel tenon diameter of 1.074". Using my mill I was going to dial in the action threads, move over and center drill and drill for pins (.001" oversized for slip fit). I realize that there is a chance alignment will not be perfect and I may have interference with tenon diameter and 1.075" bore in recoil lug. So here is my question, should I run the tenon (just the diameter where lug locates) down to say 1.070" so there will be room for error? I feel like lug will locate off pins, no reason to make everything so tight. Any thoughts would be appreciated! Thanks Jeff
 

Attachments

  • 20201218_180917.jpg
    20201218_180917.jpg
    1.3 MB · Views: 178
The pins should be permanent with resistance fit, the lug should be removable with very little movement.
I only have a 'thou or so tenon clearance on the recoil lug, it is tapered/counterbored anyway and slips over the tenon snugly.
If it's drilled precisely there should be no misalignment.

Cheers.
 
Check your Machinery's Handbook for Class 2 thread fit.
A 1 1/16" X 16tpi OD thread (Remington factory thread) has a major diameter OD 1.061/1.051. Adding .015" to clean up threads on receiver you get to 1.076/1.066. I think thats why some parts builders offer recoil lugs with a 1.075" hole. My other builds have been with Defiance, this is my first factory Remington rebuild. Just a part time Smith.
 
^^^
I was referring to your root/crest clearance, nothing to do with the lug.
There's roughly 10 thou tolerance in the external thread- as you noted. There is .014 tolerance (0.995-1.009) in the internal (receiver threads). The internal receiver threads cannot be measured without a plug gage- so what I'm saying is you really don't know what you have for a major diameter of the receiver threads. You know how much you opened them up- but you don't know what you had before you started.

You do not want a tight thread fit here. There needs to be some play in the threads to allow the shoulders to bring the parts into precise alignment.

If you do a short counterbore just inside the receiver, to the same depth as the last pass of your single pointing- you'll be able to precisely measure the major diameter of your internal threads with a telescoping gage, and use that number to calculate what your major tenon diameter should be (I leave about .008 clearance).

If you actually have 1.075 major OD of the internal threads, a 1.074 tenon major diameter isn't nearly enough clearance.

JMO, it's how I do it. YMMV.
 
Last edited:
^^^
I was referring to your root/crest clearance, nothing to do with the lug.
There's roughly 10 thou tolerance in the external thread- as you noted. There is .014 tolerance (0.995-1.009) in the internal (receiver threads). The internal receiver threads cannot be measured without a plug gage- so what I'm saying is you really don't know what you have for a major diameter of the receiver threads. You know how much you opened them up- but you don't know what you had before you started.

You do not want a tight thread fit here. There needs to be some play in the threads to allow the shoulders to bring the parts into precise alignment.

If you do a short counterbore just inside the receiver, to the same depth as the last pass of your single pointing- you'll be able to precisely measure the major diameter of your internal threads with a telescoping gage, and use that number to calculate what your major tenon diameter should be (I leave about .008 clearance).

If you actually have 1.075 major OD of the internal threads, a 1.074 tenon major diameter isn't nearly enough clearance.

JMO, it's how I do it. YMMV.
 
First off I want to thank you for sharing your thoughts and ideas!!! The idea of creating a small counter bore is a great thought but I have already cut the threads. To keep my threads within spec I did the following and would love to hear you thoughts. I started by making a thread gauge. 1.00" long by 1.074" diameter, using .040" wire i added .015" to the wire diameter measurement of a 1 1/16th" class #2 thread and carefully cut until i was a few thou under maximum.
Now to the receiver threads. I opened up the minor diameter from 1.002" to 1.016", that gave me a full cleanup and I ran the diameter to the receiver lugs. I then clocked to the original threads and opened them up until my thread gauge was a super tight fit (maybe .002" clearance). At this point I will cut the barrel to 1.074" diameter and then thread barrel tenon until I get a good fit. Hope I am not missing anything.....🤔🤔🤔🤔🤔
 
Plug gage is def another way to do it...
It's a no brainer that way- if the plug gage fits smoothly, without excessive play- all you need do is cut the tenon to the same specs.

Thread fit here really isn't critical as I mentioned- in fact, many think that "tighter" threads (I've read where some are so tight they have to lap them and think that's a good thing) are preferred, and that's just not the case.

If it screws on smoothly without binding and with little play, you're good to go :)

It's precisely faced shoulders on both the receiver ring and barrel shoulder that really matter.

Nice job.
 
On a normal lug, I make them 1.060" because I like a bit of play. This brings us to what is most important. Barrel tenon shoulder and action face being square? Hopefully Alex Wheeler throws in his experience regarding loose v tight threads. Tobnpr has you on the right track. Best of luck.
 
On a normal lug, I make them 1.060" because I like a bit of play. This brings us to what is most important. Barrel tenon shoulder and action face being square? Hopefully Alex Wheeler throws in his experience regarding loose v tight threads. Tobnpr has you on the right track. Best of luck.
Thanks for the input! Basically I want go with .002" clearance between tenon recoil lug journal (1.073") and lug through hole (comes pre bored at 1.075"). This way if there is some radial alignment error after pining recoil lug I will still have clearance. I feel like the worst senerio would be to have the lug pushing the barrel to to one side of receiver. Hope I am explaining this correctly.
 
We're all a bit prone to get into the weeds with a lot of this- nothing wrong with "overthinking" tho :)
If you think about it, recoil forces are straight back. This is why we bed the back side of the lug, to make sure it's got full contact, and the surface it's against is perfectly parallel to it. This alleviates any concern of misalignment of the contact surface of the factory stock/chassis. Personally, I wouldn't see a problem with more clearance around the lug- though I too shoot for a snug fit with no "wobble". Just sayin' I don't see that it would have any effect on accuracy if it were a few thou larger. Accuracy would suffer if the lug were against a factory surface that was not perfectly perpendicular to the receiver ring/parallel to the lug itself- then, it would want to shift the action to one side or the other under recoil.

You've got a good grasp of the concepts involved- and it really doesn't get much more complicated than that.
There's often many ways to get "there"- and some mistakenly think their way, is the "best" or "only" way.

But fact is, indicators don't lie. If the dial tells you that you got the result you wanted, doesn't matter how you got there- only that you did. Square, parallel, concentric...basic concepts, but carrying them out with high precision requires some thought. Especially with barrel work, where we shoot for "zero", and the workholding is often tenuous with spiders- light cuts are required to avoid risking ANY shift in the work.

Only been doing this for a decade, so still much to learn. JMO, YMMV.
 
Nice work!
I see what looks like a short 45 degree cut off the bottom flat, then a radius to pick the sides of the receiver.
Curious how you did that setup?
 
Nice work!
I see what looks like a short 45 degree cut off the bottom flat, then a radius to pick the sides of the receiver.
Curious how you did that setup?
Here are some better pics. Action locates on the two 45 deg surfaces and held in place by action screws. I clamped the fixture to a 90 degree fixture plate for machining.
20210109_183434.jpg

20210109_183323.jpg
 
Warning! This thread is more than 4 years ago old.
It's likely that no further discussion is required, in which case we recommend starting a new thread. If however you feel your response is required you can still do so.
Top