Hornady OAL Gauge is Driving me Crazy(er)!

I have used the wood dowel method for sixty years. If you are sub 1 MOA at 100 yds it has proven to be adequate for a one shot kill more times than I can count. Just keep in mind when you use this method the ammo often becomes rifle specific. The COL ammo mfg use is so there cartridges will chamber in the majority of rifles.
As another comment I have been amazed over the years how important this measurement is on various rifles. It stands to reason the more balanced the projectile is leaving the barrel the longer it will hold its intended path.
 
I spent a couple hours today trying to get consistent CBTO readings on my Ruger Hawkeye 270 and some Nosler ABLR bullets. The readings are all over the place. I've had more consistent results with some other bullets. I try to be consistent, firm but not too firm, give it a couple taps. I got a few clumps of measurements, but the SD on 30 measurements was .02, if I remember right, and the ES was 67 thousandths! I didn't try burning incense or chanting mantras, but what's the frigging secret for getting repeatable readings with this thing? It must work or people wouldn't have used it all these years. I'm ready to put it away and try Erik Cortina's "Jam Method".
I have found out several things using the Horandy( old Stony Point)Bullet comparator.
1) Start with a clean bore and rifle chamber ( you'd be surprised at how many people do not clean their rifles before using this tool)

2) Important: I recommend not using the Horandy generic all in one case , but rather after fire forming your own case drill your case head through using either a (Letter L or 19/64") and tap for a 5/16" X 36 TPI thread. ( how to directions can be found on the internet )
The Horandy generic case will not fit your rifle's chamber exactly and may cause problems resulting in erratic measurements. ( If using the Horandy case look at the cases shoulder and see if it is showing marks which will appear as concentric grooves. This is an indication of rub and a potential for error)

Now that you have a fire formed case sized exclusively for that specific rifles chamber you can proceed.

3) Take a bullet sample and make certain that it will easily slide into your shell case. If not I suggest the use of the Sinclair Gen 2 expander die and the correct caliber specific mandrel.
3) When seating your bullet up against the rifles lands I use a small dowel placed from the muzzles end to make contact with the bullet tip. After contact make certain that the tools brass thumb screw is secured and push the entire assembly tool case and bullet from your rifle. If done correctly your bullet will stay seated in your shell case.
4) Make certain that you are using the correct Horandy bullet comparator insert.
Note: There is nothing in the instructions stating that you need to use the stated insert is is only a suggestion based on a starting point.
If your bullets ojive does not engage this insert quite right then find an insert with a better fit.
5) Now what I do is take an average of three different readings trying to be consistent with my readings and call it done.
I know that you may experience some level of frustration but the key word here is consistency.
(As suggested the anvil base used with a quality digital set of calipers will help)
Just relax stay calm and please try my suggestions, as I think that they may help .
 
Last edited:
Send me a fired case, ill drill and tap it for you. Use your hornady coal gauge to measure CBTO with your fired case and unless your dial calipers are not accurate you should not be getting anymore than .001 difference. Been doing it that way for years. Yes this point can change over time but if you are a precision shooter you will likely be tracking this anyway. I also use Eric Cortina's method, and it works well, although I havent noticed any difference in accuracy, many ways to skin this cat.
Thank God somebody said it. I can get repeatability every time with my Hornady tool. Any variation I see is usually in the bullet itself.

You need to make sure you are putting your tool on the calipers correctly. Put it on with the screw to the back or you will not be measuring square to the calipers and you will not get repeatability. You also need to square it with the opposite mating surface by closing the calipers before tightening the screw down.
 
I junked mine a couple years ago and change to the LTL Gauge from Dead Center Sports and never looked back. DEAD CENTER SPORTS - HOME I also have his tool to make my own modified cases and they sell a adaptor for the hornady modified case. They are great to work with and will help you if needed. I also bought extras of the brass set screw and the allen cap screws so I could have a case for each caliber that I load completly set up.
 

Attachments

  • s143231942783679832_p20_i1_w640.jpeg
    s143231942783679832_p20_i1_w640.jpeg
    100.3 KB · Views: 98
Last edited:
I spent a couple hours today trying to get consistent CBTO readings on my Ruger Hawkeye 270 and some Nosler ABLR bullets. The readings are all over the place. I've had more consistent results with some other bullets. I try to be consistent, firm but not too firm, give it a couple taps. I got a few clumps of measurements, but the SD on 30 measurements was .02, if I remember right, and the ES was 67 thousandths! I didn't try burning incense or chanting mantras, but what's the frigging secret for getting repeatable readings with this thing? It must work or people wouldn't have used it all these years. I'm ready to put it away and try Erik Cortina's "Jam Method".

I have mostly custom rifles and the OAL guage has always been fairly consistent, well one of my 6.5-284s had to be rebarreled, brand new Benchmark barrel was used, everything I put through it showed signs of pressure ? Not only that I had a hell of a time getting a consistent measurement with the OAL guage, I knew just from that something was up with the chambering, sure enough back to the gunsmith he found all kinds of strange scoring from the reamer, he rechamebered with a new Manson Reamer and poof all fixed.

So I'm going to suggest it's a rough chamber job, maybe a very old reamer ?
 
I have found out several things using the Horandy( old Stony point)Bullet comparator.
1) Start with a clean bore and rifle chamber ( you'd be surprised at how many people do not clean their rifles before using this tool)

2) Important: I recommend not using the Horandy generic all in one case , but rather after fire forming your own case drill your case head through using either a (Letter L or 19/64") and tap for a 5/16" X 36 TPI thread. ( how to directions can be found on the internet )
The Horandy generic case will not fit your rifle's chamber exactly and may cause problems resulting in erratic measurements. ( If using the Horandy case look at the cases shoulder and see if it is showing rub marks. This is showing that there is rub and a potential for error)

Now that you have a fire formed case sized exclusively for that rifles chamber you can proceed.
3) Take a bullet sample and make certain that it will easily slide into your shell case. If not I suggest the use of the Sinclair Gen 2 expander die and the correct caliber specific mandrel.
3) When seating your bullet up against the rifles lands I use a small dowel placed from the muzzles end to make contact with the bullet tip. After contact make certain that the tools brass thumb screw is secured and push the entire assembly tool case and bullet from your rifle. If done correctly your bullet will stay seated in your shell case.
4) Make certain that you are using the correct Horandy bullet comparator insert.
Note: There is nothing in the instructions stating that you need to use the stated insert is is only a suggestion based on a starting point.
If your bullets ojive does not engage this insert quite right then find an insert with a better fit.
5) Now what I do is take an average of three different readings trying to be consistent with my readings and call it done.
I know that you may experience some level of frustration but the key word here is consistency.
(As suggested the anvil base used with a quality digital set of calipers will help)
Just relax stay calm and please try my suggestions, as I think that they may help .
I use this method also. I usually push the bullet back and forth a couple of times from both ends before I tighten the set screw. It helps to straighten and center the bullet in the lands. I get much more consistent measurements. But I have found using the Wheeler method with the Sharpie that with the HOALG you are actually getting a.005-.010 jam depending on how much pressure you put on the rod pushing the bullet into the lands. It doesn't take much pressure when inserting a tapered object in to a tapered hole.
 
Last edited:
That actually sounds much easier than jacking with the hornady tool
Finnlander method.jpg

Here is another take on the above.
Block 1 sets bolt face to muzzle without block 2 on the rod.
Block 2 is then reinstalled and rod is brought up to bullet tip where it gently is pushed up to the lands with a second dowel (wood/plastic).
The block is machined exactly to 1.000".
The measurement between the blocks + 1.000 is the COAL.
Subtract the comparator measurement of bullet ogive to base from bullet length to arrive at your CBTO.
After developing your system of doing this it is fairly fast & repeatable.
Frankfort Arsenal makes a similar "plastic" version but it is too flimsy in my humble opinion.
Finnlander method.jpg
 
If the accurate length is .010 (actual) into the lands, what does it matter if it is referred to as .005 or .015? The name you call it is irrelevant. Same with any measure off the lands, if your .020 off is actually .010 off, what does it matter? The precision comes in consistency you apply in adjusting from whatever length you started from.
I would agree for most purposes, this is the logic I use on my rifles. Even if you're using it to measure throat erosion the relative change in the datum point is what matters, not the absolute value of the measurement. None of my chambers are nice enough to need any more than that. If I had a custom chamber I would probably use another method to more accurately determine the absolute measurement, but I don't, so I don't see a need to change what I do.

I took 24 measurements (just what I did, don't remember why I did 24) on a factory 243 Win chamber last week, only one measurement was more than .001" off the mean, median, AND mode of 2.300". One outlier was removed, it was a full .010" off the average and was probably the result of me setting the rod to hold the bullet too deep in the case when inserted, so it came out of the case crooked. Concentricity matters in loaded rounds, I figure it matters in measuring the lands also, so I try to minimize the impact on the data by using an identical starting point each measurement.
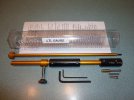
My procedure is:
  • Put the bullet into the modified case
  • Put it into my calipers
  • Push the bullet back out to the BTO measurement of book COL, and tighten the rod down
  • Insert to chamber, loosen rod, push bullet forward, tighten rod, remove
  • Measure and record
  • Reset to the book measurement to have a consistent starting point
  • Repeat a lot
I think part of my consistency is I jam the bullet in pretty hard, and still start loading at .010" off that jam. Normally I'm shorter than book COL by the time I'm at the shortest Berger recommended 0.130" off the lands testing point. Notable exception is my 300 RUM, which would be at 0.230" off the lands to get the 210 VLD to SAAMI max COL of 3.600". That just ain't happening.

I zero the calipers out and only measure how many thousands above or below an arbitrary point. To continue the 243 example, I measure to 2.300", zero the caliper, then record +1, +1, -1, -2, etc. Easier than writing down 2.301, 2.299, 2.300 each time. That's also how I check loaded rounds when they come out of the press after seating. Zero to desired BTO, and look for a variance. I use Starret dial calipers, not an electronic.
 
II finally realized it is a bit more art than science using the Hornady OAL Gauge. I sent a once-fired case to Hornady and had it drilled and tapped, and that eliminated some of my measurement difference. I then measured about 20 individual bullets to see how they were off from each other. In my case, they were all extremely consistent. I then proceeded to take measurements. Once I figured out where the "sticking" point was as far as into the lands (the bullet did not come out when the tool was removed), I used wooden dowel to measure from the crown to the bullet tip. I have also used the Frankford Arsenal tool for this. I also had a second point to compare and they were consistent. Finally. I take a pair of measurements, and use a Hornady and then a Sinclair comparator to get a pair of readings and after 10-20, depending on how anal I feel that day, I take an average. I was able to get very consistent readings. Time consuming, PITA, yes, but hey – isn't that part of the fun of reloading?
 
Have you tried the Sinclair tool? Looks like a quality product.
I use the Hornady tool with great results and the measurements have been repeatable for me. I have noticed certain projectiles will deliver different measurements even from the same box. Barnes were the worst! I only use Berger's to measure now as they have been the most consistent for me. I stay light on my fingertips and use the same amount of pressure every time. There are a lot of variables so your process needs to be practiced. Hope this helps. Don't give up yet. Continue to practice and use soft hands.
 
Even if you're using it to measure throat erosion the relative change in the datum point is what matters, not the absolute value of the measurement.
Let me give you a couple scenarios about doing it this way. If you wanna do bergers seating depth test and you dont know were your at in relation to the lands how do you start at .030 off.
I start at .010 off when I wanna do a seating depth test I wanna go 1 direction not wonder do I need to go out or in takes alot less rounds down the barrel than guessing. Its my way and reasons but it may not be somebody elses.
 
Let me give you a couple scenarios about doing it this way. If you wanna do bergers seating depth test and you dont know were your at in relation to the lands how do you start at .030 off.
It doesn't matter, even Berger concedes that the datums for thier method are arbitrary. They are giving you general areas to try. That is the whole reason the steps are .040 apart.

Do you really believe there is anything magic about .010 vs .007 or .013?
 
Dog Rocket,
I'm not sure LSherm was saying anything other than he likes to start about .010 off and work out. Yes, where you start isn't exact but a close guess based on a average of base to ojive measurements.
 
Warning! This thread is more than 4 years ago old.
It's likely that no further discussion is required, in which case we recommend starting a new thread. If however you feel your response is required you can still do so.

Recent Posts

Top