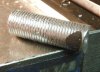
I have some half inch diameter aluminum rod around and want to make some pillars. My question is in relation to the fit up of the top of the pillars to the action.
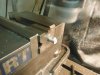
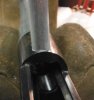
I've heard that contoured pillars leave a think layer of epoxy between the action and pillar which can break out at a later date or with larger recoiling guns. Solution: lap the top of pillar to action.
I've also read that flat topped pillars allow more epoxy between the action and pillar minimizing breakout effects.
This got me thinking that I could machine the top of the pillar with a taper to meet the action or thin the walls of the pillar to about 0.03" for the top 0.1" basically creating a thin walled integral washer.
Any thoughts?
I've seen washers being sold online that are suppose to do the same thing once installed on the top of the pillars.