How To Camouflage Paint Your Rifle
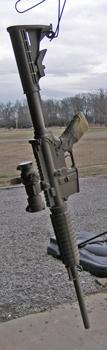
Make sure that you have shaken the paint up very well before starting to paint. You are going to want to start your painting with a very light coat of paint and use small short bursts of spray while avoiding spraying on one area for too long. You do not want to see a lot of shine as you are painting as this indicates that you are spraying too heavily and you may get runs in your paint. I will go back and forth to different parts of the gun and at various angles until I have completely colored the gun. I will then allow the paint to dry for a while and then I will go over the gun and apply another coat of the same color to complete the base coat. I will allow this coat to dry for about a half an hour before touching the gun. You can see the gun after the Khaki base coat in the picture below.
Once we have the base coat on then we are ready to apply the second color to the gun. We will use a darker color to contrast the base coat. I am using the same camo Krylon paint, but this time I am using Olive Drab Green. I will not spray this coat onto the gun, but I will be using a sponge brush that I have torn small chunks out of the tip to allow me to dapple the paint color to the gun.
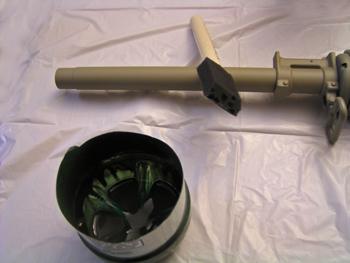
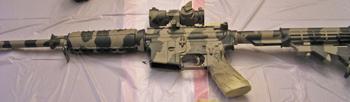
For this coat I like to have slightly less than one half of the gun's surface covered by this second color and I simply use irregular blobs of paint at various locations on the surface. I will cut the bottom out of a plastic soda bottle and use that as my paint cup by simply spraying the paint into the "cup" until I have an amount in the bottom as liquid. Do not use regular plastic drinking cups or styrofoam cups or the solvent in the paint will eat a hole in it and you will have a mess on your hands and for that matter your feet. When you are done your gun would look similar to the picture below.
<Previous | Home | Next Page >
Once we have the base coat on then we are ready to apply the second color to the gun. We will use a darker color to contrast the base coat. I am using the same camo Krylon paint, but this time I am using Olive Drab Green. I will not spray this coat onto the gun, but I will be using a sponge brush that I have torn small chunks out of the tip to allow me to dapple the paint color to the gun.
For this coat I like to have slightly less than one half of the gun's surface covered by this second color and I simply use irregular blobs of paint at various locations on the surface. I will cut the bottom out of a plastic soda bottle and use that as my paint cup by simply spraying the paint into the "cup" until I have an amount in the bottom as liquid. Do not use regular plastic drinking cups or styrofoam cups or the solvent in the paint will eat a hole in it and you will have a mess on your hands and for that matter your feet. When you are done your gun would look similar to the picture below.
<Previous | Home | Next Page >