I have a 7MM Browning A-Bolt and I want to install 2 aluminum pillars and then bed the action. The problem I have is I am affraid by drilling the hole to install the front pillar in place will open up in the slot where lug fits in. Is anyone of you ever install pillars on a Browning A-Bolt and if you had that problem how did you solve it? Maybe it is not a problem. The front bolt holding the action in the stock is very close to the recoil lug. This is not like a 700 Remington action. Thanks
You are using an out of date browser. It may not display this or other websites correctly.
You should upgrade or use an alternative browser.
You should upgrade or use an alternative browser.
Pillar intallation on a Browing A-Bolt
- Thread starter relabbe
- Start date
Jon A
Well-Known Member
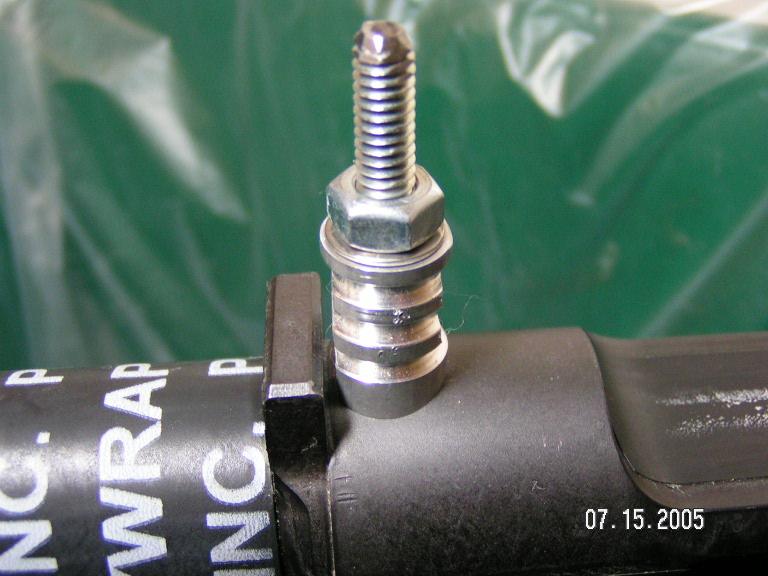
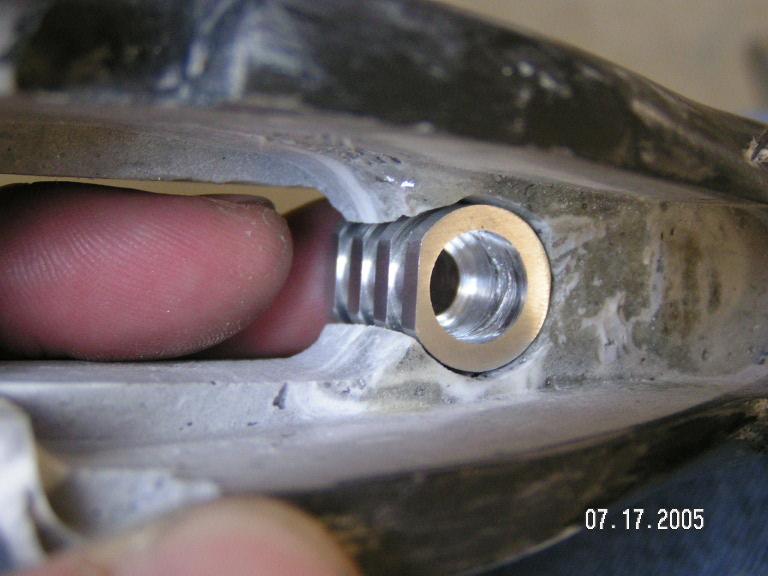
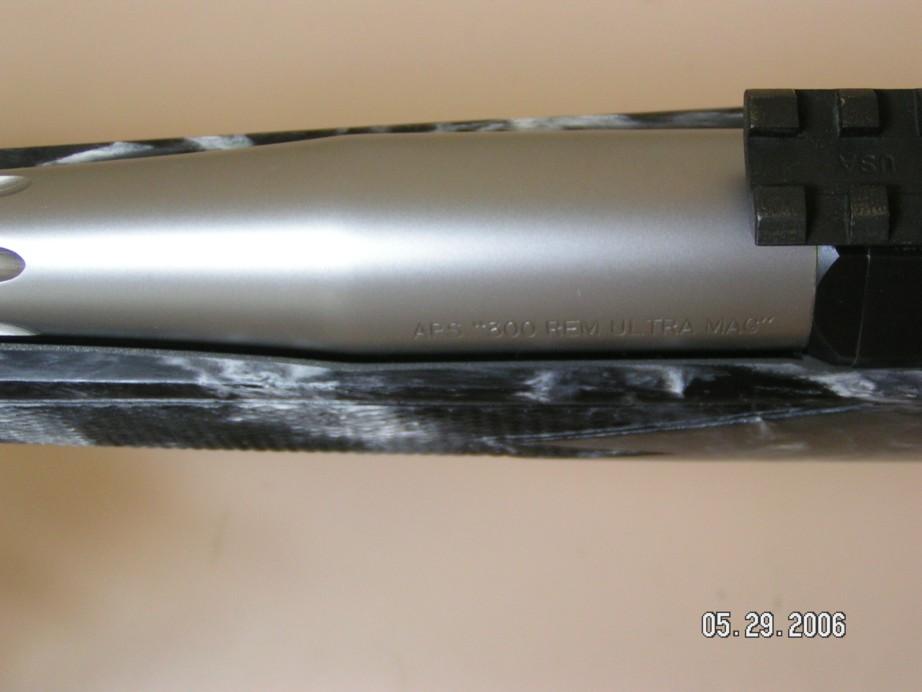
Yes, the hole will pretty much cut into the lug recess. I fixed this by grinding a flat area on the pillar about 1/2 way down (however deep the lug was) and the whole area was filled with bedding (so there's no stock left between the pillar and the recoil lug directly in front of it, just bedding):
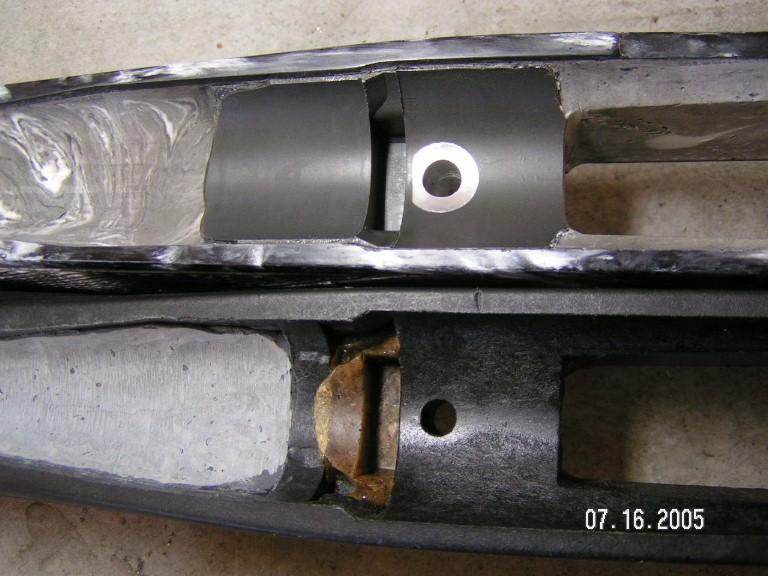
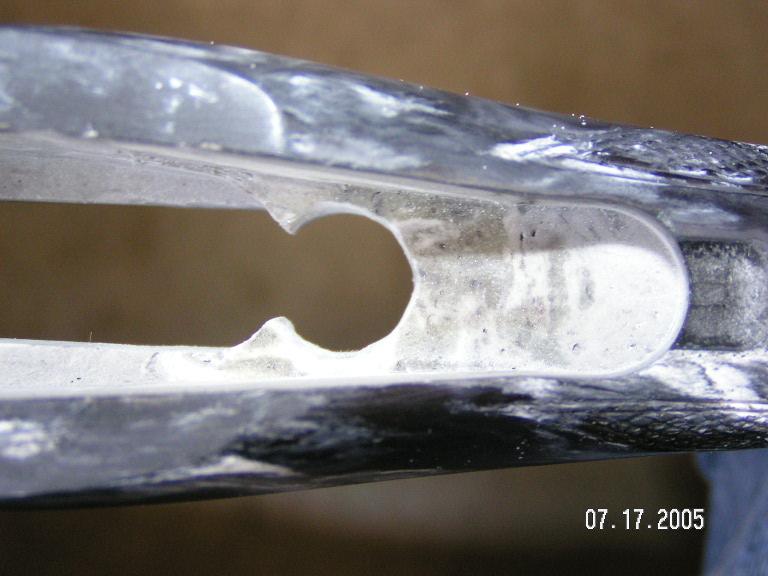
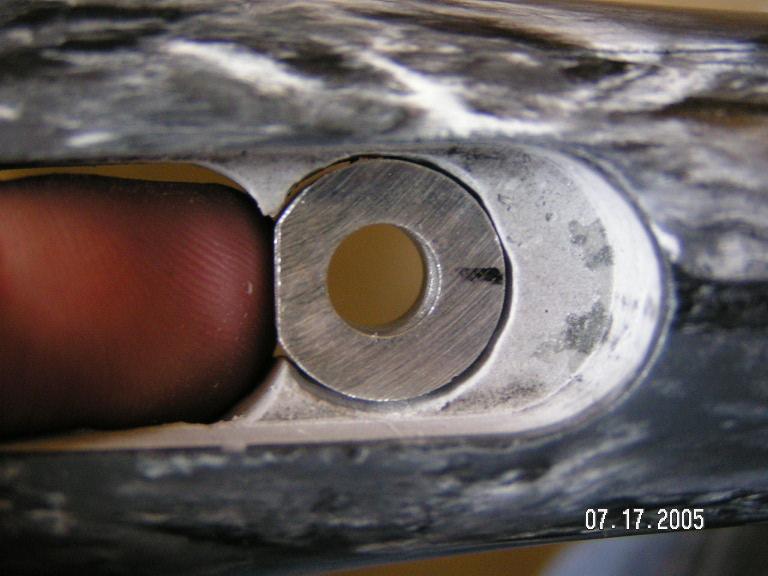
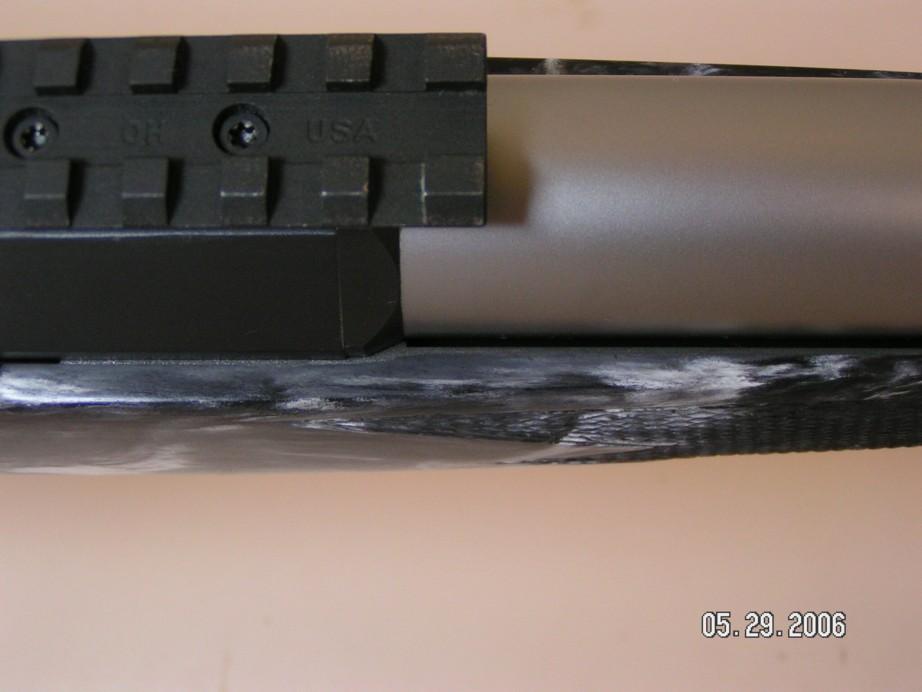
I've been meaning to upload more pics showing the process in stages, maybe I'll be able to this weekend. You also need to flatten the rear pillar or it will interfere with the trigger, or at least mine would have:
I'll try and throw up some more pics. Yes, taking the drill to the stock (especially a brand new McMillan!) makes you swallow hard a couple of times...but it can be done.
Thanks Jon A, I am amaze to see your work. I guess this is the best way to go. I just receive a McMillan stock that I want to glass bed with pillars and before drilling and messing it up I want to know how to achieve the best result.
Did you use a drill or a dremmel to enlarge the holes? How did you do them?
If you have a picture (view form the top) of the back (at the tang) I would be very interested to see your bedding.
Great Help... and very appreciate. Big thanks
Did you use a drill or a dremmel to enlarge the holes? How did you do them?
If you have a picture (view form the top) of the back (at the tang) I would be very interested to see your bedding.
Great Help... and very appreciate. Big thanks
For what it's worth, you really don't need to pillar bed a receiver in a McMillan stock. They have hard enough material in the action area to hold receivers very well even when stock screws are torqued to 60 inch-pounds.
Pillar bedding had to be done on the first synthetic stocks 'cause they were too soft to resist stock screw torquing. That got fixed when harder material was put in the receiver area. But I know most folks don't believe this.
Pillar bedding had to be done on the first synthetic stocks 'cause they were too soft to resist stock screw torquing. That got fixed when harder material was put in the receiver area. But I know most folks don't believe this.
Jon A
Well-Known Member
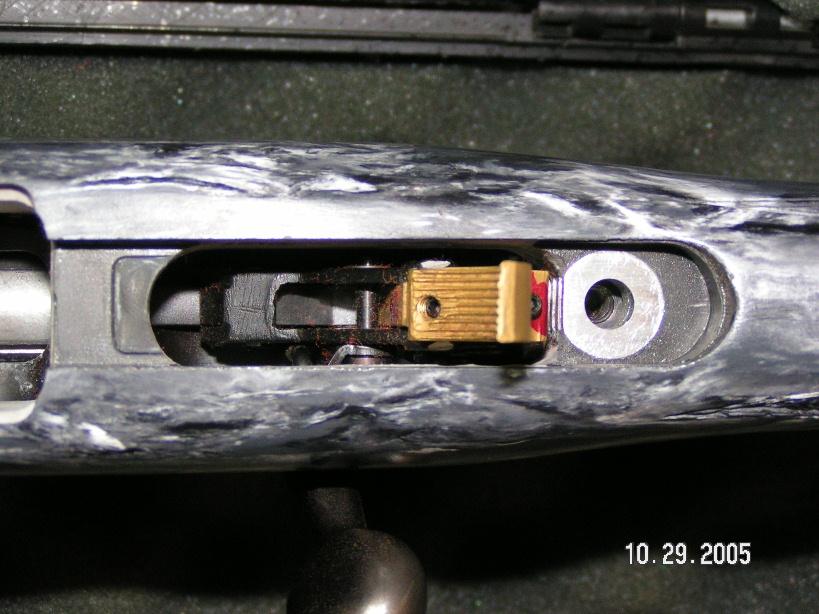
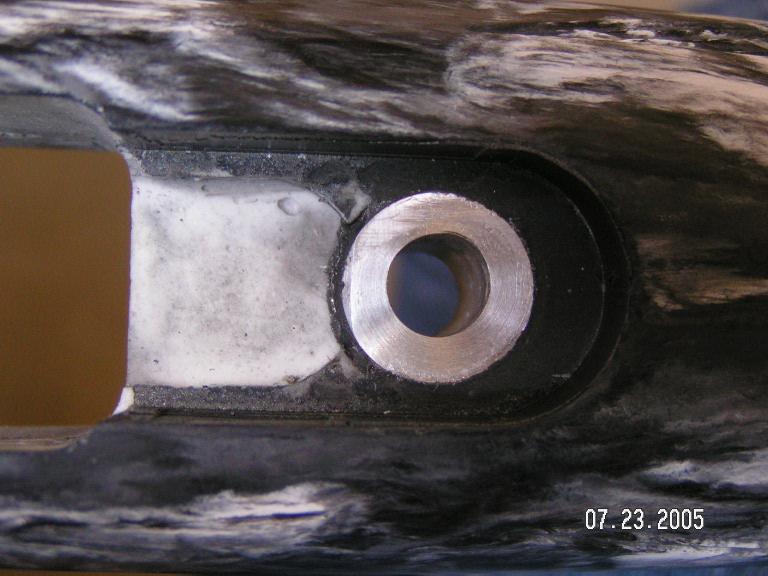
That's probably the "ugliest" location of the whole bedding job. But I was going for function, not beauty. /ubbthreads/images/graemlins/wink.gif
As you can see, the pillar needs to be counterbored at the top as well to clear the nut on the trigger group. While I know the 80% or so the pillar is surrounded in bedding should be more than strong enough, I like to overdo things. So I also removed material aft of the pillar and bedded a pad there so the action wouldn't be held entirely by the pillar--hard knocks and such could stress it and test its strength. So the way I did it there's still a nicely bedded "stock sandwich" between the trigger guard and the action so any worries about the pillar breaking from the stock under extreme use are gone. You won't fail it unless you break the stock in half...but the pillar still serves its function of allowing you to torque the action exactly the same way every time and not losing that torque due to the stock deforming. I had actually bedded this thing without the pillars first, and while the McMillan stock is certainly much stiffer when torquing the screws than any other stock I've had...it's not as good as with pillars. They're just a more solid platform to torque things to.
I'll upload more pics soon.
Oh, I used a hand drill for the pillar holes, etc. I also used it with a sanding disc when fine-tuning the length/angle of the pillars at the ends. Everything I did was with a simple hand drill, grinder, dremel and a bunch of hand sanding. I'm no machinist.... /ubbthreads/images/graemlins/frown.gif
Thanks a lot Jon A, /ubbthreads/images/graemlins/laugh.gif I will be very happy to get the same result as you did. This information is very valuable to me and I have got no doubt to whom plans to pillar bed his A-Bolt.
I am not sure if I have to bed the stock area between the magazine and the trigger or live it float. Did you bed it?
By the way where did you get your pillars. I bought mine on E-Bay but I think there might be a little smaller in diameter. I might want to get your style.
Thanks again for sharing your knowledge and keep on the good work. /ubbthreads/images/graemlins/cool.gif
Jon A
Well-Known Member
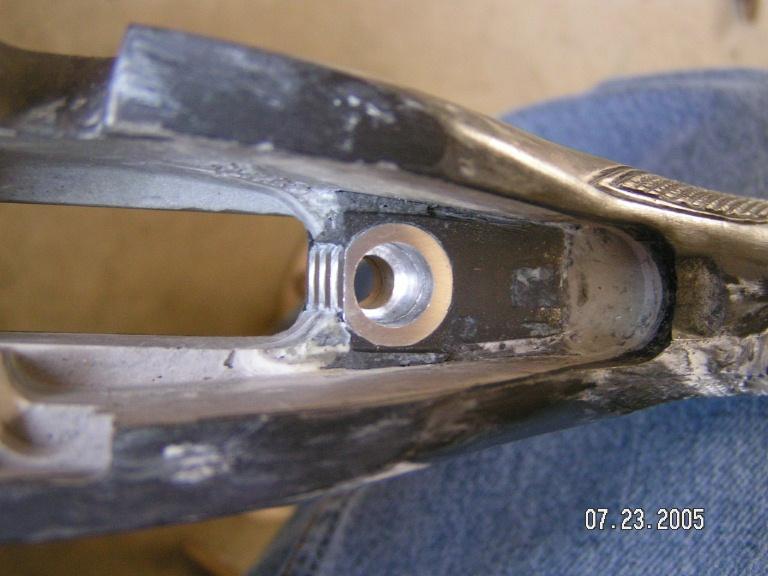
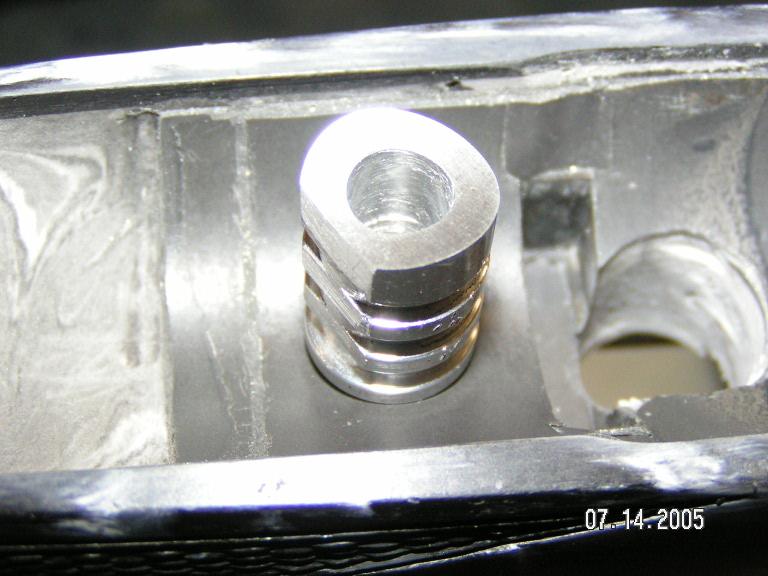
I used THESE PILLARS. Of course they need modifications to fit. They need to be shortened, the rear needs to be counterbored, the front one needs to be reamed as the front action screw is too big to fit through.... And of course the radius is too small to match the reciever for the front one. Some use flat topped pillars and bed on top of them...I'm sure that works fine and would have been much easier...I sanded it to fit by hand. /ubbthreads/images/graemlins/shocked.gif Before I was done I was sure I was completely nuts.
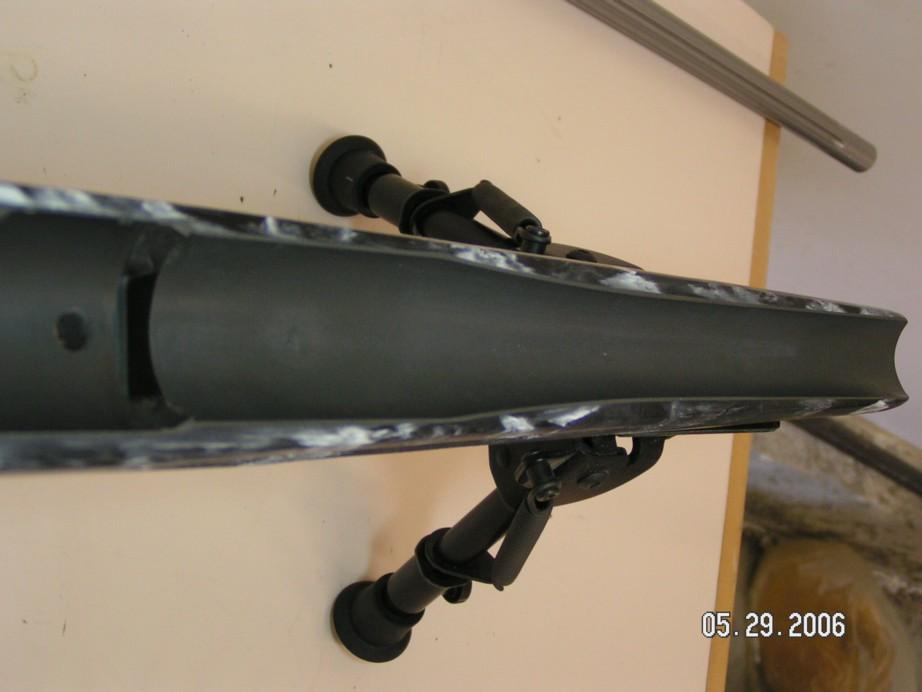
By between the magazine and trigger are you talking about where the front of the trigger guard rests in my second pic? If so, I would say in most cases that shouldn't be needed if everything functions properly with it resting against the stock. But something you'll want to do before you mix any bedding compound is check function (magazine fit, feeding, etc) a bunch of times as you get close to the pillars' final shapes. Their depth and the angles of their bottoms locates the magazine relative to the action. If you hose it up it won't feed, the floorplate might not close, etc.
In my case with the bigger 300 RUM magazine, I found the best feeding happened when the trigger guard was slightly off the stock inletting. So I had to angle the bottom of the rear pillar such that it held the guard in that position. And in this case, no I don't think you want the front of the guard floating. Any sort of blow from rough use on it will cantilever on the rear screw and you risk breaking something. I wanted it to solidly rest on something. But putting the bedding there is the easy part and can be done after the main bedding job. The hard part is getting the angle on the rear pillar perfect so it places the trigger guard exactly where you want it.
Even without that problem it's sort of "nice" to have the trigger guard "snap" into place solidly when you put it on and not wiggle around as you tighten the screw. The McMillan inletting was enough wider than the guard there that there was some side to side play. That's your floorplate latch and if it's cocked to one side or the other it won't snap closed as smoothly. When I put in the bedding, I located the trigger guard in the inletting exactly where it lined up with the floorplate the best with a couple of really narrow strips of tape and let bedding fill in the sides where the tape wasn't. So now it only goes on centered in the bedding and there's no lateral play. This also makes snapping the floorplate open/closed feel a lot more solid.
As you can see, it's quite a job. If you want to tackle it, that's great. But keep in mind you can always send the works to McMillan if you don't want to take it on.
Thanks for the advices Jon A. I ordered myself a pilot bit from Brownells and waiting to receive it to begin the project. I have the pillars and the bedding compound.
I know that it might cost me about half the price of getting it done by McMillan (160.00 $)but I would have to sent my gun and the stock accross the border and it is too much trouble. I like better to do the job myself and having the satisfaction of doing a good job just like you did. It is Priceless...
The area that I am still not sure if it needs bedding is the area of the action between the magazine and the trigger assembly. I am sorry that I did not explain myself correctly and you thought I was talking about the area against the trigger plate. Nevertheless these comments were also very valuable.
Thanks again for you input.
Jon A
Well-Known Member
OK, so you're basically wondering if you need to bed the whole action vs. just the front and the rear. To tell you the truth, I doubt if it matters all that much one way or the other. I elected not to do it. Not only was it easier but I felt there was less chance of stock flexing messing things up when the screws are torqued but I very well may be all wet there. I know some strive for the action completely resting on only the pillars for similar reasons but there are more ways to skin a cat I guess.
A guy posted pics of his McMillan job HERE and it looks like they did the whole thing...but you never know where they put some tape to make gaps. It also looks like they made life easier by using smaller diameter pillars. But those pics should give you something else to look at. I'm still working on resizing and uploading a bunch more of my own if you'll bear with me. /ubbthreads/images/graemlins/wink.gif
A guy posted pics of his McMillan job HERE and it looks like they did the whole thing...but you never know where they put some tape to make gaps. It also looks like they made life easier by using smaller diameter pillars. But those pics should give you something else to look at. I'm still working on resizing and uploading a bunch more of my own if you'll bear with me. /ubbthreads/images/graemlins/wink.gif
Thanks Jon A, I guess I will do it the way you did. My pillars look to be the same as McMillan's. As you did, I will face the front pillar to leave more bedding between it and the recoil lug.
You sure did a better job than McMillan.
Thanks for all the help. : /ubbthreads/images/graemlins/wink.gif
You sure did a better job than McMillan.
Thanks for all the help. : /ubbthreads/images/graemlins/wink.gif
Jon A
Well-Known Member
Thanks. But had I been charging myself my hourly rate for all the time I spent doing this...that would have been one big bill! I honestly don't know how McMillan and other good Smiths can do as good a job as they do for the prices they charge. I know if I tried to do it for a living I'd go broke!
Anyway, here are some more pics. Sorry it took so long and I really thought I had more...well I did have more--just not many that were any good. Here's the rest:

Anyway, here are some more pics. Sorry it took so long and I really thought I had more...well I did have more--just not many that were any good. Here's the rest:
Jon A
Well-Known Member
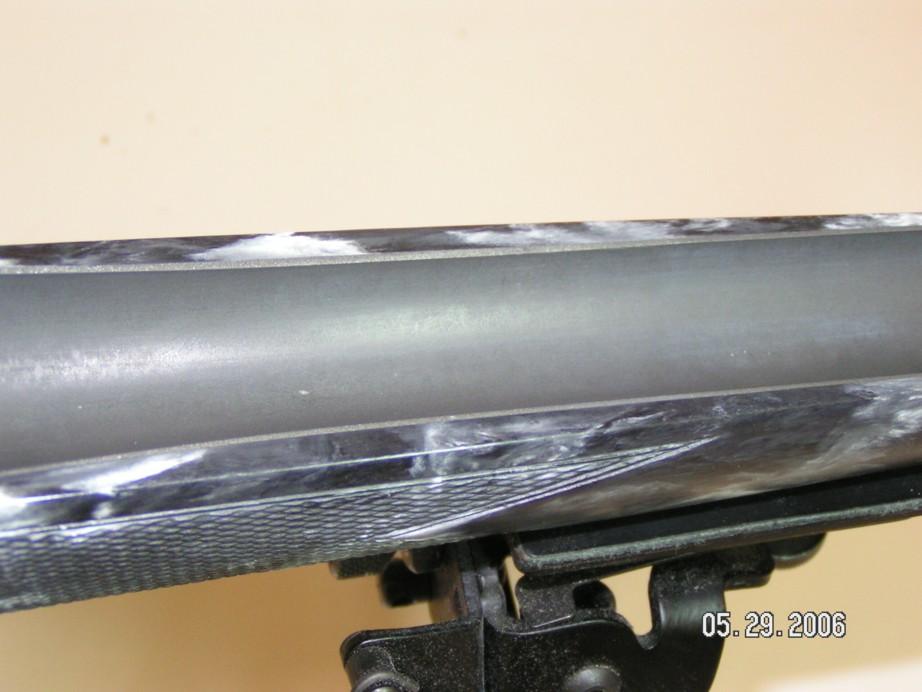
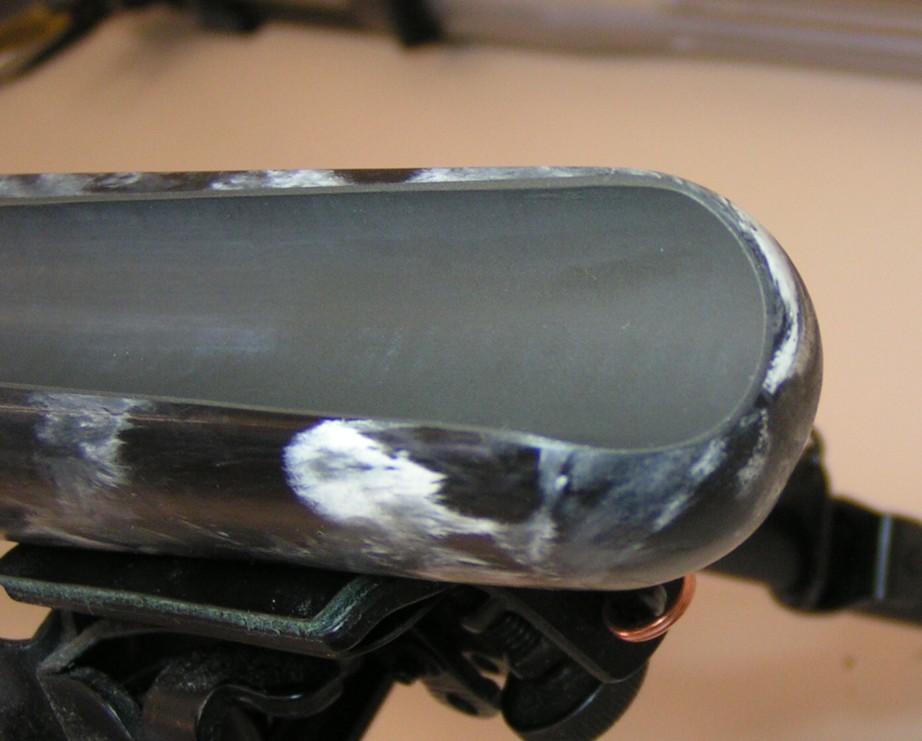
Now that I've got the new tube, the next stage is complete for better or worse:
Sorry that's sort of out of focus, but I was sick of the camera by that time. As you can see, I ended up skimming over the pillar this time.

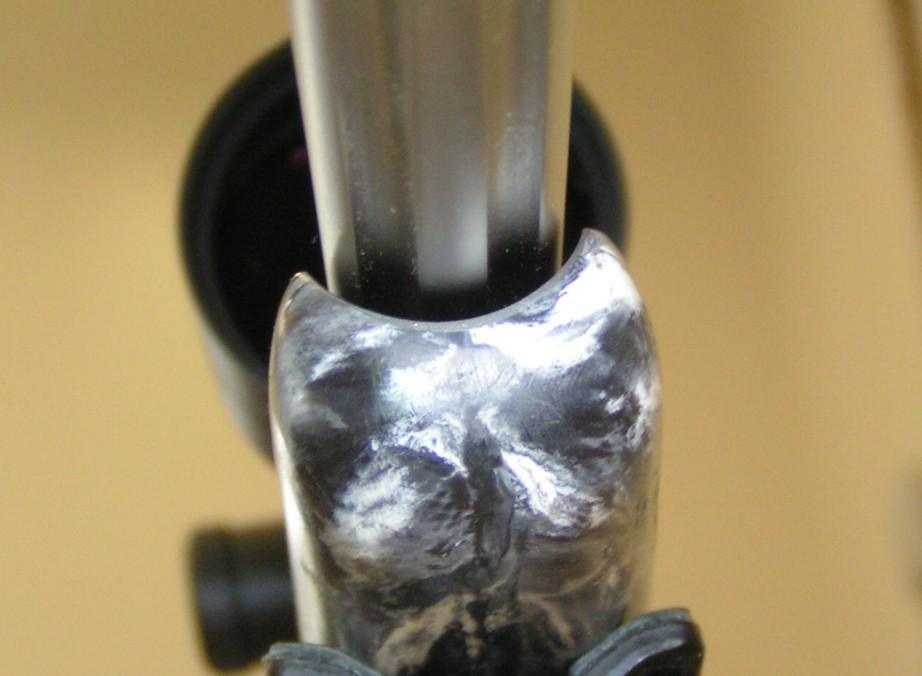
Just learning as I go....
Sorry that's sort of out of focus, but I was sick of the camera by that time. As you can see, I ended up skimming over the pillar this time.
Just learning as I go....
James Jones
Well-Known Member
- Joined
- Jul 1, 2002
- Messages
- 2,854
Jon A , thats a hell of a good job , you should be proud of that job , its alot better than alot I've seen done by "smiths" that chargerd $150+
But like you said ,you took your time and did a good job , I think that guys that are trying to make a living doing it just do a fast job. typicaly they work but look kinda shabby
But like you said ,you took your time and did a good job , I think that guys that are trying to make a living doing it just do a fast job. typicaly they work but look kinda shabby
bandanabandit1
Member
- Joined
- Jul 22, 2012
- Messages
- 6
I apologize that I am posting in an old thread but this is really one of the few posts I have found about bedding an A-Bolt. Anyway, I am planning on doing my first pillar bedding job on an aftermarket stock and I have a few questions if someone could help me with;
Did you notice a substantial increase in accuracy?
Is there any model-specific pillars I have to use for the A-Bolt or can any type work? (I know, stupid question)
Is torque that big of a deal as I have been hearing? Can I expect a noticable difference in accuracy if I dont tighten the action screws to the same torque?
Should I bed the entire action or just around the front of the action and around the tang area?
Thanks in advance for helping me out!!