top predator
Well-Known Member
Earlier this fall, my brother in law wanted to have his Marlin 882 .22 mag played with a little, so I figured I'd start with the trigger, doing the bic pen spring trick. I didn't want to go too low on the poundage as my nephew may be handling it too and I wanted to err on the side of safety. started off with an over 7lb pull, ended up with 3lb.
When working with any firearm, make sure it is unloaded. Chamber empty, no magazine.
First, what I call spring #1 and spring #2
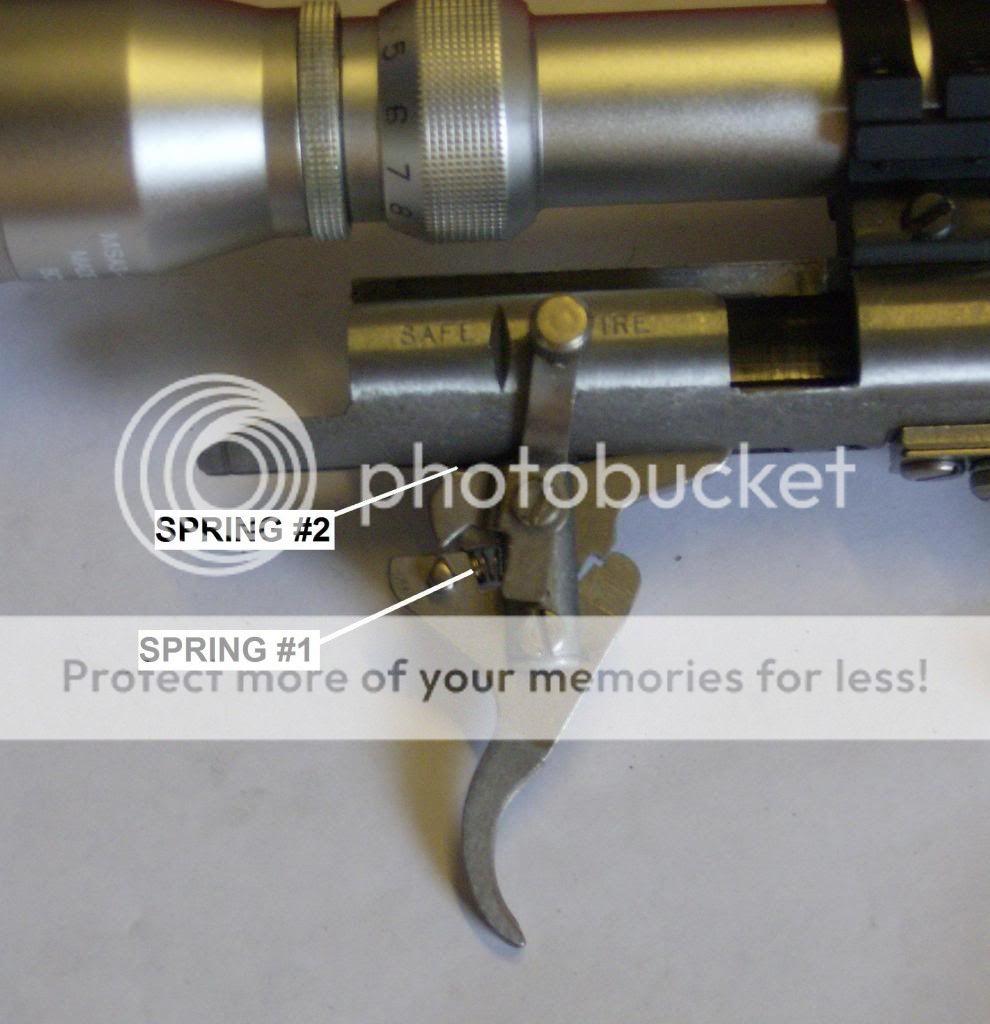
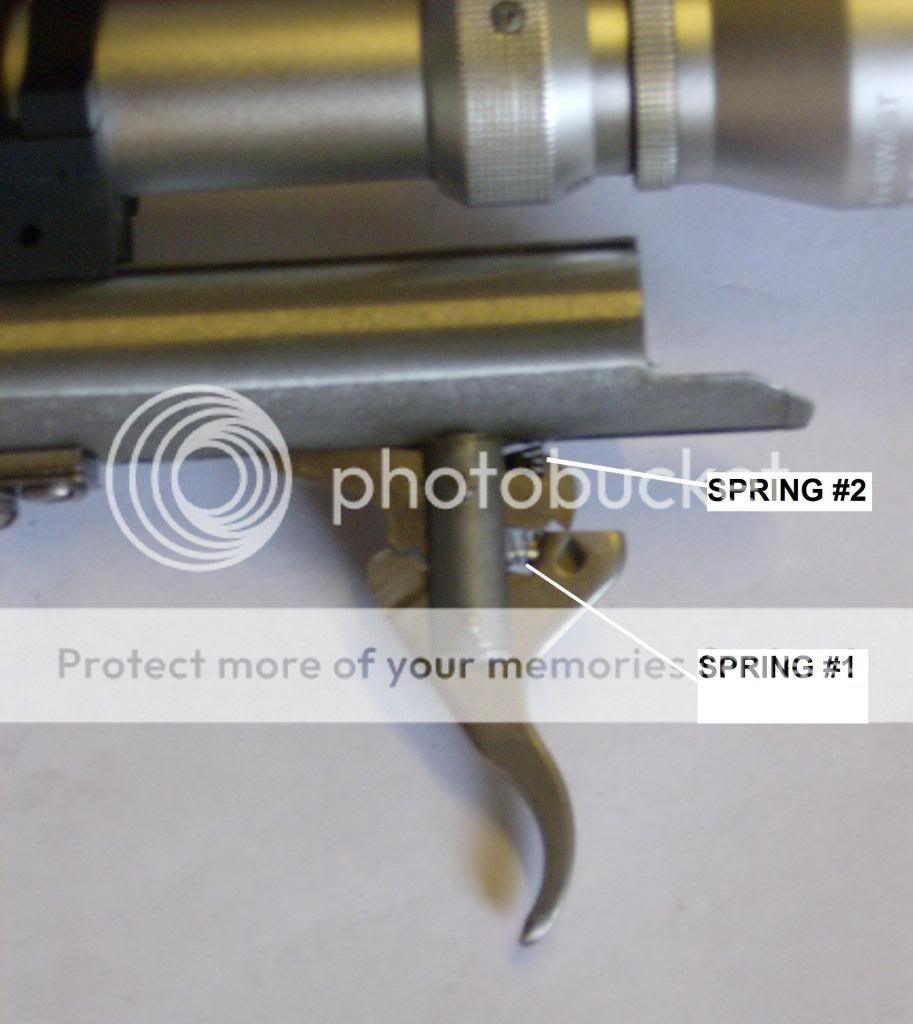
I found out that spring #2 was not the one to mess with, as it didn't do much for trigger pull, and actually created slam fires (on an empty chamber) and actually increased creep when replaced. Spring #1 is the one to mess with, and I replaced this one with the bic pen spring. I clipped the spring coil 1/4 at a time to where I felt it was safe enough for a junior hunter to use, but light enough to be more effective than the stock trigger pull.
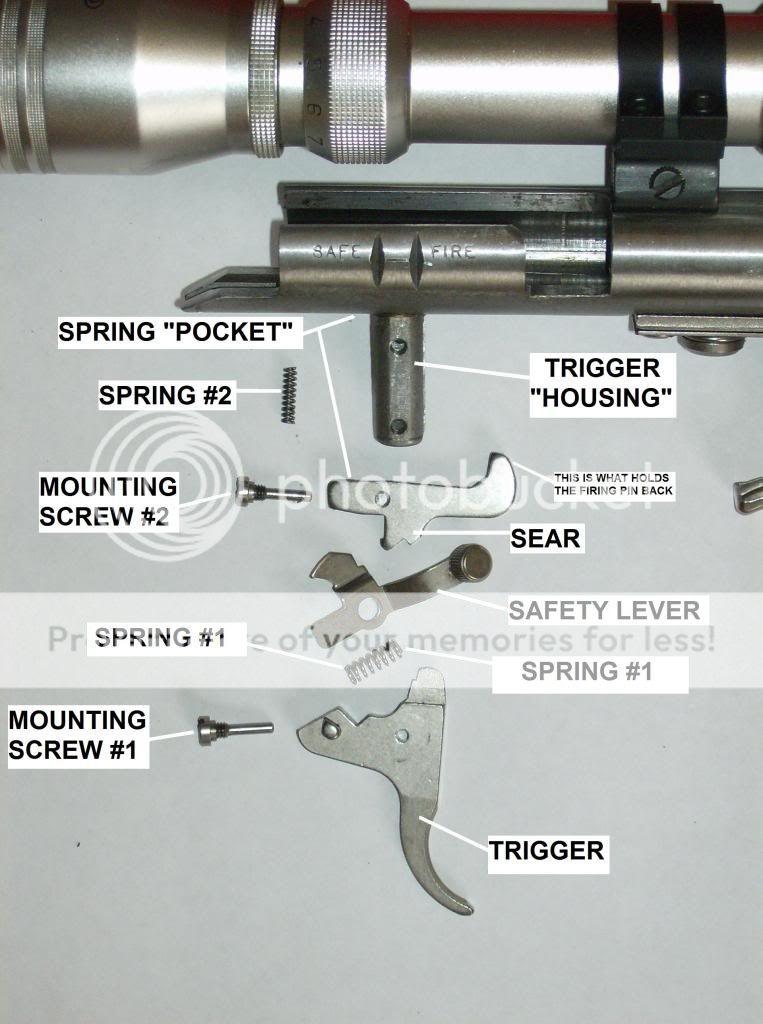
Taking the trigger group was easy, just unscrew the 2 slotted screws that hold everything together. Toward the back side of the trigger group there is a spring that sits in a hole (or pocket), make sure this spring (#2) doesn't go flying out when dismantling.
You can also trim the coils on spring #1, but I opted to go with the bic pen spring and keep the original as is.
Step 1. Make sure rifle is unloaded.
Step 2. Remove the bolt.
Step 3. Remove action barrel from stock.
Step 4. Trigger group disassembly:
a) remove mounting screw #1
b) remove saftey lever
c) remove trigger (don't lose spring #1)
d) remove spring #1 (it'll just fall out, not attached or retained by anything other than compression of the trigger and sear bodies)
e) remove mounting screw #2
f) slide the sear body down (don't lose spring #2)
g) remove spring #2 from the pocket / hole in the receiver
Step 4. Place everything neatly as you removed it so as not to confuse what goes where in the sequence. Even draw yourself a diagram or take a picture to make reassembly easier if you must.
Reassembly is in reverse order, make sure the springs seat correctly in either the spring #2 pocket or spring #1 flat against the trigger body and sear body. Don't overtighten the mounting srews as it'll pinch things up.
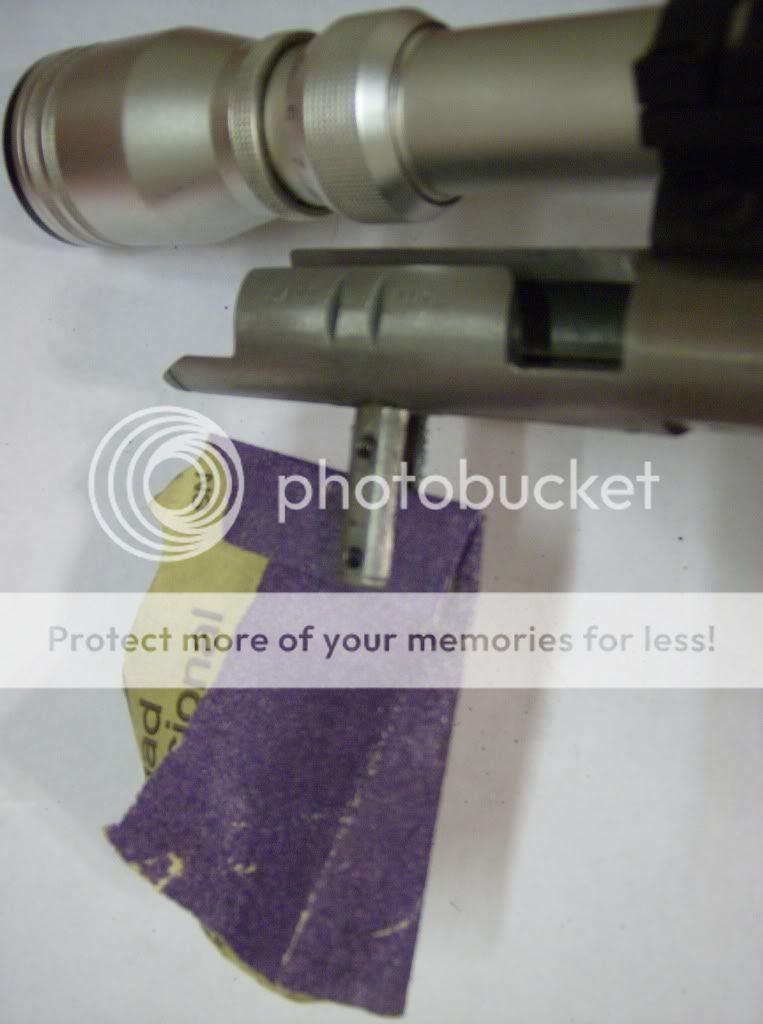
I also like to lightly sand the inside of the trigger housing / post, the mating surfaces of the sear / trigger body, and where the sear body meets the bolt. I also like to smoothen the sides of the trigger / sear bodies, and the slot where the sear body "pokes" through the receiver.
Once the trigger group is back together, reassemble the receiver / barrel back to the stock. Insert the bolt. Work the action forceably; don't be shy, TRY to make it slam fire. It's a nice little safety test. Speaking of the safety, make sure it engages. Pull on the trigger with some might to make sure it holds. With some protective padding on a hard surface, "drop with care" the butt of the unloaded but cocked rifle from anywhere between 12 and 24 inches. With and without the safety on. Try working the action some more.
The whole process takes an hour or less and only costs the price of a bic pen. You can trim more coils off until the trigger feels just right, and operates in a safe fashion. There's no way of saying how many coils to go with as those cheap bic springs are just that - cheap springs. But 1/4 coil at a time will not get you too far ahead of yourself. Alittle trial and error is involved, have a few pens on hand.
Of course this modification doesn't take the place of a quality replacement adjustable trigger, but does improve the stock trigger of the Marlin 882, 925, 25, and similiar trigger groups not equipped with the Pro-Fire trigger.
When working with any firearm, make sure it is unloaded. Chamber empty, no magazine.
First, what I call spring #1 and spring #2
I found out that spring #2 was not the one to mess with, as it didn't do much for trigger pull, and actually created slam fires (on an empty chamber) and actually increased creep when replaced. Spring #1 is the one to mess with, and I replaced this one with the bic pen spring. I clipped the spring coil 1/4 at a time to where I felt it was safe enough for a junior hunter to use, but light enough to be more effective than the stock trigger pull.
Taking the trigger group was easy, just unscrew the 2 slotted screws that hold everything together. Toward the back side of the trigger group there is a spring that sits in a hole (or pocket), make sure this spring (#2) doesn't go flying out when dismantling.
You can also trim the coils on spring #1, but I opted to go with the bic pen spring and keep the original as is.
Step 1. Make sure rifle is unloaded.
Step 2. Remove the bolt.
Step 3. Remove action barrel from stock.
Step 4. Trigger group disassembly:
a) remove mounting screw #1
b) remove saftey lever
c) remove trigger (don't lose spring #1)
d) remove spring #1 (it'll just fall out, not attached or retained by anything other than compression of the trigger and sear bodies)
e) remove mounting screw #2
f) slide the sear body down (don't lose spring #2)
g) remove spring #2 from the pocket / hole in the receiver
Step 4. Place everything neatly as you removed it so as not to confuse what goes where in the sequence. Even draw yourself a diagram or take a picture to make reassembly easier if you must.
Reassembly is in reverse order, make sure the springs seat correctly in either the spring #2 pocket or spring #1 flat against the trigger body and sear body. Don't overtighten the mounting srews as it'll pinch things up.
I also like to lightly sand the inside of the trigger housing / post, the mating surfaces of the sear / trigger body, and where the sear body meets the bolt. I also like to smoothen the sides of the trigger / sear bodies, and the slot where the sear body "pokes" through the receiver.
Once the trigger group is back together, reassemble the receiver / barrel back to the stock. Insert the bolt. Work the action forceably; don't be shy, TRY to make it slam fire. It's a nice little safety test. Speaking of the safety, make sure it engages. Pull on the trigger with some might to make sure it holds. With some protective padding on a hard surface, "drop with care" the butt of the unloaded but cocked rifle from anywhere between 12 and 24 inches. With and without the safety on. Try working the action some more.
The whole process takes an hour or less and only costs the price of a bic pen. You can trim more coils off until the trigger feels just right, and operates in a safe fashion. There's no way of saying how many coils to go with as those cheap bic springs are just that - cheap springs. But 1/4 coil at a time will not get you too far ahead of yourself. Alittle trial and error is involved, have a few pens on hand.
Of course this modification doesn't take the place of a quality replacement adjustable trigger, but does improve the stock trigger of the Marlin 882, 925, 25, and similiar trigger groups not equipped with the Pro-Fire trigger.