Trail Cameras
By Mark Carder
I'm sure we've all heard the old adage, "If a tree fell in the woods and no one was around, would it still make a sound?" Of course it would, but if no one was around how would you know? Following that same thought pattern, if the trophy of a lifetime passes by your stand and you're not there, how will you know? Use a trail camera! These devices are quite ingenious little sneaks when it comes to keeping tabs on an area you can't be in 24/7. I recently acquired a trail camera, and want to share some of my thoughts on the process of choosing one, their physical placement, and their entertainment value.
I now live in Texas, where about 96% of the land is privately owned. If you're a hunter moving to Texas, be prepared to enter into a lease agreement with a land owner in order to hunt. The whole lease agreement process is an ordeal worthy of an independent article, but it's not the focus here. I am on a lease with two friends and we have several stand locations around "our" property. We decided to place trail cameras out to see what passes by our stand sites. In trying to keep costs down on my lease budget, I began the quest for the most advanced yet economical trail camera I could find.
The first thing I can tell you is to decide on a set of requirements of what you absolutely must have in a trail camera to be happy with it. I already owned a handheld digital camera for snapping pictures of vacations, kids, special events, and the dog doing something stupid. I used some of the features of that existing camera as my starting point. The handheld camera takes 4 megapixel photos on its highest setting. For me, 4 megapixels provided plenty of detail when I pulled the pictures up on my computer. I figured I'm not going to be counting nose hairs on the deer, so I decided that 4 megapixels would be the base picture quality for my trail camera.
Next, I wanted a trail camera with infrared capability that could take pictures at night without a flash, for three reasons. First, we have feral hogs in Texas and they move at night most of the time, so I wanted to be able to see them. Secondly, when pressure is high and the moon is full, the big boys go nocturnal. And finally, a flash draws attention. I'm paranoid about thievery, so stealth makes me feel better. I also wanted date and time stamping and an SD card slot, figuring I would need lots of megabytes to hold the plethora of beasts who would be lining up to pass by my stand. I figured all that was simple enough, so I decided about fifty dollars should do me fine...right.
Once you've decided on your trail camera requirements, you're ready to go shopping, but be prepared for sensory overload. I think every hunting company out there makes some type of trail camera, and no two are alike in features. As I prepared for my shopping adventure, tingling with anticipation, I stopped off at my "library". While there I browsed through the many outdoor catalogs I tend to accumulate throughout the month. I was surprised to find each had an entire section of about 3-4 pages of trail cameras. After flushing and washing my hands, I sat down at the kitchen table with several of the catalogs and I used my chosen requirements to eliminate several trail cameras. Right off the bat, however, I had to increase my budget by a hundred dollars in order to get the infrared feature.
Next, I went feature by feature, circling some trail cameras and crossing out others. I discovered that I would be able to go up to 5 megapixels at no additional charge, and that I could even get video capability. I carefully narrowed the search to two different trail cameras. Both choices in hand, I went to the internet and read a few reviews from actual customers posted on the websites. The reviews helped to swing me towards one particular brand of trail camera, and the sale price sealed the deal. I won't bore you with a sales pitch and list every single feature, but suffice it to say I got all I wanted and even more stuff I probably won't use. After a few mouse clicks, my Stealth Camera Rouge IR was on its way. Now before you give me too much guff, yes, my camera is endorsed by Jim Shockey and, yes, I am a fan. However, selling the idea to the War Department (wife) was not hard because she is a fan, too.
Once the trail camera arrived I read the directions. Yes, I read them. Anticipating the camera's arrival, I had already bought the necessary SD card and batteries, so it only took about three minutes to set up and test. I was now ready to place my trail camera. Most of the trail cameras come with a mounting strap, and then you can buy all sorts of aftermarket mounting brackets. I settled on mounting the camera on a 4 by 4 fence post I had in the garage.
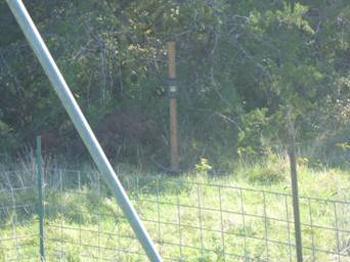
Fig 1. Camera before camouflage.
Using posthole diggers, I dug a 3 foot deep hole about 30 feet from my target area. Here are several considerations before you dig a hole or attach a camera to a tree: Avoid the sun. Both sunrise and sunset can blind your camera. Use a compass to position the camera angle out of the direct sunlight. And remember that your infrared capability has limits. My limit is 40 feet, so I placed my camera with a 10 foot "safety buffer" to catch anything that might wander in from a different angle. Since I had dug a hole, I tried to camouflage my fence post and camera, since animals do notice when things are different. Camouflaging the trail camera also made me feel better, considering my worries about thievery.
One feature that I liked was being able to set the trail camera to shoot three pictures in a row, and then wait a preset amount of time before shooting the next series. I set the follow-up time to only one minute, being afraid that I might miss some monster that would suddenly bolt through the area. I decided that I should have set it to four minutes. Why four minutes, you ask? Well, that is where the sheer entertainment value of the camera comes in.
I got some great pictures of cow eyeballs looking into the camera because it was new and exciting and cows are nosy. I also got pictures of an ugly feral hog that was white with brown, black, red and some other colored spots. We named him Patch, because he looked like he was wearing a patch work quilt. Patch had a bounty on him for being so ugly, and the pot grew weekly for the lucky guy to sausage ol' Patch.
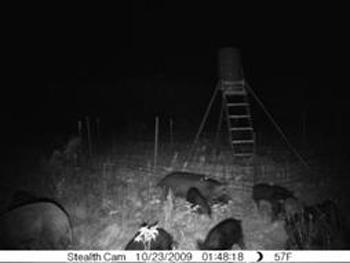
Bacon on the Hoof.
Lessons learned from my first season with a trail camera:
First, make sure that you carefully read the instructions on how to physically place the trail camera. I had only briefly read the instructions for suggested camera placement and thought I knew best. But I had actually watched multiple deer pass by and my trail camera completely missed them due to poor placement. I had paid too much attention to placing my precious trail camera up high, out of the sun, and away from thieves. After visiting other trail camera sites with tons of good photos of trophy animals, I began to notice one thing. Those pictures were taken on the same level as the animals.
I had placed my trail camera too high and at an angle, which limited the triggering range. The first thing to do is to set the camera on the same level as the animal you want to see, in a direction that best captures their avenues of approach. After that, consider keeping your trail camera out of the rising and setting sun for maximum game photos. Also, by getting in closer you can get a better look at the animals. I had set up my trail camera a little too far away.
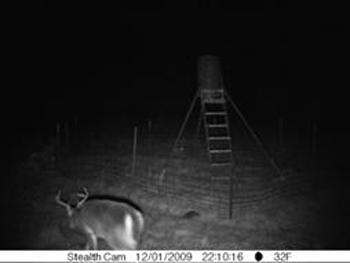
Fig. 2 The one that walked away.
As the season passed, I reviewed the trail camera data weekly. I got a little excited about several photos of a nice buck (Fig 3). However, I daydreamed like a giddy bride-to-be about her upcoming wedding over a single photo of a trophy buck that had passed by one evening (Fig 2). I patterned the first nice buck, but passed on him the only morning that he was outside my blind because my expectation was that the coveted trophy buck was sure to follow. And like a forlorn bridesmaid, I finished the season still waiting for the trophy buck. A trophy photo in the trail camera does not equal a trophy in the freezer...which brings me to my next point.
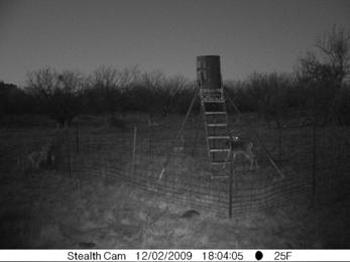
Fig. 3 Passing on Mr. Nice.
Get to know your deer. This being the first year of our lease, we emplaced several ground rules about what constitutes a management buck and an agreed trophy buck. However, we didn't really know the genetic potential of our deer, and our expectation of this trophy 10 pointed deer might have been a bit overzealous. To date, only one 5 1/2 year old 10 pointer was harvested. However, we do know there are multiple 3 to 4 year old 8 pointers and several 6 pointers as well, so the future is looking bright. We know this because we have them on our trail cameras.
Now, one last word of advice. After you've shown the War Department (your wife) all of those great trail camera pictures of deer on your leased land, but you haven't harvested anything the entire season, be prepared to explain good deer management practices to her as you write out next year's deer lease check.
By Mark Carder
I'm sure we've all heard the old adage, "If a tree fell in the woods and no one was around, would it still make a sound?" Of course it would, but if no one was around how would you know? Following that same thought pattern, if the trophy of a lifetime passes by your stand and you're not there, how will you know? Use a trail camera! These devices are quite ingenious little sneaks when it comes to keeping tabs on an area you can't be in 24/7. I recently acquired a trail camera, and want to share some of my thoughts on the process of choosing one, their physical placement, and their entertainment value.
I now live in Texas, where about 96% of the land is privately owned. If you're a hunter moving to Texas, be prepared to enter into a lease agreement with a land owner in order to hunt. The whole lease agreement process is an ordeal worthy of an independent article, but it's not the focus here. I am on a lease with two friends and we have several stand locations around "our" property. We decided to place trail cameras out to see what passes by our stand sites. In trying to keep costs down on my lease budget, I began the quest for the most advanced yet economical trail camera I could find.
The first thing I can tell you is to decide on a set of requirements of what you absolutely must have in a trail camera to be happy with it. I already owned a handheld digital camera for snapping pictures of vacations, kids, special events, and the dog doing something stupid. I used some of the features of that existing camera as my starting point. The handheld camera takes 4 megapixel photos on its highest setting. For me, 4 megapixels provided plenty of detail when I pulled the pictures up on my computer. I figured I'm not going to be counting nose hairs on the deer, so I decided that 4 megapixels would be the base picture quality for my trail camera.
Next, I wanted a trail camera with infrared capability that could take pictures at night without a flash, for three reasons. First, we have feral hogs in Texas and they move at night most of the time, so I wanted to be able to see them. Secondly, when pressure is high and the moon is full, the big boys go nocturnal. And finally, a flash draws attention. I'm paranoid about thievery, so stealth makes me feel better. I also wanted date and time stamping and an SD card slot, figuring I would need lots of megabytes to hold the plethora of beasts who would be lining up to pass by my stand. I figured all that was simple enough, so I decided about fifty dollars should do me fine...right.
Once you've decided on your trail camera requirements, you're ready to go shopping, but be prepared for sensory overload. I think every hunting company out there makes some type of trail camera, and no two are alike in features. As I prepared for my shopping adventure, tingling with anticipation, I stopped off at my "library". While there I browsed through the many outdoor catalogs I tend to accumulate throughout the month. I was surprised to find each had an entire section of about 3-4 pages of trail cameras. After flushing and washing my hands, I sat down at the kitchen table with several of the catalogs and I used my chosen requirements to eliminate several trail cameras. Right off the bat, however, I had to increase my budget by a hundred dollars in order to get the infrared feature.
Next, I went feature by feature, circling some trail cameras and crossing out others. I discovered that I would be able to go up to 5 megapixels at no additional charge, and that I could even get video capability. I carefully narrowed the search to two different trail cameras. Both choices in hand, I went to the internet and read a few reviews from actual customers posted on the websites. The reviews helped to swing me towards one particular brand of trail camera, and the sale price sealed the deal. I won't bore you with a sales pitch and list every single feature, but suffice it to say I got all I wanted and even more stuff I probably won't use. After a few mouse clicks, my Stealth Camera Rouge IR was on its way. Now before you give me too much guff, yes, my camera is endorsed by Jim Shockey and, yes, I am a fan. However, selling the idea to the War Department (wife) was not hard because she is a fan, too.
Once the trail camera arrived I read the directions. Yes, I read them. Anticipating the camera's arrival, I had already bought the necessary SD card and batteries, so it only took about three minutes to set up and test. I was now ready to place my trail camera. Most of the trail cameras come with a mounting strap, and then you can buy all sorts of aftermarket mounting brackets. I settled on mounting the camera on a 4 by 4 fence post I had in the garage.
Fig 1. Camera before camouflage.
Using posthole diggers, I dug a 3 foot deep hole about 30 feet from my target area. Here are several considerations before you dig a hole or attach a camera to a tree: Avoid the sun. Both sunrise and sunset can blind your camera. Use a compass to position the camera angle out of the direct sunlight. And remember that your infrared capability has limits. My limit is 40 feet, so I placed my camera with a 10 foot "safety buffer" to catch anything that might wander in from a different angle. Since I had dug a hole, I tried to camouflage my fence post and camera, since animals do notice when things are different. Camouflaging the trail camera also made me feel better, considering my worries about thievery.
One feature that I liked was being able to set the trail camera to shoot three pictures in a row, and then wait a preset amount of time before shooting the next series. I set the follow-up time to only one minute, being afraid that I might miss some monster that would suddenly bolt through the area. I decided that I should have set it to four minutes. Why four minutes, you ask? Well, that is where the sheer entertainment value of the camera comes in.
I got some great pictures of cow eyeballs looking into the camera because it was new and exciting and cows are nosy. I also got pictures of an ugly feral hog that was white with brown, black, red and some other colored spots. We named him Patch, because he looked like he was wearing a patch work quilt. Patch had a bounty on him for being so ugly, and the pot grew weekly for the lucky guy to sausage ol' Patch.
Bacon on the Hoof.
Lessons learned from my first season with a trail camera:
First, make sure that you carefully read the instructions on how to physically place the trail camera. I had only briefly read the instructions for suggested camera placement and thought I knew best. But I had actually watched multiple deer pass by and my trail camera completely missed them due to poor placement. I had paid too much attention to placing my precious trail camera up high, out of the sun, and away from thieves. After visiting other trail camera sites with tons of good photos of trophy animals, I began to notice one thing. Those pictures were taken on the same level as the animals.
I had placed my trail camera too high and at an angle, which limited the triggering range. The first thing to do is to set the camera on the same level as the animal you want to see, in a direction that best captures their avenues of approach. After that, consider keeping your trail camera out of the rising and setting sun for maximum game photos. Also, by getting in closer you can get a better look at the animals. I had set up my trail camera a little too far away.
Fig. 2 The one that walked away.
As the season passed, I reviewed the trail camera data weekly. I got a little excited about several photos of a nice buck (Fig 3). However, I daydreamed like a giddy bride-to-be about her upcoming wedding over a single photo of a trophy buck that had passed by one evening (Fig 2). I patterned the first nice buck, but passed on him the only morning that he was outside my blind because my expectation was that the coveted trophy buck was sure to follow. And like a forlorn bridesmaid, I finished the season still waiting for the trophy buck. A trophy photo in the trail camera does not equal a trophy in the freezer...which brings me to my next point.
Fig. 3 Passing on Mr. Nice.
Get to know your deer. This being the first year of our lease, we emplaced several ground rules about what constitutes a management buck and an agreed trophy buck. However, we didn't really know the genetic potential of our deer, and our expectation of this trophy 10 pointed deer might have been a bit overzealous. To date, only one 5 1/2 year old 10 pointer was harvested. However, we do know there are multiple 3 to 4 year old 8 pointers and several 6 pointers as well, so the future is looking bright. We know this because we have them on our trail cameras.
Now, one last word of advice. After you've shown the War Department (your wife) all of those great trail camera pictures of deer on your leased land, but you haven't harvested anything the entire season, be prepared to explain good deer management practices to her as you write out next year's deer lease check.