Precision Shooting 1-Part 3: Marksmanship: Just The Basics
By Ward Brien
Addressing this subject logically, one of the important fundamentals of setting up on your target and being able to hit it begins with a solid shooting platform. About a decade ago I was with a very good and long time friend, glassing on a hillside. The area had been ranged and the target reference points established. Back then, laser rangefinders were not an option and we did not carry the Swiss made optical range finder; so we used our mil-dot reticles to accomplish the task. One of our target reference points was an intersection of two dirt roads. Figuring the tire tracks were 10 inches wide, we used that as our constant. (.36 yards X 1000 =360; 360 / .4 mils = 900 yards). Then we calculated the cosine number of the angle in which we were holding at to obtain our corrected for gravity distance, (900 yards X .87 = 783 yards). This was our best guestimate, however when the quarry walked into the box, the trigger was pulled and the round hit, but off center and to the left approximately 4 inches. We were lucky to be able to utilize the prone firing position as it provided great stability for the shot.
The following story is true and written by Ian McMurchy:
This hunting season some friends and I had an opportunity to participate in a Chronic Wasting Disease cull for mule deer. The control area was on both shores of a rugged river valley that wound its way through a mixture of crop-land and pastures. By the time we began hunting the deer were very spooky, so long-shooting was necessary for over half of the opportunities presented.
I had recently introduced some buddies to long-range shooting. We had been practicing regularly on steel plates that we set up from seven hundred out to one-thousand yards. My hope was that becoming as proficient and confident as possible at the longer distances would make hunting out to six hundred yards doable. The cull was an excellent opportunity to test our skills and equipment since we could do a lot of shooting since tags were free and almost unlimited.
Fortunately I made the acquaintance of a landowner with two important assets – he enjoyed hunting and he had a serious problem with too many deer on his property. Plus our new friend was intrigued with the idea of shooting deer at long range. Glen knew the habits of the deer very well and he guiding us to some excellent shooting opportunities. During the initial hunting he was quite content to shoot distances with the laser range-finders and simply watch the deer hitting the ground "way out there".
With a little encouragement we got him to shoot our rifles and he became more and more intrigued with the idea of getting into the long-range shooting game. One day he asked me to help him round up the necessary equipment. I found a new Winchester M-70 Stealth in .308 Winchester in a shop near his town and also ordered in a great Nikon Tactical scope. After purchasing the rifle, scope and Badger mounts and a Harris bipod, Glen brought the rifle to my home so that we could work-over the trigger and bedding. The following week we had another hunting trip planned. I wanted to get the new rifle broke-in and zeroed so that he could participate.
My partner and I drove the two and one-half hours over to Glen's farm and immediately set up my cleaning rack and gear in his heated workshop. The temperature was about minus thirty outside. We intended to do the "shoot-clean" barrel break-in ritual, and then zero the rifle with my favorite long-range ammo – Black Hills 175 grain match hollow-point boat-tails.
We quickly settled into a somewhat strange barrel breaking-in routine. My buddy Wayne would take the new rifle a couple of steps out the side-door and fire a shot into the frozen ground beside the shop. Then he would hustle the M-70 inside where I would put it into my cleaning cradle and give it a good barrel cleaning. After I dried the bore Wayne would go outside and blast another shot into the ground and the process was repeated. We did this for ten singles, five pairs and a set of five shots. The procedure did not take long as we got a nice rhythm going. Being able to shoot without bothering anyone was great since there were no neighbors nearby.
After twenty-five shots we took the new rifle over to a 100-yard target and zeroed the Nikon scope. After slipping the turrets we pronounced the shiny new Stealth ready for the field! With only a couple of hours of sunlight left we had to hustle to ready for a late afternoon hunt. We gathered necessary gear such as warm clothing and boots, lasers, binocs and knives and jumped into Glen's old four by four. Within minutes of leaving the farm we started glassing a huge valley that wound its way several miles out from the central river.
Our timing was perfect – the witching-hour was just starting! As we glassed each patch of buck-brush and sage we started to locate feeding deer. From our vantage point we could see at least half a dozen does either feeding or still bedded-down. Because of the nasty winds they were all on the opposite side of the valley. I had checked the wind several times with my Brunton Sherpa meter – average speed was just over ten miles per hour with gusts to fourteen. Glen and Wayne crawled to the edge of the valley and snapped down their Harris bipods. Within seconds they had the closest group of mulies in their scopes.
"Let's let Glen blood that brand new Stealth." I said to my partner. "Wayne you back him up on that big doe that is walking down the slope towards us. Distance is going to be just over 585 yards." There was not much angle downward as they are almost directly across from us. "Give me fifteen and one quarter minutes of elevation Glen." Wayne helped Glen with the turret setting, then they assured me that they had put on the elevation. Then I told him to put on three and one half minutes of left windage and to get on the far-off deer.
"Remember to breath slow. Release the trigger real easy, no jerking!" I said to Glen. "Tell me when you're ready." I focused my Nikon Venturer XL binocs on the far-off doe. "Shooter Ready!" Glen said. Wayne immediately repeated the same phrase. I waited until a nasty wind-gust had blown through and said, "Send it!". A few seconds later the valley echoed as the Sierra bullet arced upward over six feet and drifted a foot and one half to the right. After what seemed like a long time we heard a deep, solid smack as the bullet disrupted on hide, muscle and spine. The doe dropped on the spot.
"Great shot, Glen – what a way to break in a new rifle!" said Wayne as he shared a high-five with our new shooting partner. I stood beside the smiling hunters and shot one more laser reading – this time on the carcass of the mule-deer. "Five eighty-six! Not bad for a newbie!" I said to Glen. I had to grin as he sat in awe of the shot that he had just made. "Unreal, that is unreal. I don't believe I could make a shot like that!" Glen said as he looked at the long black rifle. "I could really get into this!" "Unreal, that is unreal!"
We savored the moment for a while until the cold wind started to freeze us to the bone. "Well, so much for that – your Stealth ain't a virgin anymore!" Wayne said as we walked back to the truck. "You got that right!" said Glen, then he involuntarily said the phrase that dominated his thinking, "Unreal, that is just unreal!!!" Wayne and I looked at each other and grinned. We had just created another monster – our new buddy was hooked on long-range hunting.
As mentioned in the above story, all of the attributes that make for an accurate rifle are important, and in this situation, came together very well and performed as expected. Also, the shooting position is important. Because of this, I have included some of the more used shooting positions for you to review.
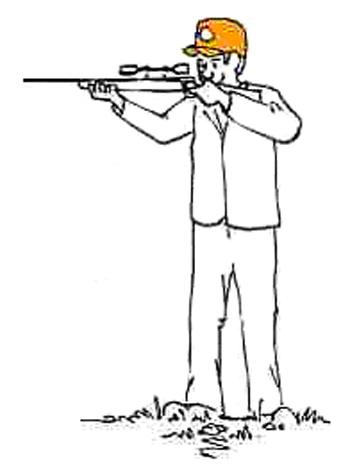
Standing position
The Standing position (or off-hand shooting position) should only be used for short range distances. You are vulnerable, more visible and not very stable. Your body and arms will fatigue causing you to wobble. You are also like a ship's sail which will catch the wind, again causing your stability to be compromised. The standing position usually comes into play during quick, snap engagements for instance when you are walking. For this reason you would want to keep the power setting down low so that the wobble would be reduced and your field of view through your scope increased. Standing, you want your feet parallel with your hips and shoulders, with the elbow of your support arm tucked firmly into your rib-cage. In this position you must apply good breathing skills or your rifle will porpoise; not easy to do when your heart is beating like crazy and you and your competition are eyeballing each other.
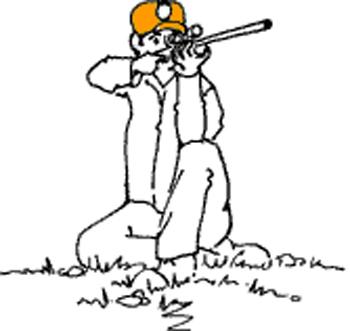
Kneeling Position
The kneeling position is similar to that of the standing position but with less presentation. The buffeting of the wind is usually somewhat reduced however; you are still fighting the issue of stability. Again, if you are utilizing a variable power scope, it is wise to compensate for the "wobble" by reducing the power setting down to a more manageable level. In the kneeling position you will notice the shooter with his elbow bone directly on his knee bone; and he is utilizing his sling as it is "cuffed" around his bicep. Well, Bone on bone is not exactly what you want. It is better to move the elbow slightly behind the knee or in front of the knee, off of the bone and onto muscle. This will help you to stabilize better. In addition, what you do not see is that the heel of his foot is tucked under and into his tail end. If a tree was available for him to lean up against, it would further aid in his stability. But this position brings us to an interesting issue; your heartbeat and its resulting pulse.
One could write a book on breathing. Breathing helps keep your mind clear and oxygenated; your heart beat consistent and is an equally important issue. Many times I have heard the stories where a hunter and his guide are waking the tundra when all of a sudden they spot a Moose. The hunter's heart begins to race and he fights to quickly get down and on target as time takes on a whole different meaning. Looking through the scope he tries to settle down while not being noticed, but it is not easy. However, if you are in a position other than standing, or kneeling, there is one thing you can do to immediately help with the pulse of your beating heart; relax your legs. Your legs have about one half the blood of your entire body in them, and when they are tensed and tight, you are restricting your blood to your torso. This causes your heart to beat stronger and increases the force of your pulse. The moment you relax your legs, and un-bend them, you will immediately notice your body and breathing relax.
Breathing methodology has been pretty much established and written in stone. As taught, the shooter would inhale three deep breaths and then on the fourth exhale, slow the exhale at the halfway point, and pull the trigger in-between heart beats. Well, there is another method that is rarely taught, but does work very well. You would again, inhale and exhale three deep breaths of air, then on the forth inhale, at about half way, very slowly continue to inhale. You will notice that your heart beat is much milder then on the exhale method; try it.
This obviously takes a conscious effort and most hunters will say they don't have the time to relax. Do you believe this to be true? After all, you are prepared and you do have your data. So, do you have to rush the shot? Do you have to guess where to hold? If it is a close shot there may be no time for anything but the snap shot. However, "if the quarry is at distance, and your approach is refined, you should have a considerable amount of time".
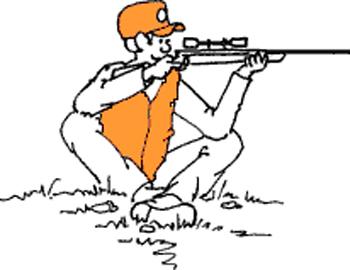
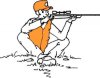
Sitting Position
There are various different approaches to the sitting position. One way is to sit open legged with your elbows (bone on bone) ontop of your knees or with your legs crossed. If there is a tree, berm or rock to lean up against, this can be pretty good. Stability is increased; you are not as exposed or vulnerable and the position can be assumed in a relatively short amount of time. Mobility is not as good as kneeling, but you can instinctively relax your legs.
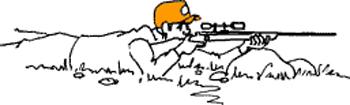
Prone Position
The prone position is an ideal position. It may limit your field of view and be slow to assume, however it is the best for concealability, and stability. There are several methods of the prone firing position which have been taught over the years. One method teaches you to have your front side flat on the ground, your legs spread slightly apart with your heels, toes and hips flat on the ground with your body aligned straight with your rifle. This is how I was taught, however in many situations such as with uneven ground, hillsides and other obstacles, it doesn't prove realistic. Best comfort, with as little resistance on your body is recommended; ideally, you would be on flat ground with your heels and toes flat on the ground. Having your heels and toes flat, assists your hips being squared and flat; thus adding stability to your position and keeping your heels and toes safe from being seen.
In addition to what we have already discussed in this chapter, there are shooting aids that can be utilized to secure a solid platform. Some of these are as follows: Backpack, Sand Bags, and Small bean bags for the butt of your rifle; shooting sticks, metal tree climbing screws, and bipods.

Bi-Pods
The back pack is an essential piece of gear that you can use to rest your rifle on. If in the prone position, lay your back pack down and lay your rifle on top of it. It will help keep it steady.
You can make a bean bag out of hollow beads that can be purchased at a hobby store by stuffing an old sock. Fill up the sock with the beads, tie it off and you have a light "squeezable" rest for the butt of your rifle. Small bean bags work great on the butt of your rifle stock if you are utilizing a bi-pod as a front rest. While set up, you can let the butt rest on this "bag" which you can squeeze to raise or lower your site picture with.

Shooting sticks
Shooting sticks are another aid that you can rest the front of your rifle on while in the sitting or kneeling position. They are manufactured out of space age materials that can be purchased from your gun store; or you can make them in the field by cutting several sticks and tying them together with Para-chord.
Tree stakes make for an excellent rifle rest when leaning up against a tree. They can be beat, staked or screwed into the side of a tree to rest your rifle on, if you can afford to take the time. However, this practice is not recommended as it is not exactly forest service friendly.
Ward Brien is a US Army Veteran, owner of Sniper Tools Design Co., LLC and the inventor of the "Angle Co-Sine Indicator," which is sold and under contract to different branches of the US military, British military and others. Located in the top of the Colorado Rockies, Ward also instructs a specialized three day Precision Shooting 1 course to hunters and has trained military and other government agencies.
By Ward Brien
Addressing this subject logically, one of the important fundamentals of setting up on your target and being able to hit it begins with a solid shooting platform. About a decade ago I was with a very good and long time friend, glassing on a hillside. The area had been ranged and the target reference points established. Back then, laser rangefinders were not an option and we did not carry the Swiss made optical range finder; so we used our mil-dot reticles to accomplish the task. One of our target reference points was an intersection of two dirt roads. Figuring the tire tracks were 10 inches wide, we used that as our constant. (.36 yards X 1000 =360; 360 / .4 mils = 900 yards). Then we calculated the cosine number of the angle in which we were holding at to obtain our corrected for gravity distance, (900 yards X .87 = 783 yards). This was our best guestimate, however when the quarry walked into the box, the trigger was pulled and the round hit, but off center and to the left approximately 4 inches. We were lucky to be able to utilize the prone firing position as it provided great stability for the shot.
The following story is true and written by Ian McMurchy:
This hunting season some friends and I had an opportunity to participate in a Chronic Wasting Disease cull for mule deer. The control area was on both shores of a rugged river valley that wound its way through a mixture of crop-land and pastures. By the time we began hunting the deer were very spooky, so long-shooting was necessary for over half of the opportunities presented.
I had recently introduced some buddies to long-range shooting. We had been practicing regularly on steel plates that we set up from seven hundred out to one-thousand yards. My hope was that becoming as proficient and confident as possible at the longer distances would make hunting out to six hundred yards doable. The cull was an excellent opportunity to test our skills and equipment since we could do a lot of shooting since tags were free and almost unlimited.
Fortunately I made the acquaintance of a landowner with two important assets – he enjoyed hunting and he had a serious problem with too many deer on his property. Plus our new friend was intrigued with the idea of shooting deer at long range. Glen knew the habits of the deer very well and he guiding us to some excellent shooting opportunities. During the initial hunting he was quite content to shoot distances with the laser range-finders and simply watch the deer hitting the ground "way out there".
With a little encouragement we got him to shoot our rifles and he became more and more intrigued with the idea of getting into the long-range shooting game. One day he asked me to help him round up the necessary equipment. I found a new Winchester M-70 Stealth in .308 Winchester in a shop near his town and also ordered in a great Nikon Tactical scope. After purchasing the rifle, scope and Badger mounts and a Harris bipod, Glen brought the rifle to my home so that we could work-over the trigger and bedding. The following week we had another hunting trip planned. I wanted to get the new rifle broke-in and zeroed so that he could participate.
My partner and I drove the two and one-half hours over to Glen's farm and immediately set up my cleaning rack and gear in his heated workshop. The temperature was about minus thirty outside. We intended to do the "shoot-clean" barrel break-in ritual, and then zero the rifle with my favorite long-range ammo – Black Hills 175 grain match hollow-point boat-tails.
We quickly settled into a somewhat strange barrel breaking-in routine. My buddy Wayne would take the new rifle a couple of steps out the side-door and fire a shot into the frozen ground beside the shop. Then he would hustle the M-70 inside where I would put it into my cleaning cradle and give it a good barrel cleaning. After I dried the bore Wayne would go outside and blast another shot into the ground and the process was repeated. We did this for ten singles, five pairs and a set of five shots. The procedure did not take long as we got a nice rhythm going. Being able to shoot without bothering anyone was great since there were no neighbors nearby.
After twenty-five shots we took the new rifle over to a 100-yard target and zeroed the Nikon scope. After slipping the turrets we pronounced the shiny new Stealth ready for the field! With only a couple of hours of sunlight left we had to hustle to ready for a late afternoon hunt. We gathered necessary gear such as warm clothing and boots, lasers, binocs and knives and jumped into Glen's old four by four. Within minutes of leaving the farm we started glassing a huge valley that wound its way several miles out from the central river.
Our timing was perfect – the witching-hour was just starting! As we glassed each patch of buck-brush and sage we started to locate feeding deer. From our vantage point we could see at least half a dozen does either feeding or still bedded-down. Because of the nasty winds they were all on the opposite side of the valley. I had checked the wind several times with my Brunton Sherpa meter – average speed was just over ten miles per hour with gusts to fourteen. Glen and Wayne crawled to the edge of the valley and snapped down their Harris bipods. Within seconds they had the closest group of mulies in their scopes.
"Let's let Glen blood that brand new Stealth." I said to my partner. "Wayne you back him up on that big doe that is walking down the slope towards us. Distance is going to be just over 585 yards." There was not much angle downward as they are almost directly across from us. "Give me fifteen and one quarter minutes of elevation Glen." Wayne helped Glen with the turret setting, then they assured me that they had put on the elevation. Then I told him to put on three and one half minutes of left windage and to get on the far-off deer.
"Remember to breath slow. Release the trigger real easy, no jerking!" I said to Glen. "Tell me when you're ready." I focused my Nikon Venturer XL binocs on the far-off doe. "Shooter Ready!" Glen said. Wayne immediately repeated the same phrase. I waited until a nasty wind-gust had blown through and said, "Send it!". A few seconds later the valley echoed as the Sierra bullet arced upward over six feet and drifted a foot and one half to the right. After what seemed like a long time we heard a deep, solid smack as the bullet disrupted on hide, muscle and spine. The doe dropped on the spot.
"Great shot, Glen – what a way to break in a new rifle!" said Wayne as he shared a high-five with our new shooting partner. I stood beside the smiling hunters and shot one more laser reading – this time on the carcass of the mule-deer. "Five eighty-six! Not bad for a newbie!" I said to Glen. I had to grin as he sat in awe of the shot that he had just made. "Unreal, that is unreal. I don't believe I could make a shot like that!" Glen said as he looked at the long black rifle. "I could really get into this!" "Unreal, that is unreal!"
We savored the moment for a while until the cold wind started to freeze us to the bone. "Well, so much for that – your Stealth ain't a virgin anymore!" Wayne said as we walked back to the truck. "You got that right!" said Glen, then he involuntarily said the phrase that dominated his thinking, "Unreal, that is just unreal!!!" Wayne and I looked at each other and grinned. We had just created another monster – our new buddy was hooked on long-range hunting.
As mentioned in the above story, all of the attributes that make for an accurate rifle are important, and in this situation, came together very well and performed as expected. Also, the shooting position is important. Because of this, I have included some of the more used shooting positions for you to review.
Standing position
The Standing position (or off-hand shooting position) should only be used for short range distances. You are vulnerable, more visible and not very stable. Your body and arms will fatigue causing you to wobble. You are also like a ship's sail which will catch the wind, again causing your stability to be compromised. The standing position usually comes into play during quick, snap engagements for instance when you are walking. For this reason you would want to keep the power setting down low so that the wobble would be reduced and your field of view through your scope increased. Standing, you want your feet parallel with your hips and shoulders, with the elbow of your support arm tucked firmly into your rib-cage. In this position you must apply good breathing skills or your rifle will porpoise; not easy to do when your heart is beating like crazy and you and your competition are eyeballing each other.
Kneeling Position
The kneeling position is similar to that of the standing position but with less presentation. The buffeting of the wind is usually somewhat reduced however; you are still fighting the issue of stability. Again, if you are utilizing a variable power scope, it is wise to compensate for the "wobble" by reducing the power setting down to a more manageable level. In the kneeling position you will notice the shooter with his elbow bone directly on his knee bone; and he is utilizing his sling as it is "cuffed" around his bicep. Well, Bone on bone is not exactly what you want. It is better to move the elbow slightly behind the knee or in front of the knee, off of the bone and onto muscle. This will help you to stabilize better. In addition, what you do not see is that the heel of his foot is tucked under and into his tail end. If a tree was available for him to lean up against, it would further aid in his stability. But this position brings us to an interesting issue; your heartbeat and its resulting pulse.
One could write a book on breathing. Breathing helps keep your mind clear and oxygenated; your heart beat consistent and is an equally important issue. Many times I have heard the stories where a hunter and his guide are waking the tundra when all of a sudden they spot a Moose. The hunter's heart begins to race and he fights to quickly get down and on target as time takes on a whole different meaning. Looking through the scope he tries to settle down while not being noticed, but it is not easy. However, if you are in a position other than standing, or kneeling, there is one thing you can do to immediately help with the pulse of your beating heart; relax your legs. Your legs have about one half the blood of your entire body in them, and when they are tensed and tight, you are restricting your blood to your torso. This causes your heart to beat stronger and increases the force of your pulse. The moment you relax your legs, and un-bend them, you will immediately notice your body and breathing relax.
Breathing methodology has been pretty much established and written in stone. As taught, the shooter would inhale three deep breaths and then on the fourth exhale, slow the exhale at the halfway point, and pull the trigger in-between heart beats. Well, there is another method that is rarely taught, but does work very well. You would again, inhale and exhale three deep breaths of air, then on the forth inhale, at about half way, very slowly continue to inhale. You will notice that your heart beat is much milder then on the exhale method; try it.
This obviously takes a conscious effort and most hunters will say they don't have the time to relax. Do you believe this to be true? After all, you are prepared and you do have your data. So, do you have to rush the shot? Do you have to guess where to hold? If it is a close shot there may be no time for anything but the snap shot. However, "if the quarry is at distance, and your approach is refined, you should have a considerable amount of time".
Sitting Position
There are various different approaches to the sitting position. One way is to sit open legged with your elbows (bone on bone) ontop of your knees or with your legs crossed. If there is a tree, berm or rock to lean up against, this can be pretty good. Stability is increased; you are not as exposed or vulnerable and the position can be assumed in a relatively short amount of time. Mobility is not as good as kneeling, but you can instinctively relax your legs.
Prone Position
The prone position is an ideal position. It may limit your field of view and be slow to assume, however it is the best for concealability, and stability. There are several methods of the prone firing position which have been taught over the years. One method teaches you to have your front side flat on the ground, your legs spread slightly apart with your heels, toes and hips flat on the ground with your body aligned straight with your rifle. This is how I was taught, however in many situations such as with uneven ground, hillsides and other obstacles, it doesn't prove realistic. Best comfort, with as little resistance on your body is recommended; ideally, you would be on flat ground with your heels and toes flat on the ground. Having your heels and toes flat, assists your hips being squared and flat; thus adding stability to your position and keeping your heels and toes safe from being seen.
In addition to what we have already discussed in this chapter, there are shooting aids that can be utilized to secure a solid platform. Some of these are as follows: Backpack, Sand Bags, and Small bean bags for the butt of your rifle; shooting sticks, metal tree climbing screws, and bipods.
Bi-Pods
The back pack is an essential piece of gear that you can use to rest your rifle on. If in the prone position, lay your back pack down and lay your rifle on top of it. It will help keep it steady.
You can make a bean bag out of hollow beads that can be purchased at a hobby store by stuffing an old sock. Fill up the sock with the beads, tie it off and you have a light "squeezable" rest for the butt of your rifle. Small bean bags work great on the butt of your rifle stock if you are utilizing a bi-pod as a front rest. While set up, you can let the butt rest on this "bag" which you can squeeze to raise or lower your site picture with.
Shooting sticks
Shooting sticks are another aid that you can rest the front of your rifle on while in the sitting or kneeling position. They are manufactured out of space age materials that can be purchased from your gun store; or you can make them in the field by cutting several sticks and tying them together with Para-chord.
Tree stakes make for an excellent rifle rest when leaning up against a tree. They can be beat, staked or screwed into the side of a tree to rest your rifle on, if you can afford to take the time. However, this practice is not recommended as it is not exactly forest service friendly.
Ward Brien is a US Army Veteran, owner of Sniper Tools Design Co., LLC and the inventor of the "Angle Co-Sine Indicator," which is sold and under contract to different branches of the US military, British military and others. Located in the top of the Colorado Rockies, Ward also instructs a specialized three day Precision Shooting 1 course to hunters and has trained military and other government agencies.